
Running an HVAC business with Odoo
How do I submit and approve employee expenses in Odoo?
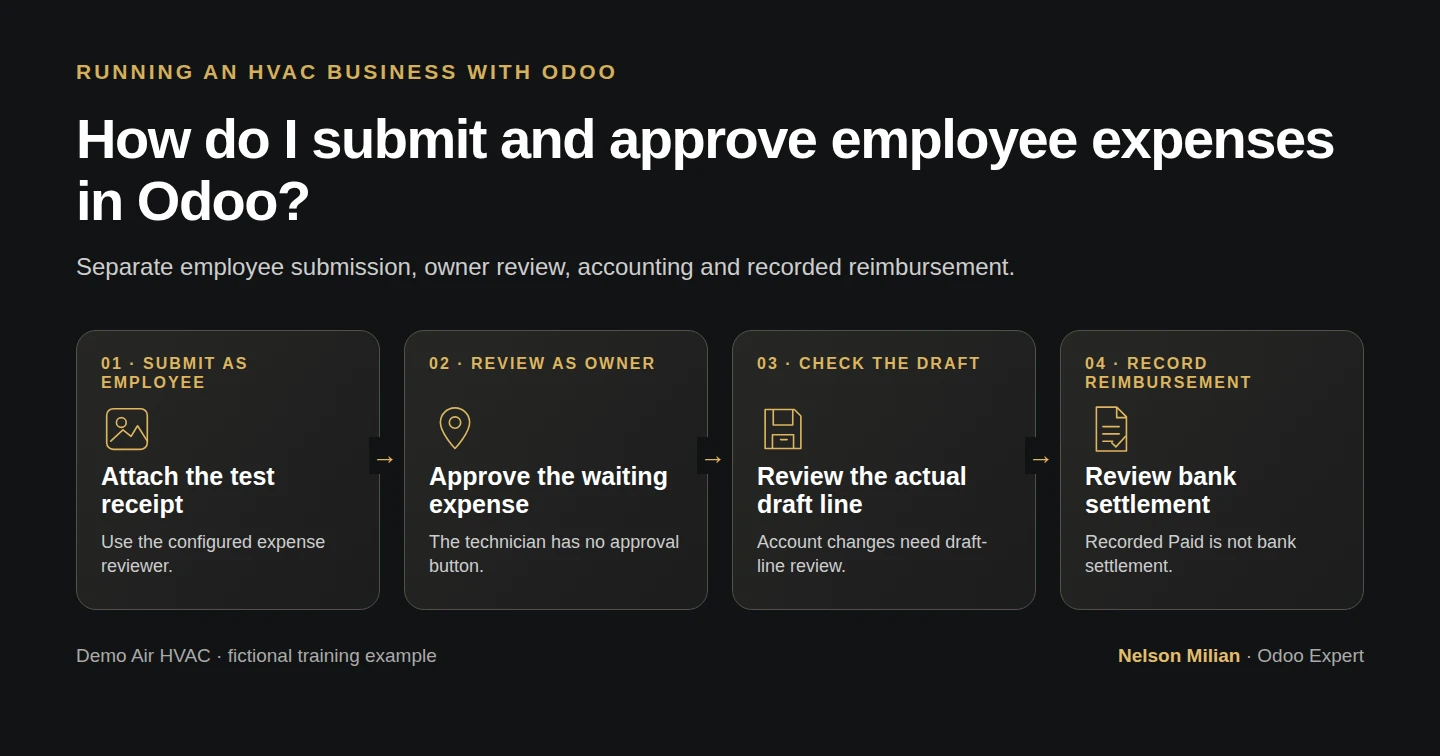
Submit an Odoo employee expense with a receipt, verify reviewer access, inspect its draft Purchase Receipt and record a separate synthetic reimbursement.
A technician buys small shop supplies and needs Alex to review the expense. This example retains a $12.72 fictional receipt, routes the technician’s submission to the owner, reviews the accounting draft and records a separate synthetic reimbursement. Approval, posting and payment are distinct steps. The final Paid state clears the employee payable, while bank settlement remains a separate check.
Alex Rivera and Demo Air HVAC are fictional training examples. Prices, dates, quantities and business situations in this guide are illustrative.
Before you begin
Tested in stock Odoo 20.0-20260926 Community as the demo owner administrator, with official modules and standard configuration. Use the linked employee and access setup from How do I create an employee record in Odoo?, How do I set user access rights in Odoo? and How do I assign a technician and deadline to an Odoo task?, the invoicing setup from How do I set up US invoicing in Odoo? and bank journal from How do I set up bank accounts and payment journals in Odoo?. The submitter is Demo Technician H42, using the employee and linked user from those prerequisites. The reviewer is Demo Air Owner, with the official Expenses Administrator role after activation and existing Invoicing permission. Prepare the clearly labelled PDF receipt DEMO-H60-RECEIPT-001: October 14, shop supplies $12 plus $0.72 demo tax, total $12.72 USD, employee-paid. A separate fictional reimbursement input supplies $12.72 on October 14, memo DEMO-H60-REIMBURSE-001. These are synthetic assumptions, not proof of a purchase, tax treatment or money movement. Local mail remains in Mailpit.
Step-by-step workflow
Step 1. Activate the official Expenses app
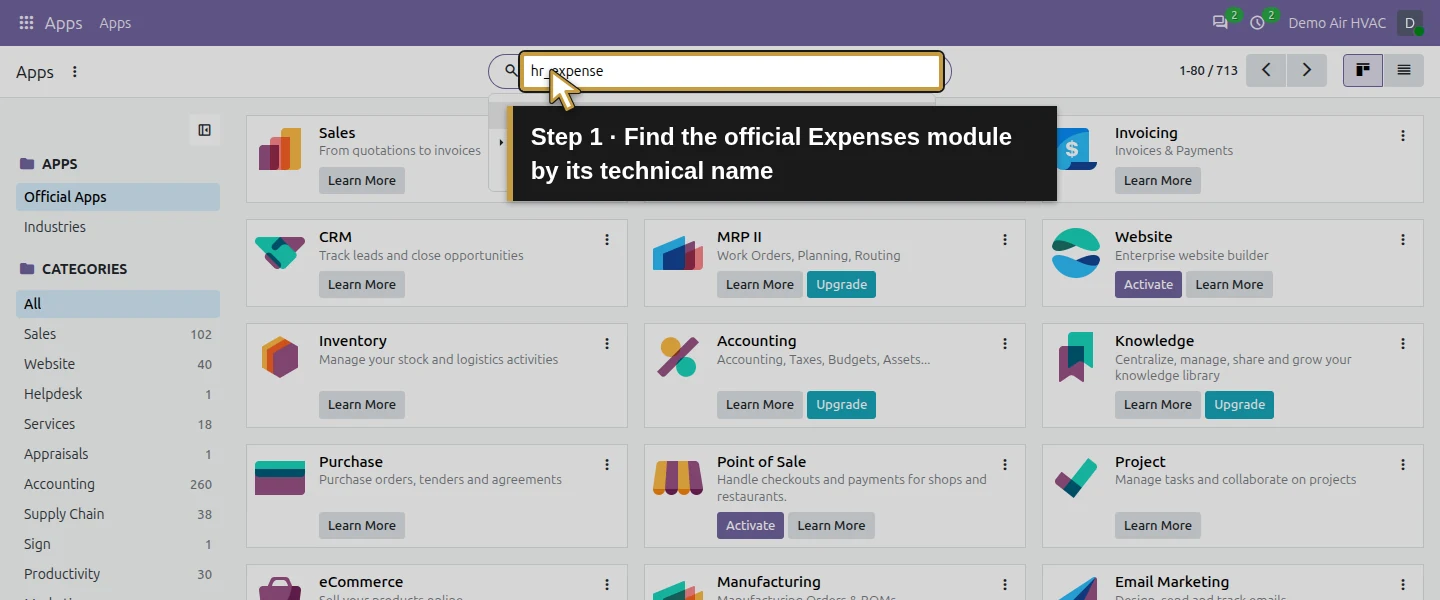
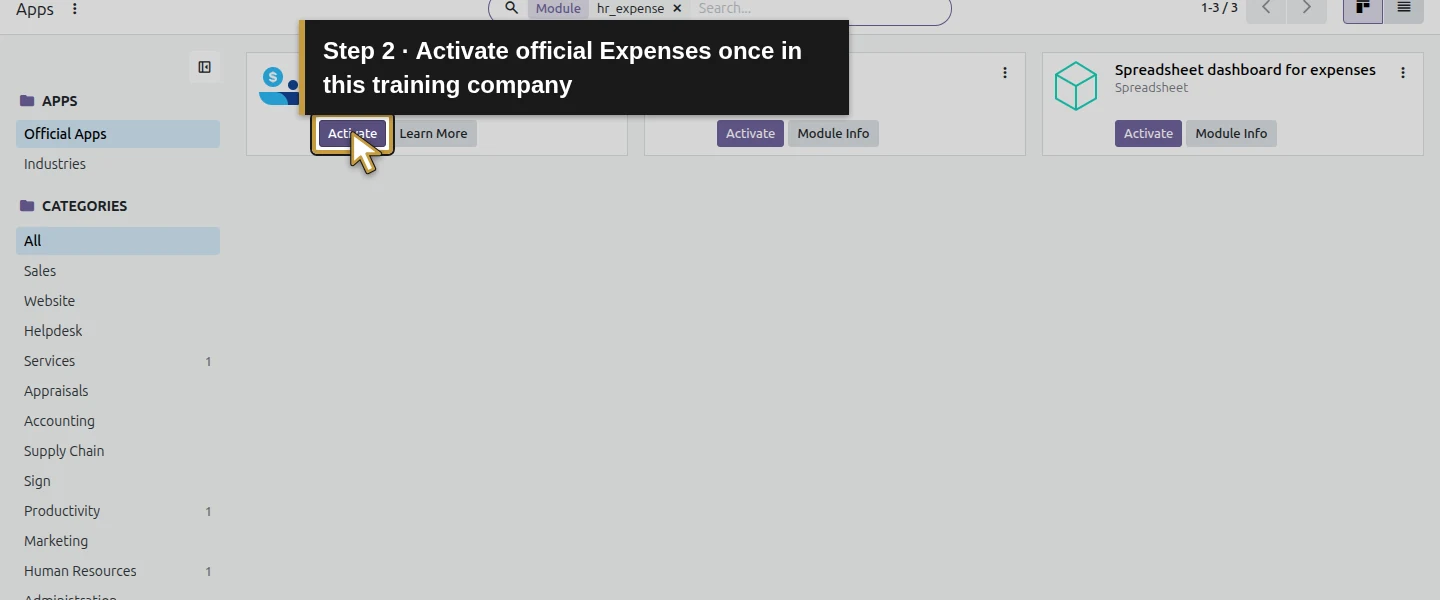
As the owner administrator, open Apps and find Expenses, technical name hr_expense. Click its Activate button once and wait for installation. This test installed the official Odoo S.A./LGPL-3 module. The app supplies expense products including Expenses, reference EXP_GEN. No Enterprise expense feature or custom add-on is used. Refresh the technician’s browser so Expenses appears in the apps menu.
Step 2. Configure the employee’s reviewer before submission
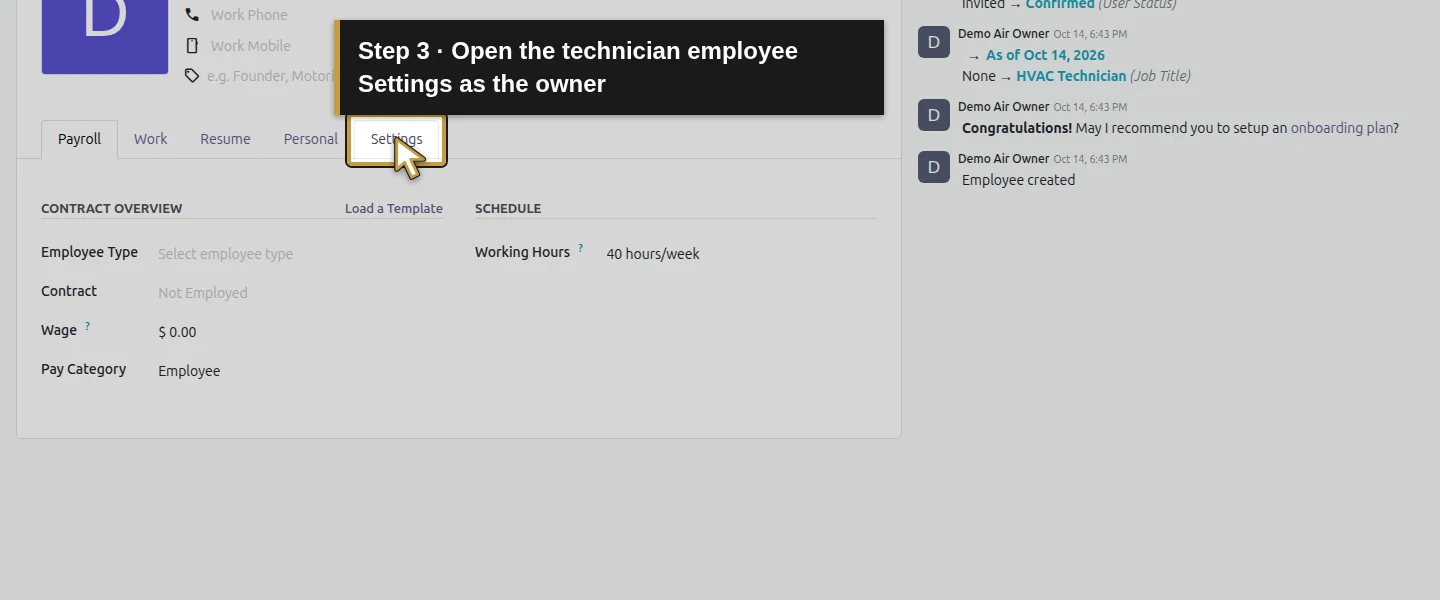
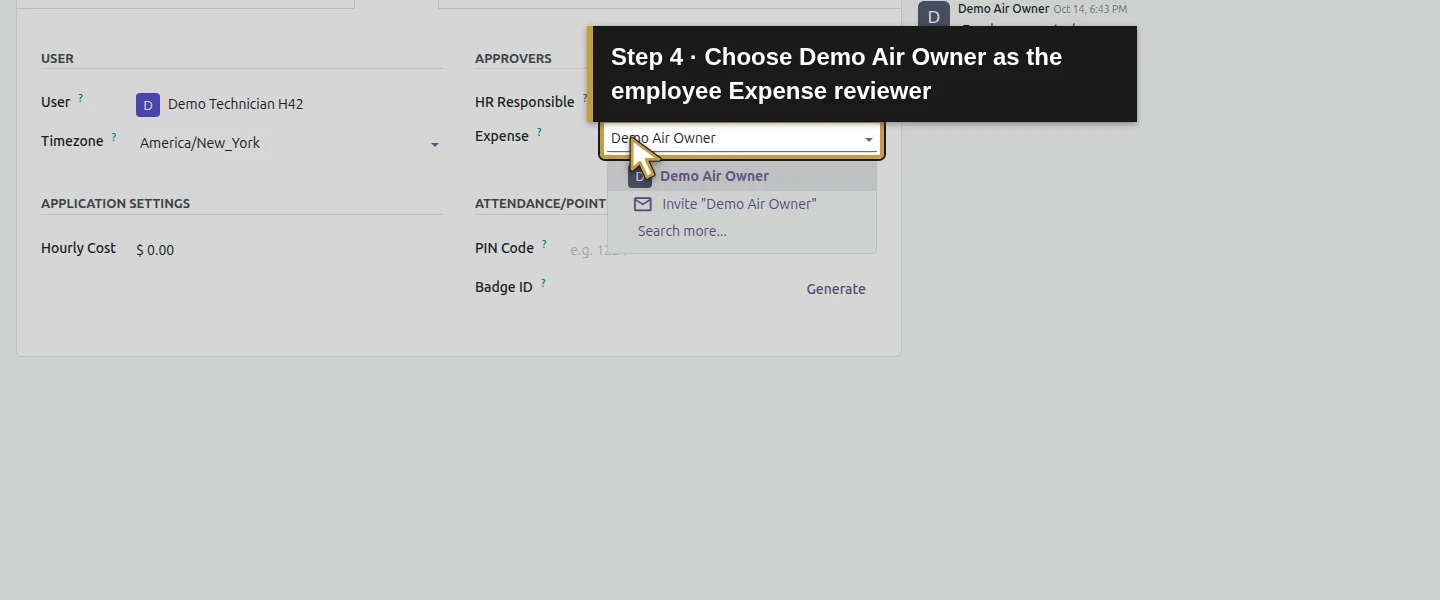
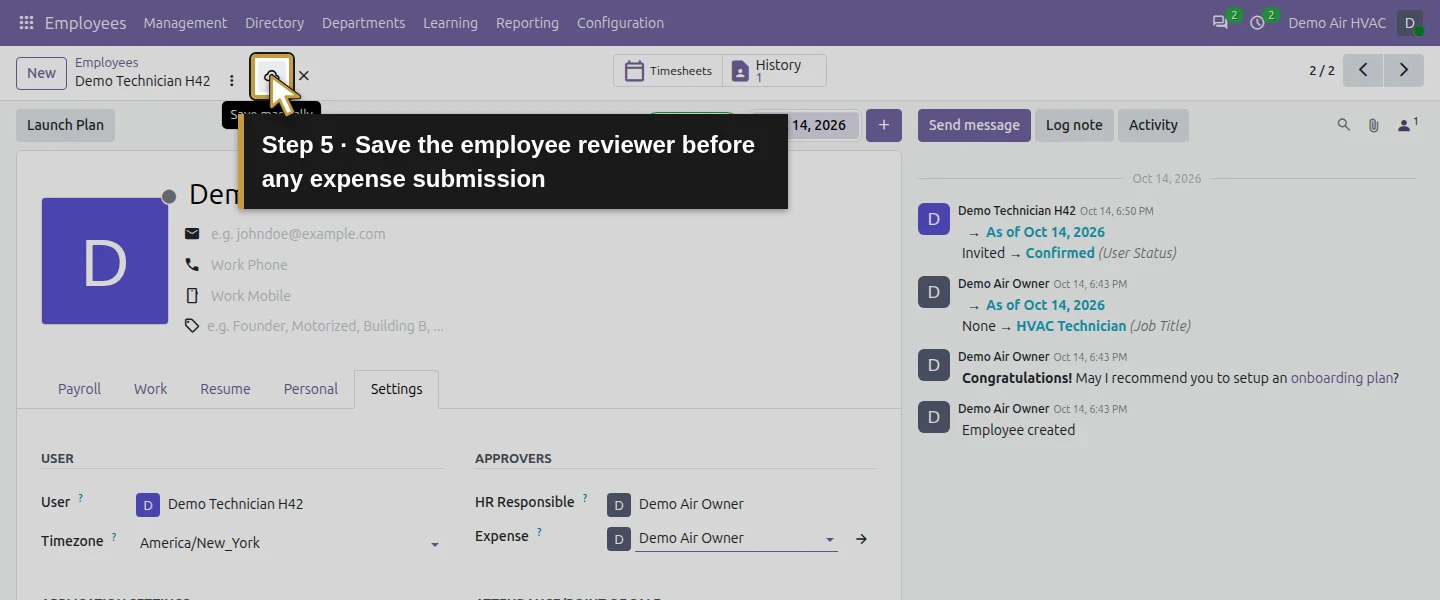
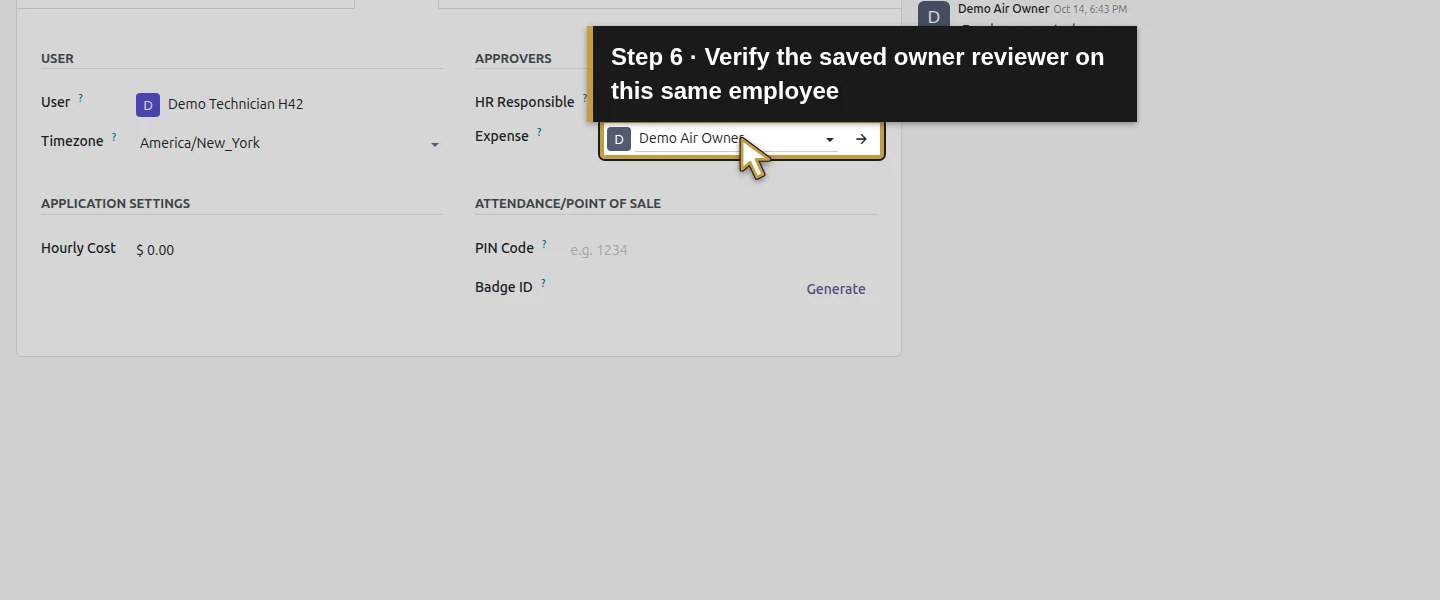
As the owner, open Employees → Demo Technician H42 → Settings. In Expense, select Demo Air Owner and save the employee. Keep the technician linked to its existing user; its ordinary user groups remain unchanged and include no expense-approver group. Check the saved reviewer before creating and submitting the expense. During earlier verification, a Manager selection on the new expense form did not survive creation. Setting the employee’s Expense reviewer before submission stored the intended owner as Manager. In the illustrated workflow, this employee setting is saved before the new expense is created. Do not assume an empty reviewer means a separate approval will occur.
Step 3. Enter the employee-paid expense
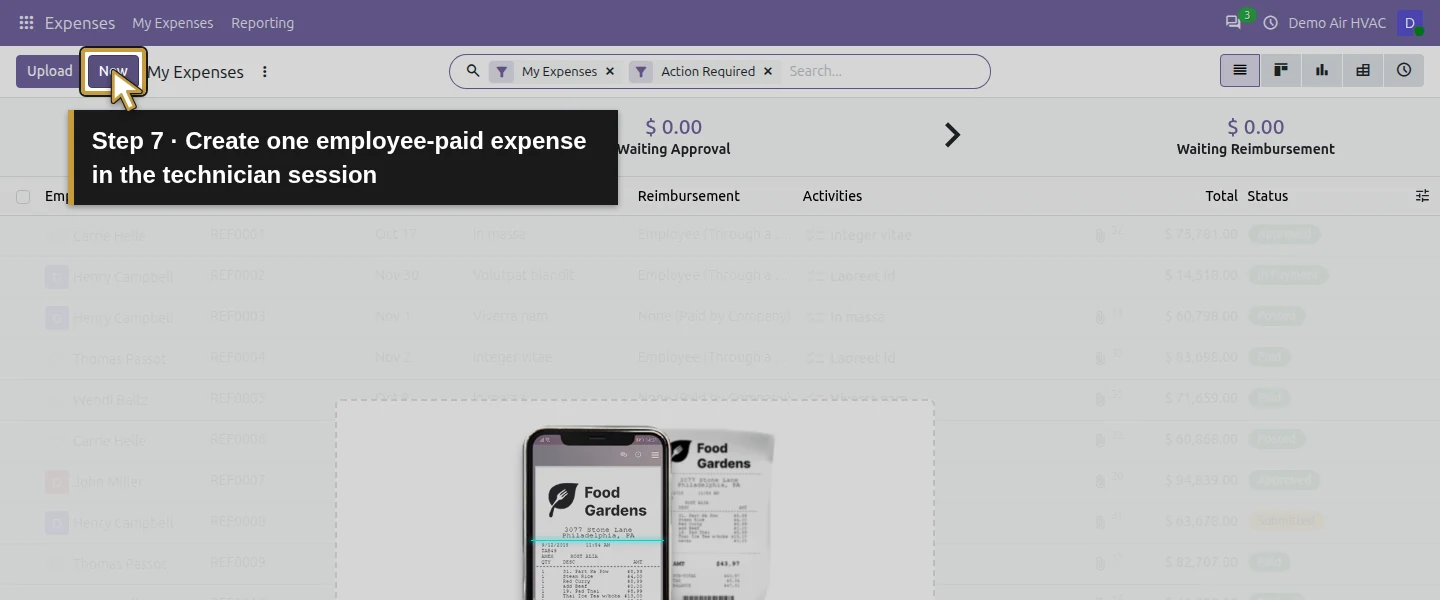
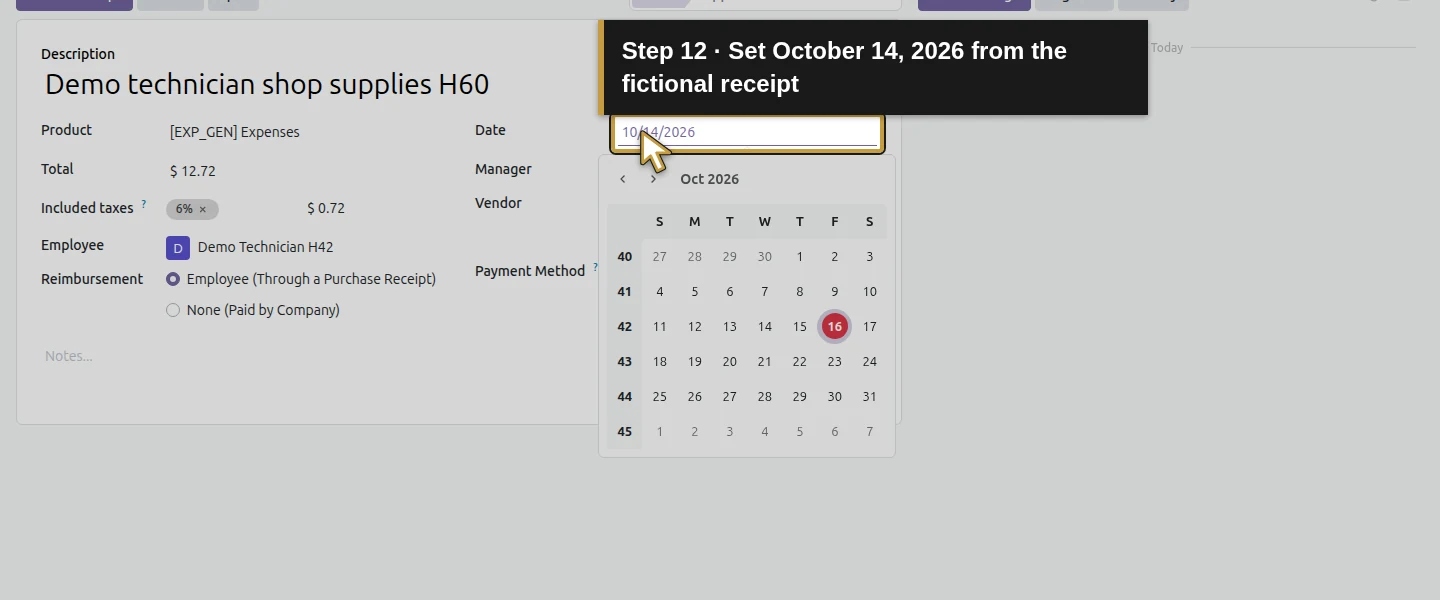
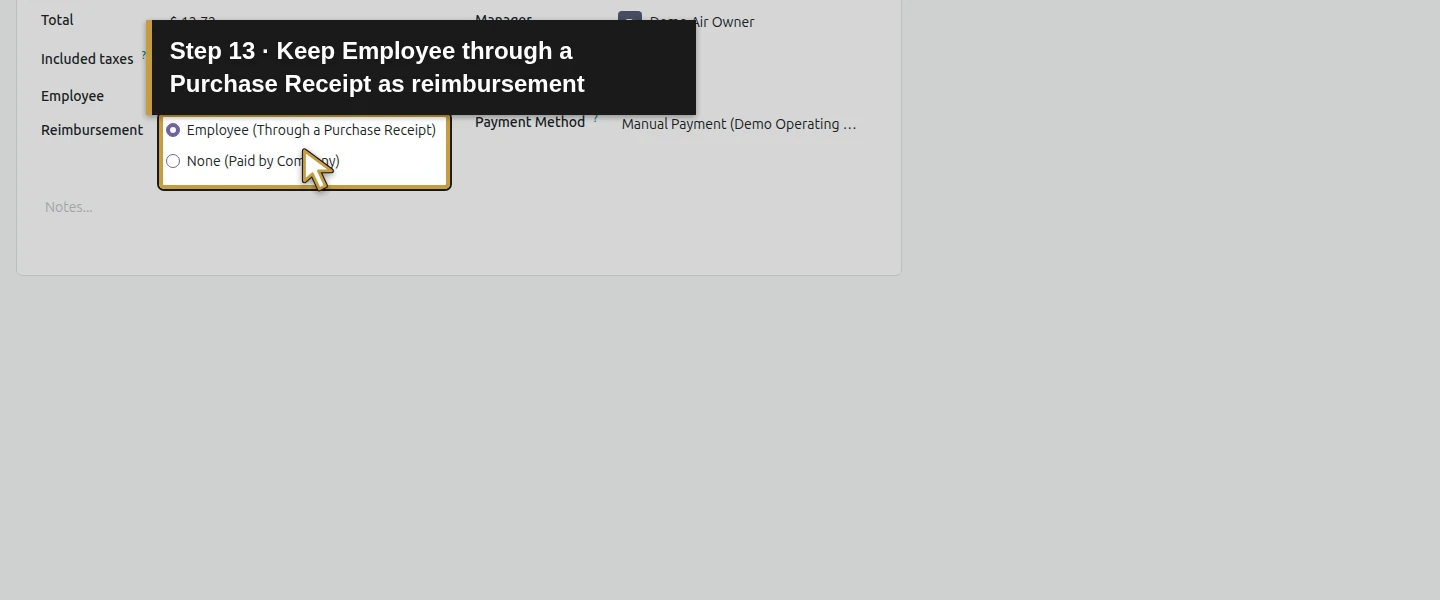
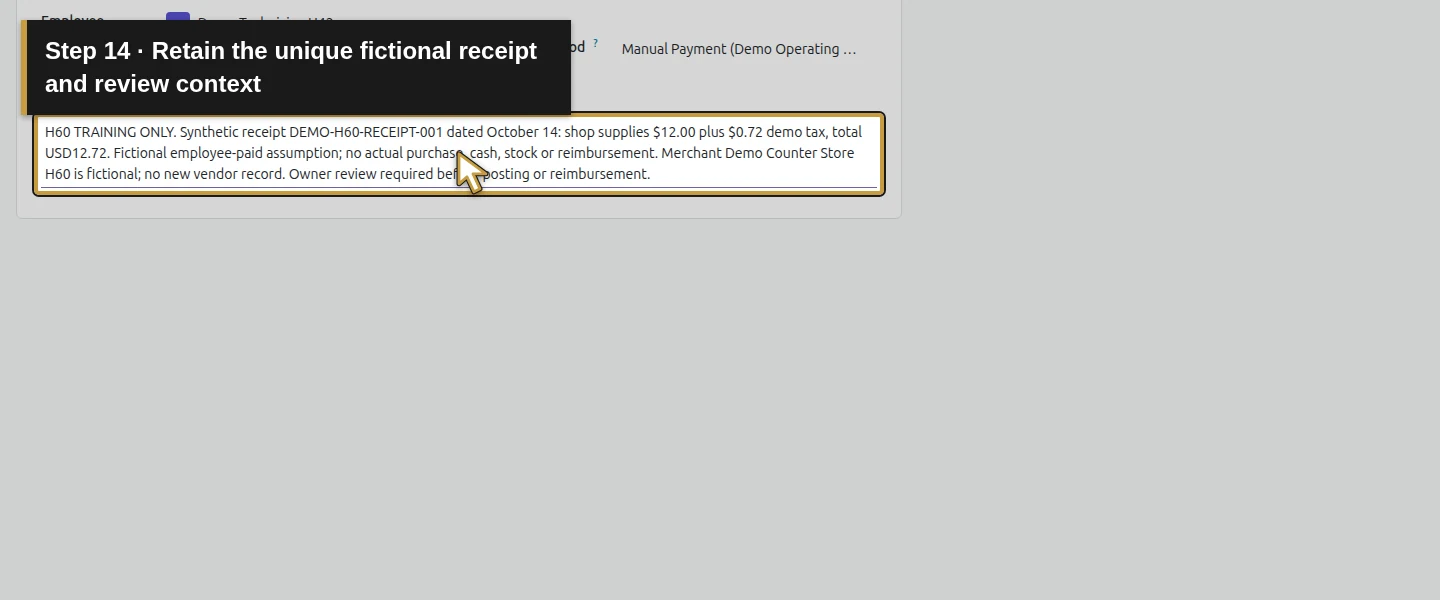
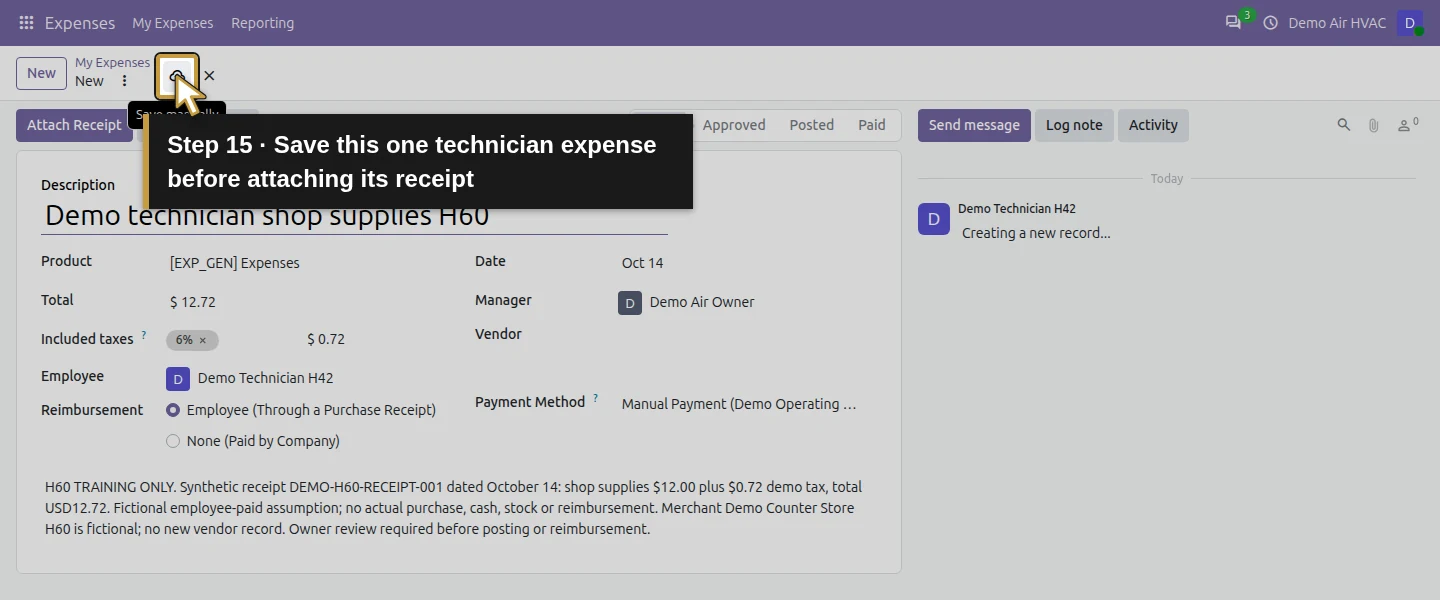
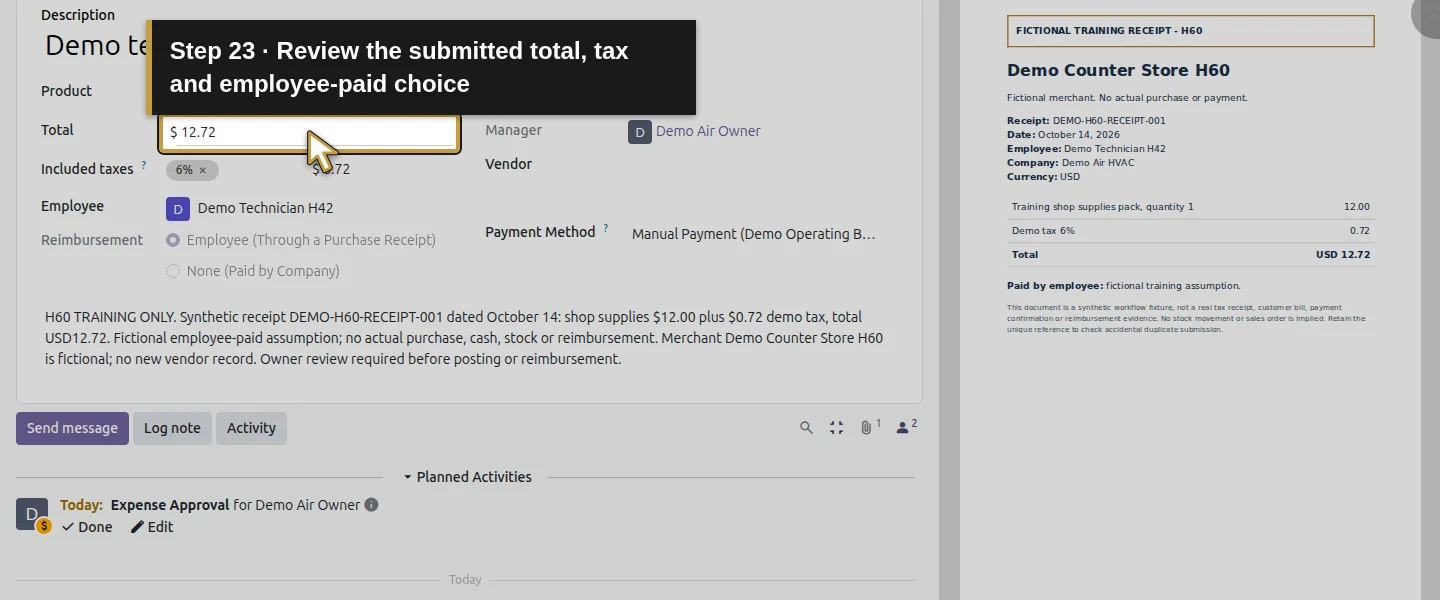
In the technician’s session, open Expenses → My Expenses → New. Enter Demo technician shop supplies H60 in Description. In Product, choose the actual Expenses / EXP_GEN dropdown option. Enter 12.72 in Total. The selected existing 6% Included taxes calculates $0.72 tax and $12 untaxed; the expense total includes this tax. Verify Employee: Demo Technician H42, Date October 14, and Employee (Through a Purchase Receipt) under Reimbursement. The other choice is None (Paid by Company) and is not used here. Add Notes with the unique receipt reference, purpose and explicit training context, then save.
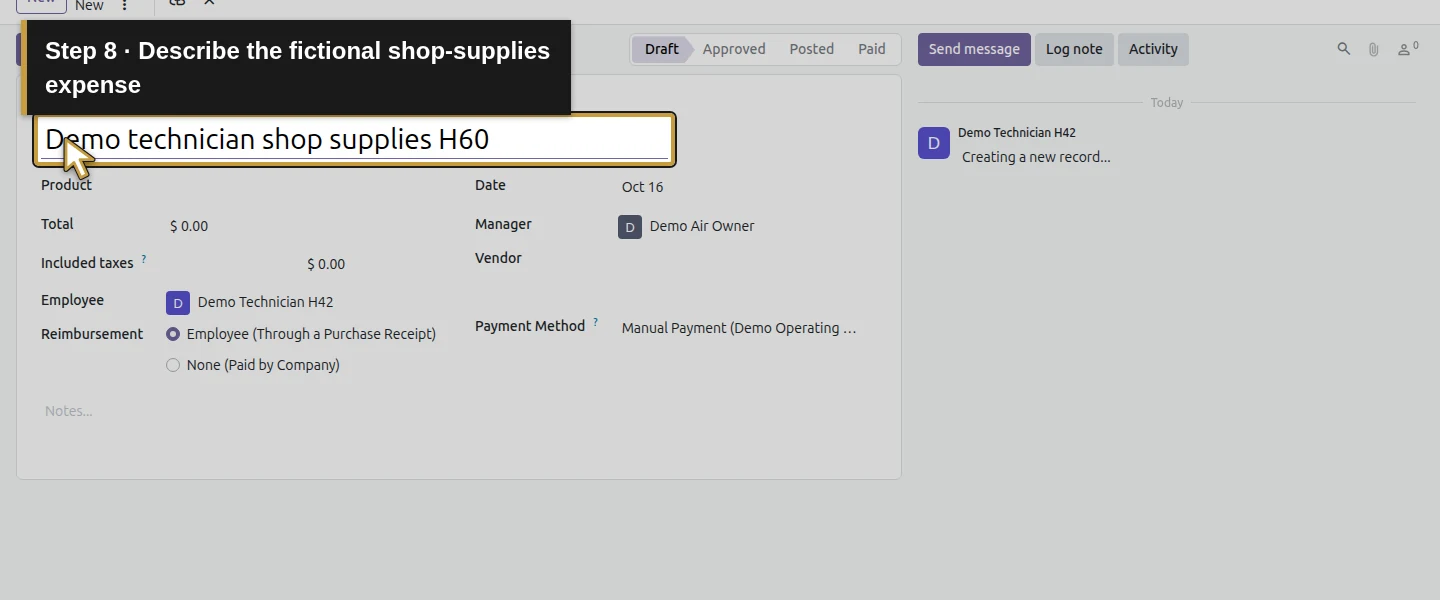
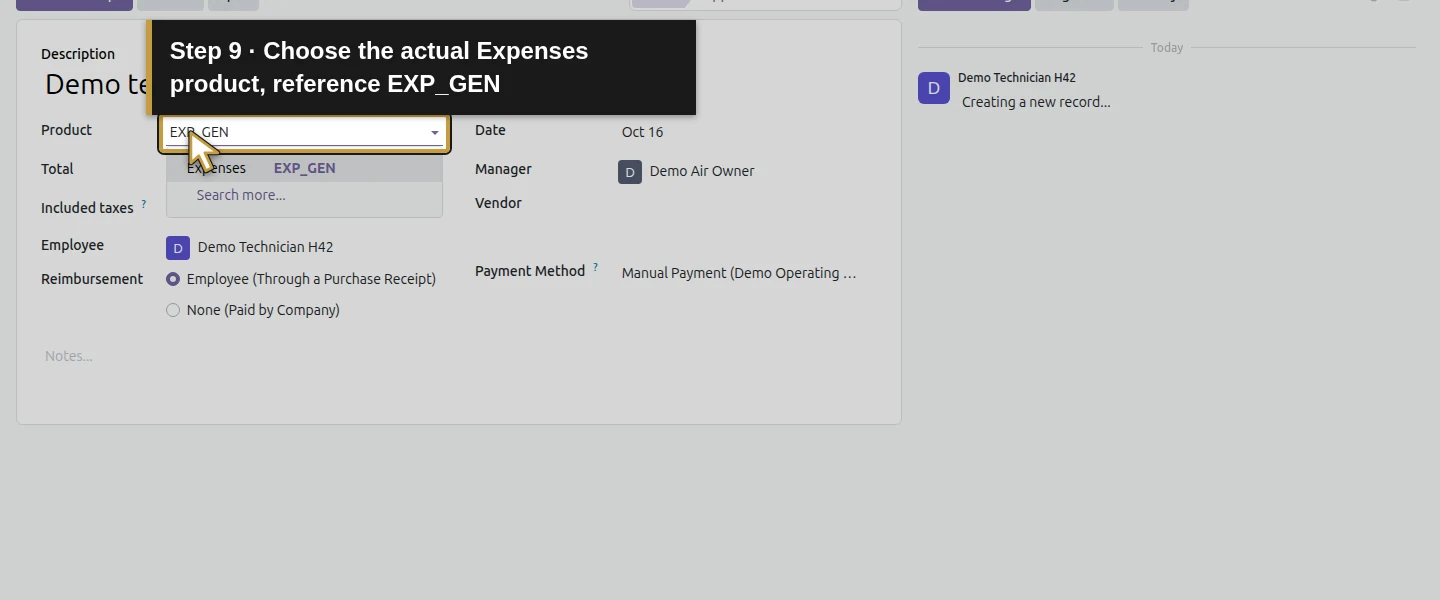
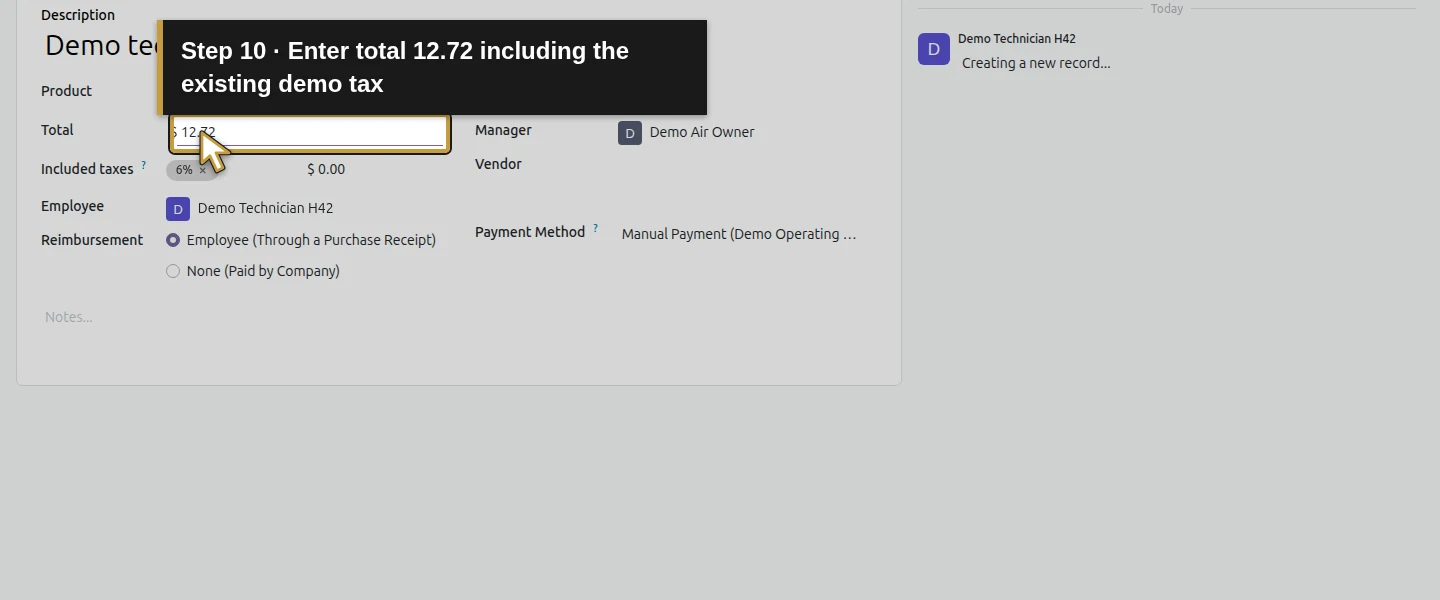
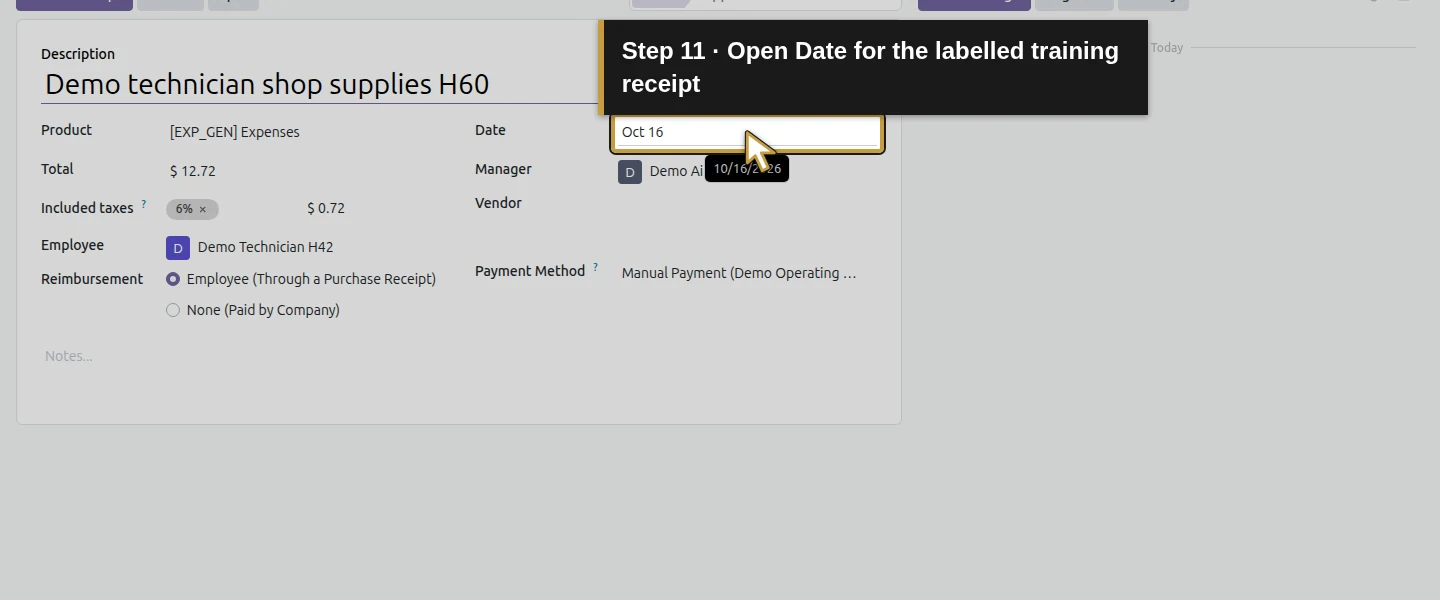
Step 4. Attach and check the actual receipt
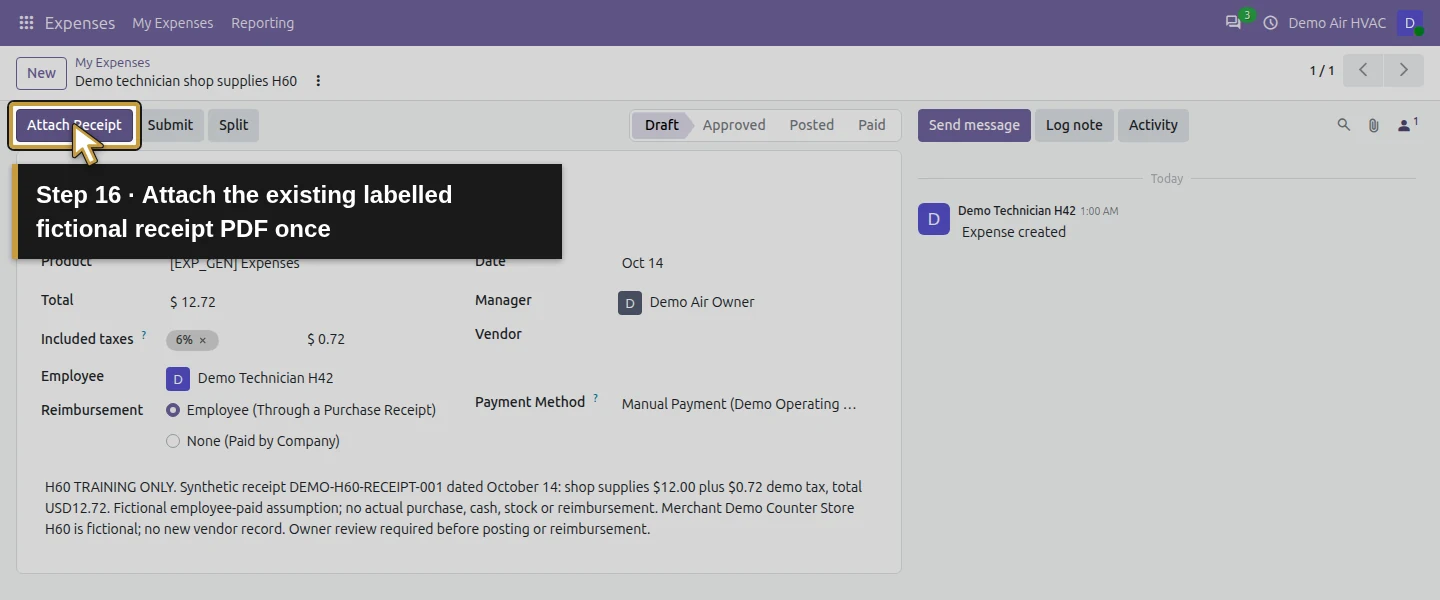
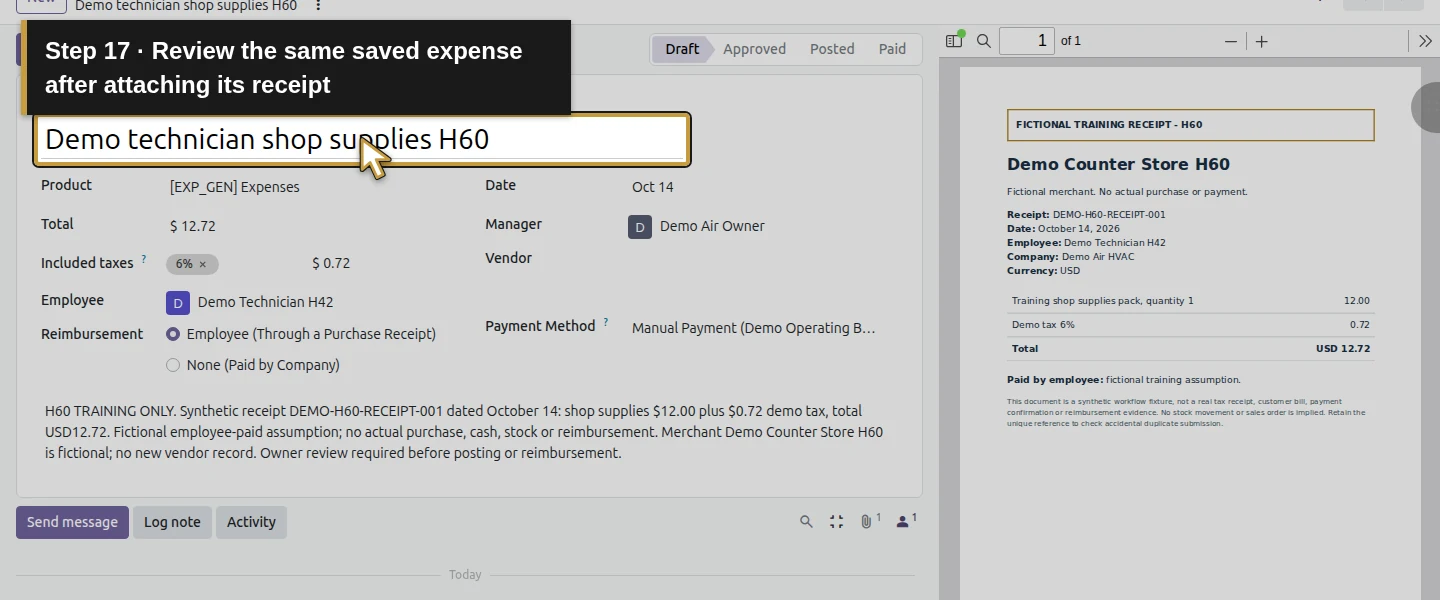
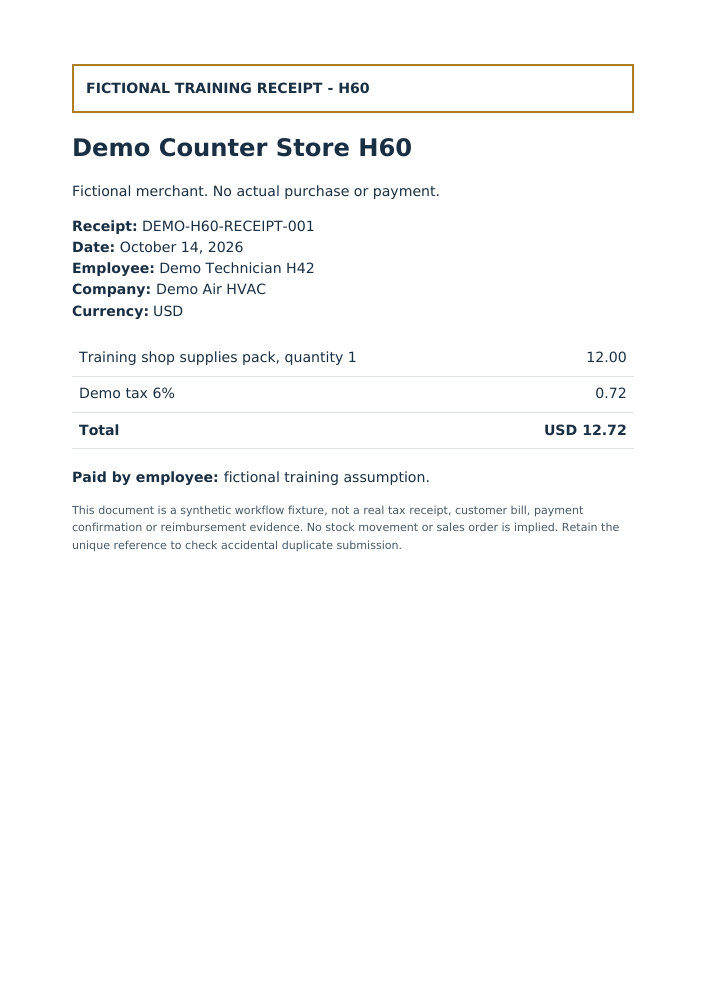
Click Attach Receipt and choose the labelled h60-synthetic-receipt.pdf. Verify the file is retained on this saved expense. Its content shows the fictional merchant, employee, receipt reference/date, $12 net, $0.72 demo tax, $12.72 total and employee-paid assumption. The uploaded PDF is 21,786 bytes and matches the prepared file. This document is a training fixture; use the actual receipt and the business’s receipt-review process for a real expense. Do not submit the same purchase again just because the screen has refreshed.
Step 5. Submit as the technician and inspect the role boundary
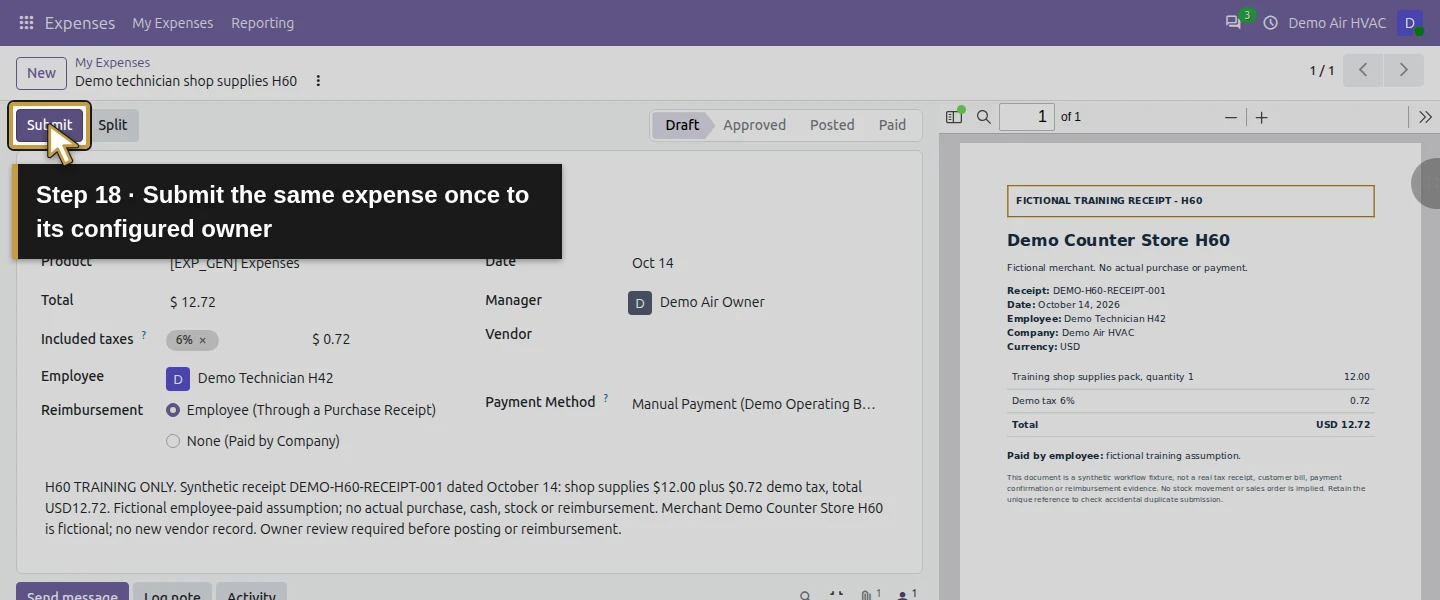
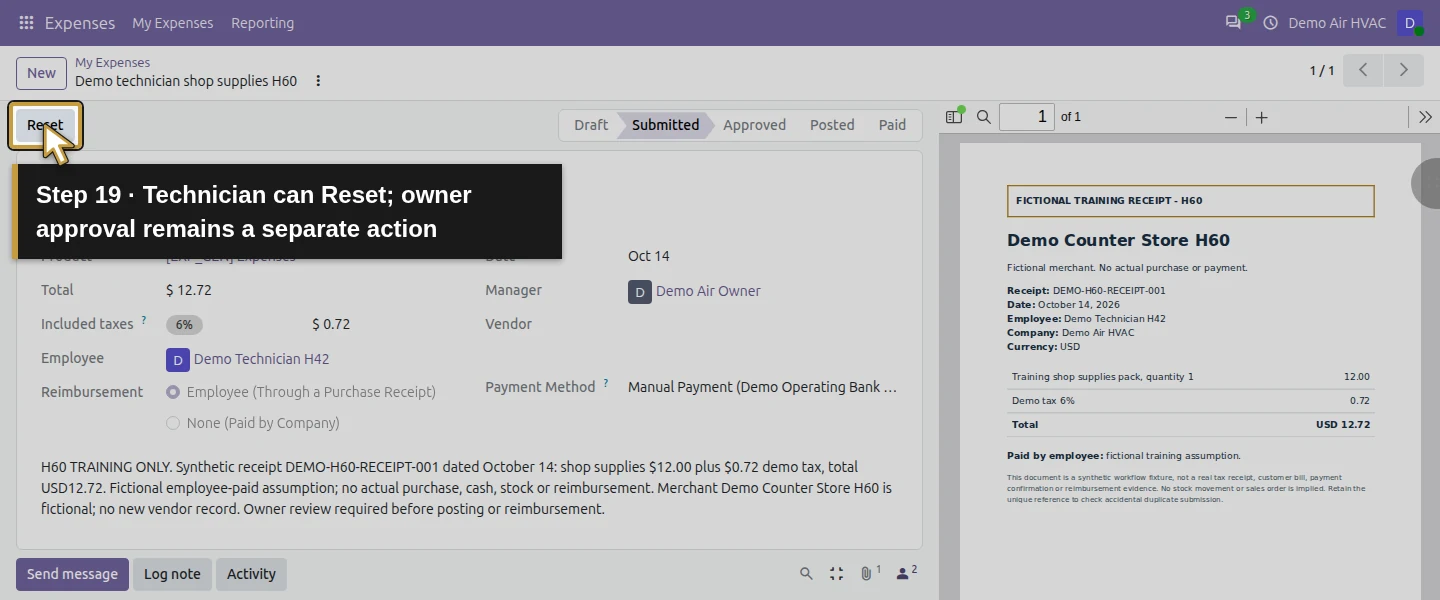
Click Submit once. Reopen the same expense: it is Submitted, Manager is Demo Air Owner and the receipt remains linked. The technician sees Reset, with no Approve or Refuse control, and its saved Can Approve result is false. This proves the inspected ordinary-employee view; it does not test arbitrary approval requests or every role arrangement. Submission also creates an owner Expense Approval activity. One native New expenses waiting for your approval email reaches the owner in the local sink. No customer message or real external delivery is involved.
Step 6. Review the submission in the owner’s queue
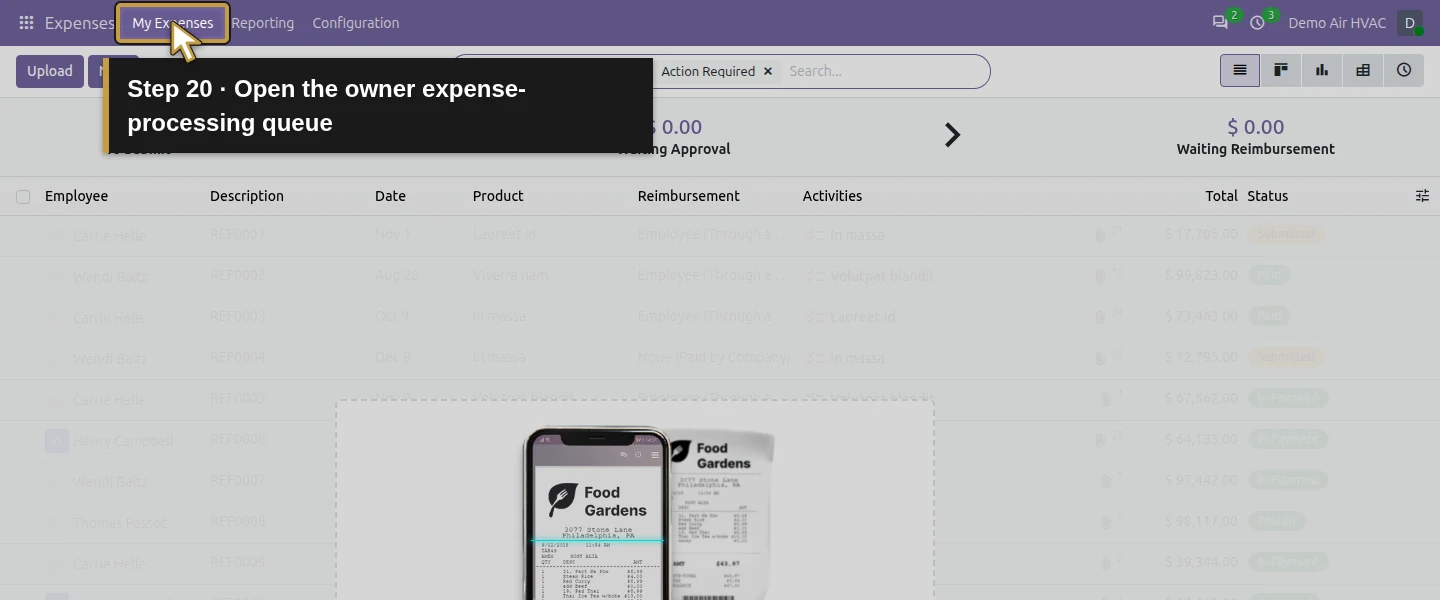
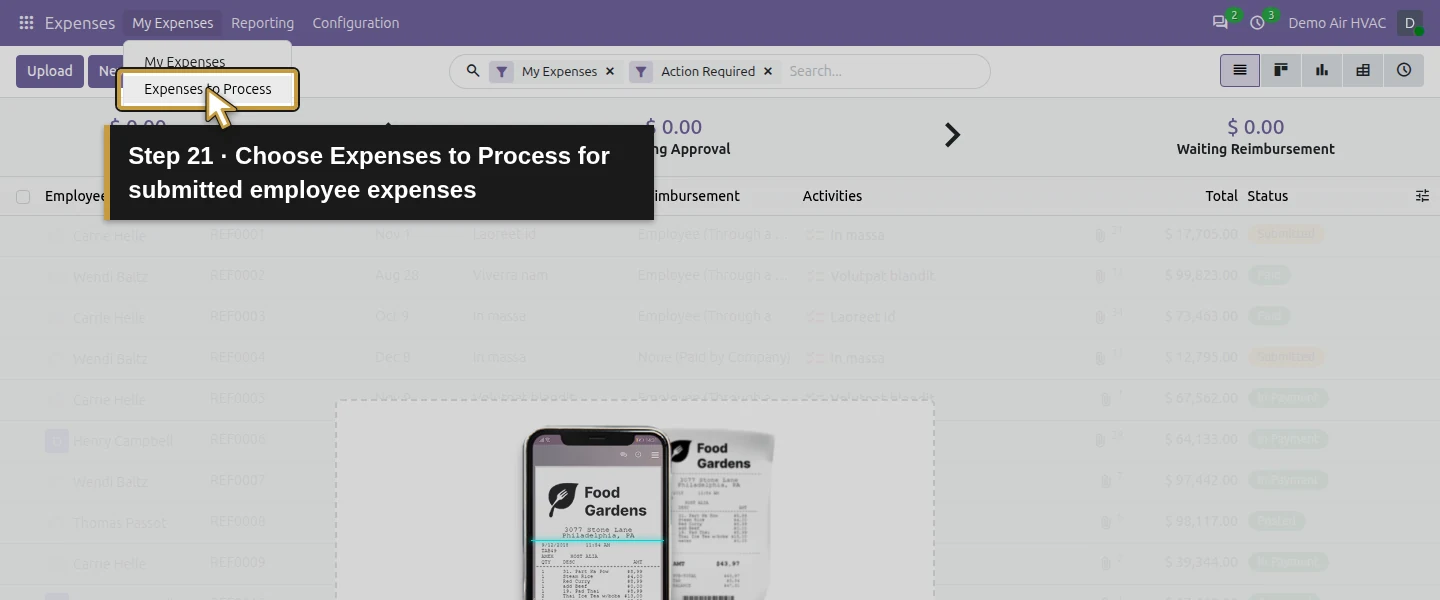
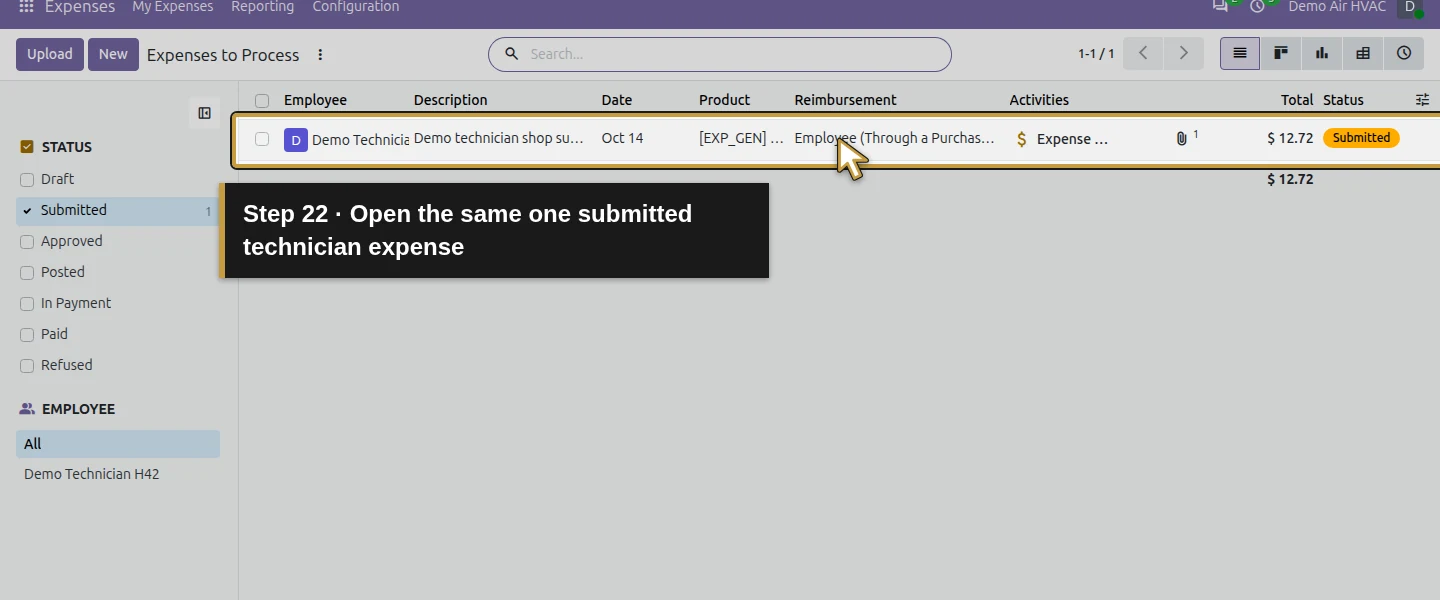
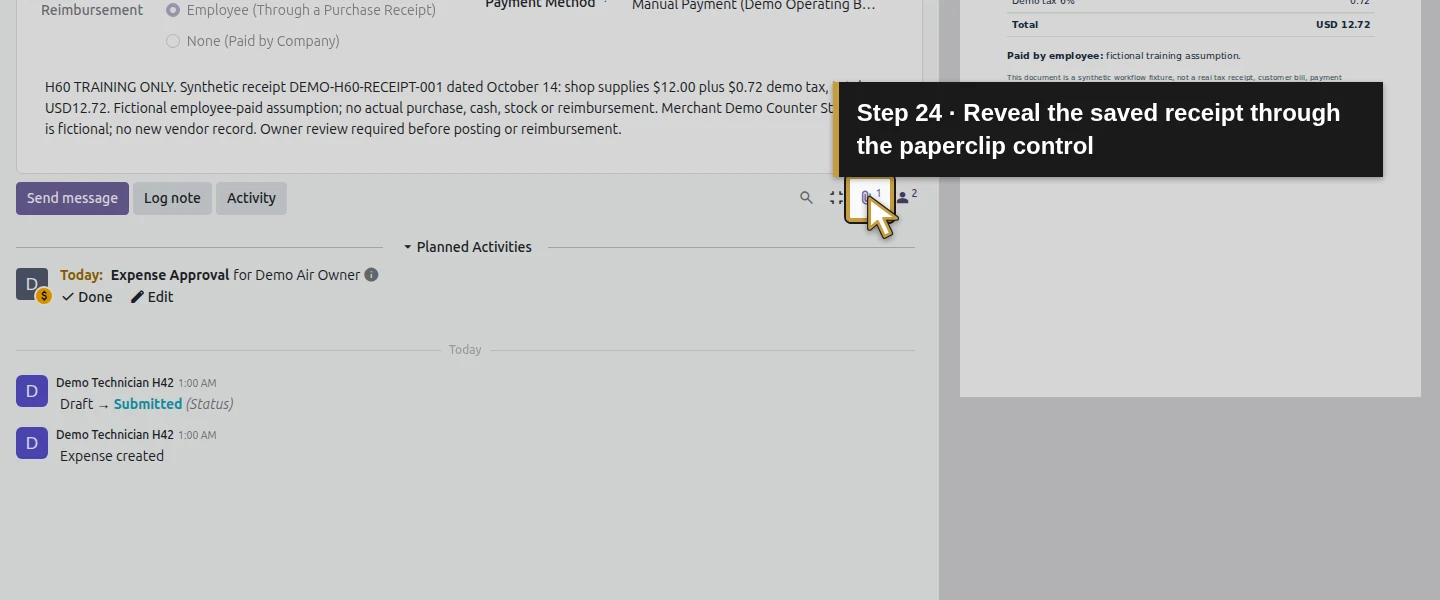
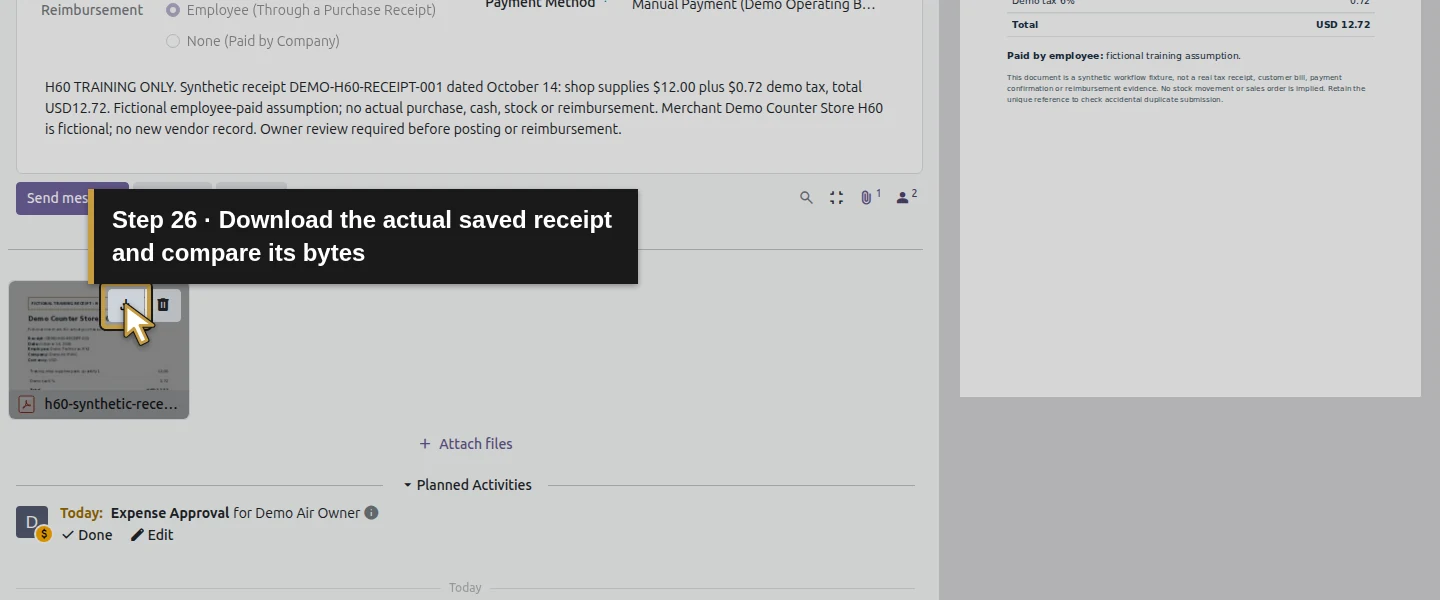
As the owner, open Expenses → My Expenses → Expenses to Process. The Submitted filter contains this one expense. Open it and verify employee, purpose, amount/currency, tax, reimbursement choice, manager and payment method. Use the paperclip attachment control to reveal the receipt; open it or choose Download. The owner’s native download matches the technician’s uploaded PDF. This owner view exposes Approve and Refuse. Review possible prior submissions and the underlying purchase evidence before approving; this lesson does not exercise a duplicate-receipt submission.
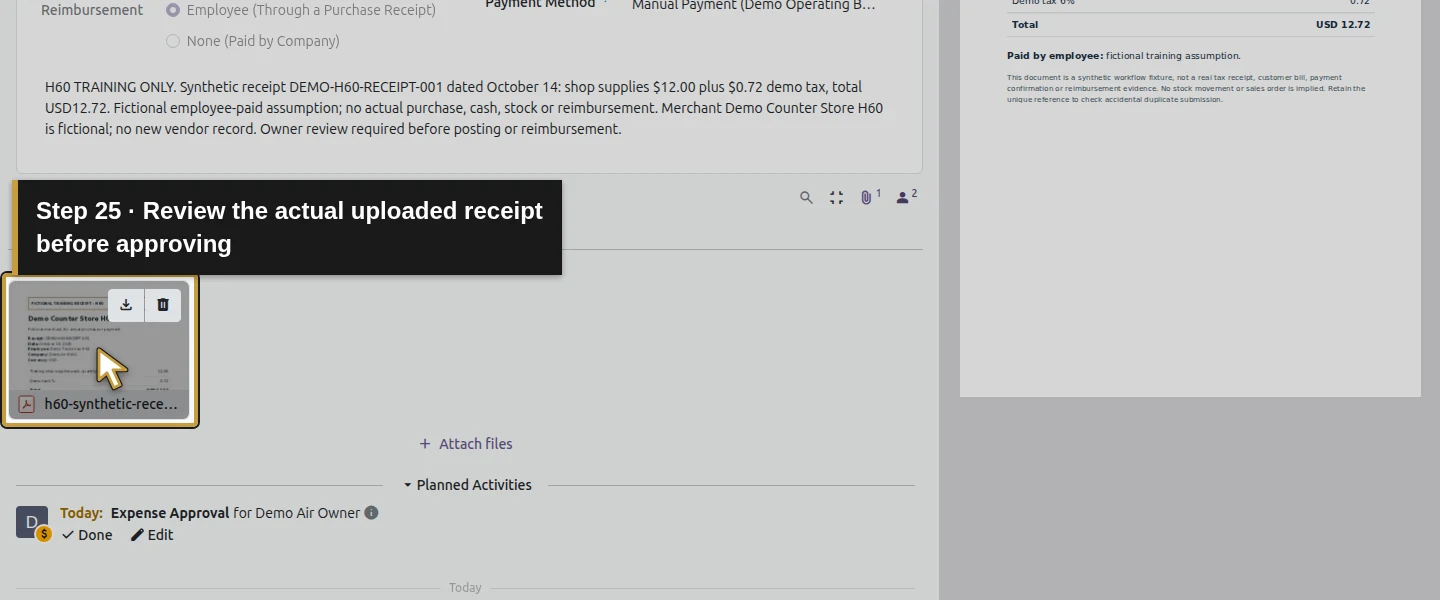
Example fictional receipt uploaded to the expense
This one-page training receipt is the file attached in Step 4 and downloaded by the owner in Step 6. It shows the fictional shop-supplies purchase dated October 14, 2026: $12 plus $0.72 demo tax, total $12.72. Its employee-paid label is an assumption for this lesson. It is a supplied example, not an Odoo-generated financial report or evidence of a real purchase or repayment.
Download the fictional training receipt (PDF, 1 page)
Step 7. Approve and inspect the accounting draft
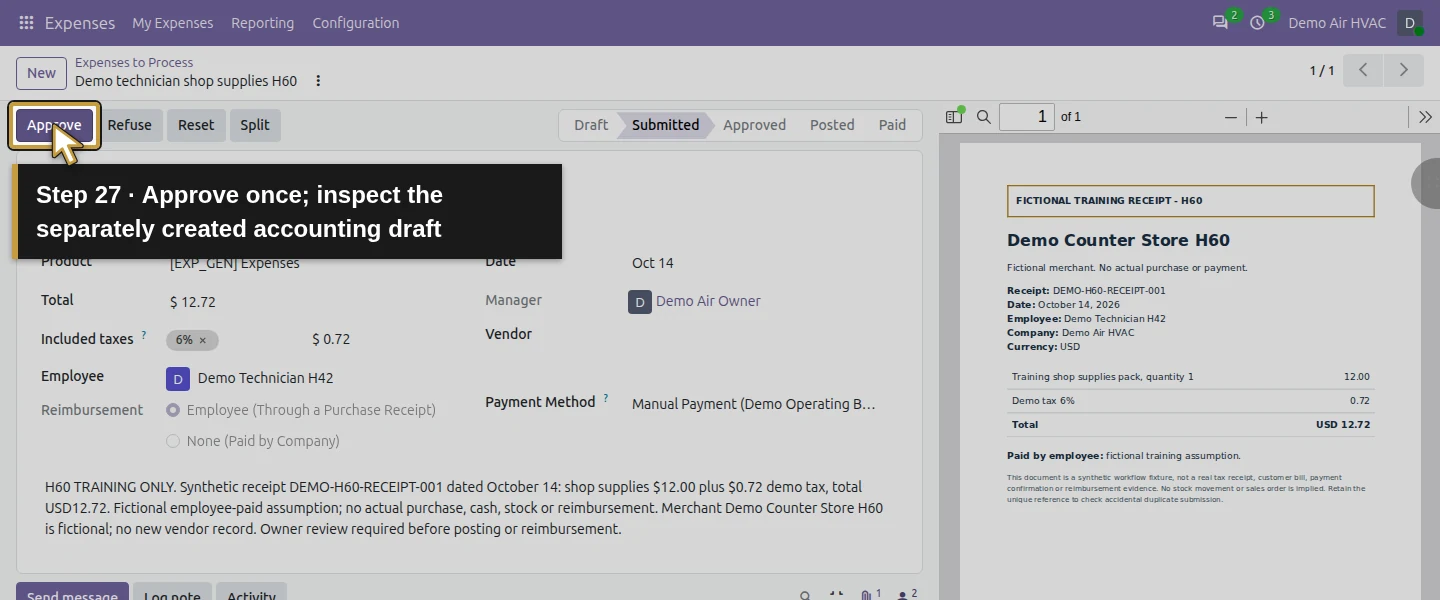
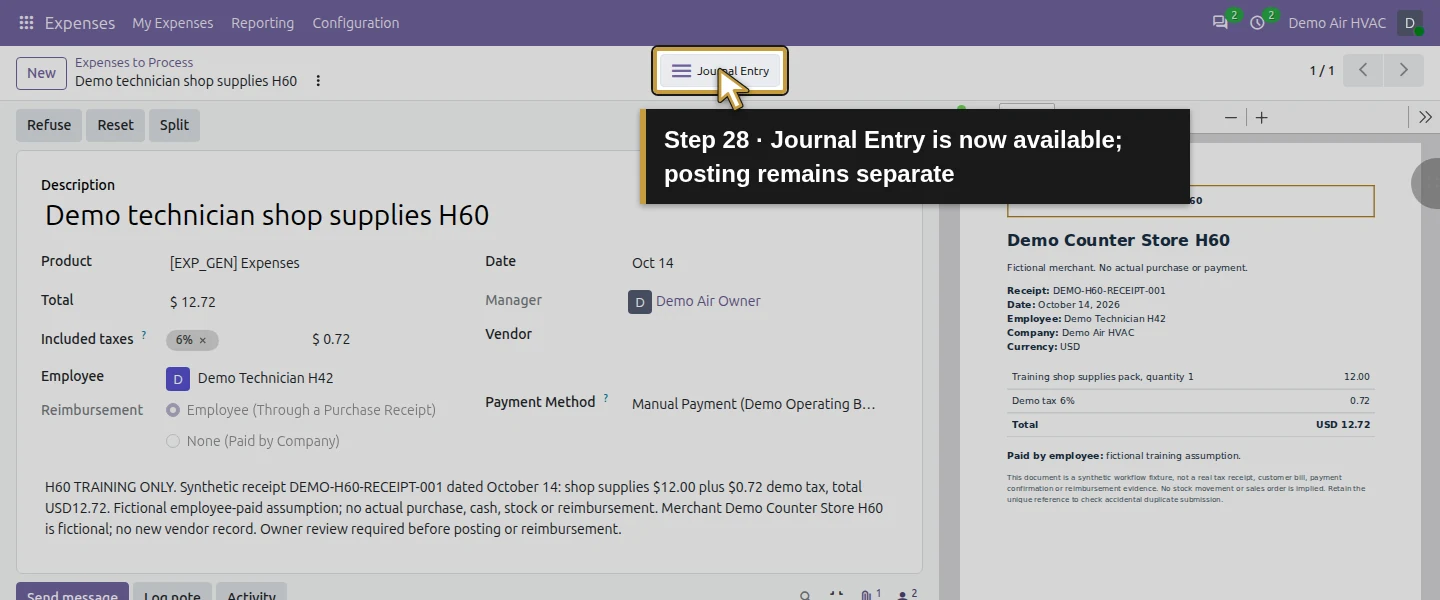
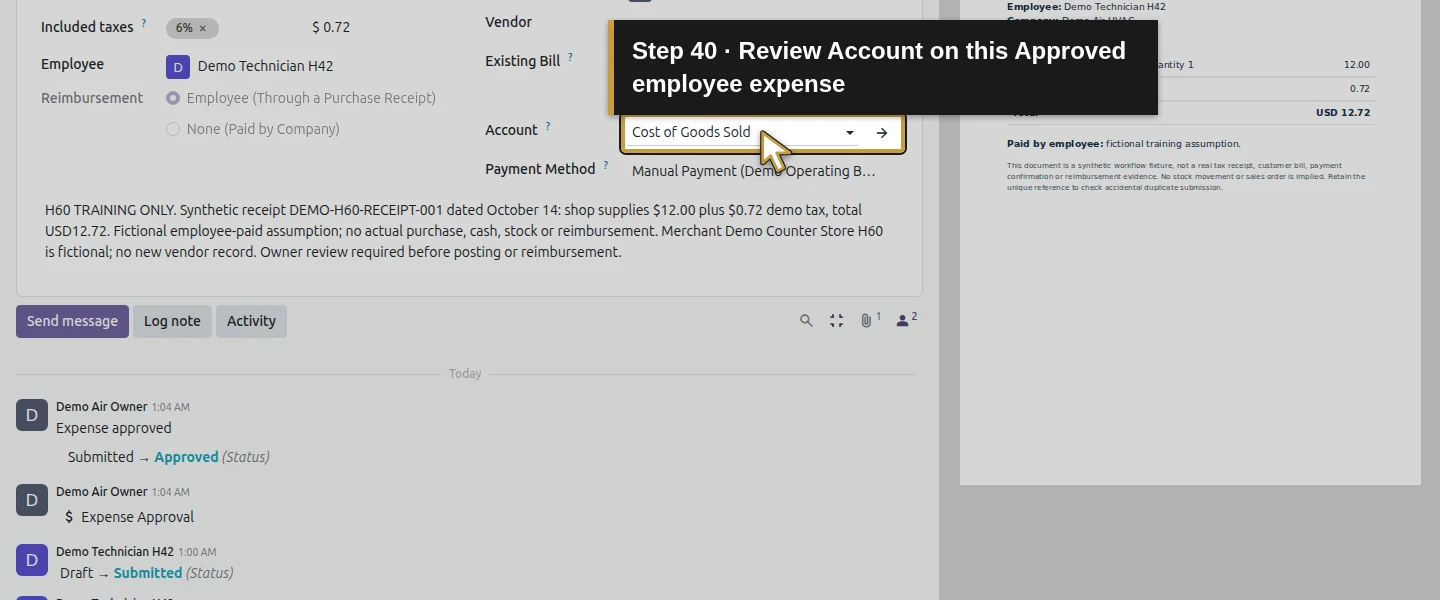
Click Approve once. The expense becomes Approved and gains Journal Entry. Approval also creates one Draft Purchase Receipt for $12.72; no payment has been created. The approval activity is completed by the workflow. In this test, the generic expense product initially selected Cost of Goods Sold. Review the actual account choice rather than treating that default as a recommendation for all shop or office supplies.
Step 8. Expose the owner’s existing accounting-view controls
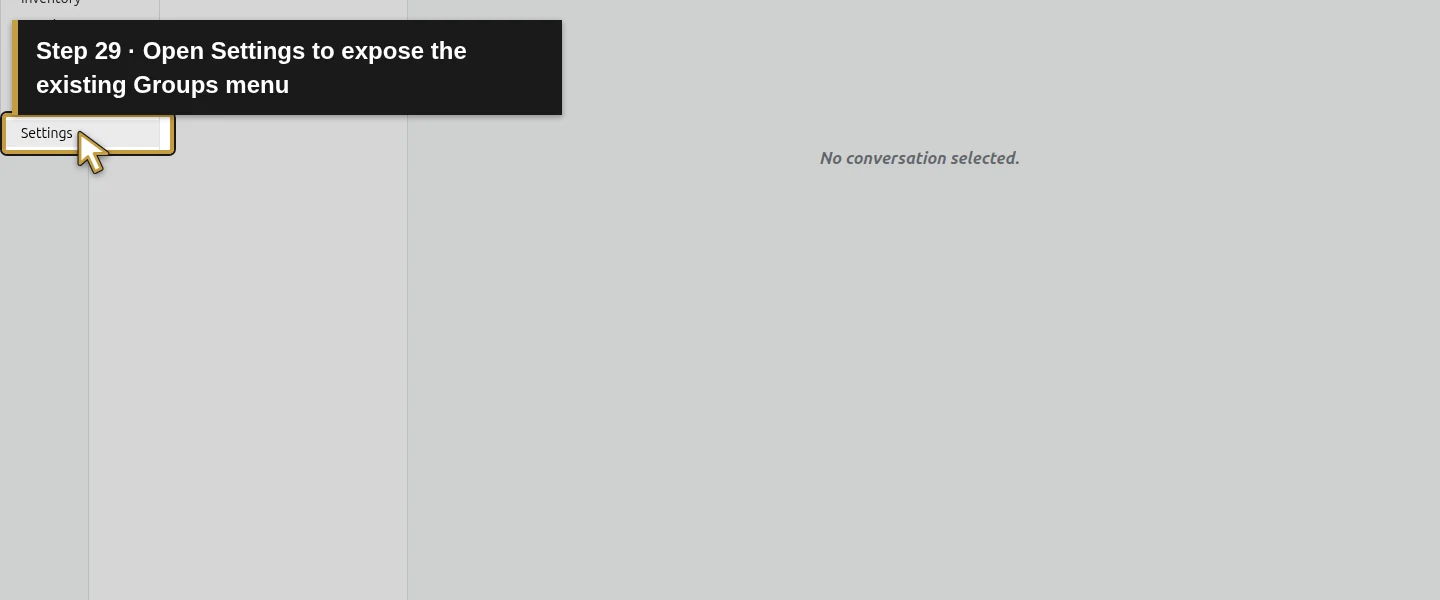
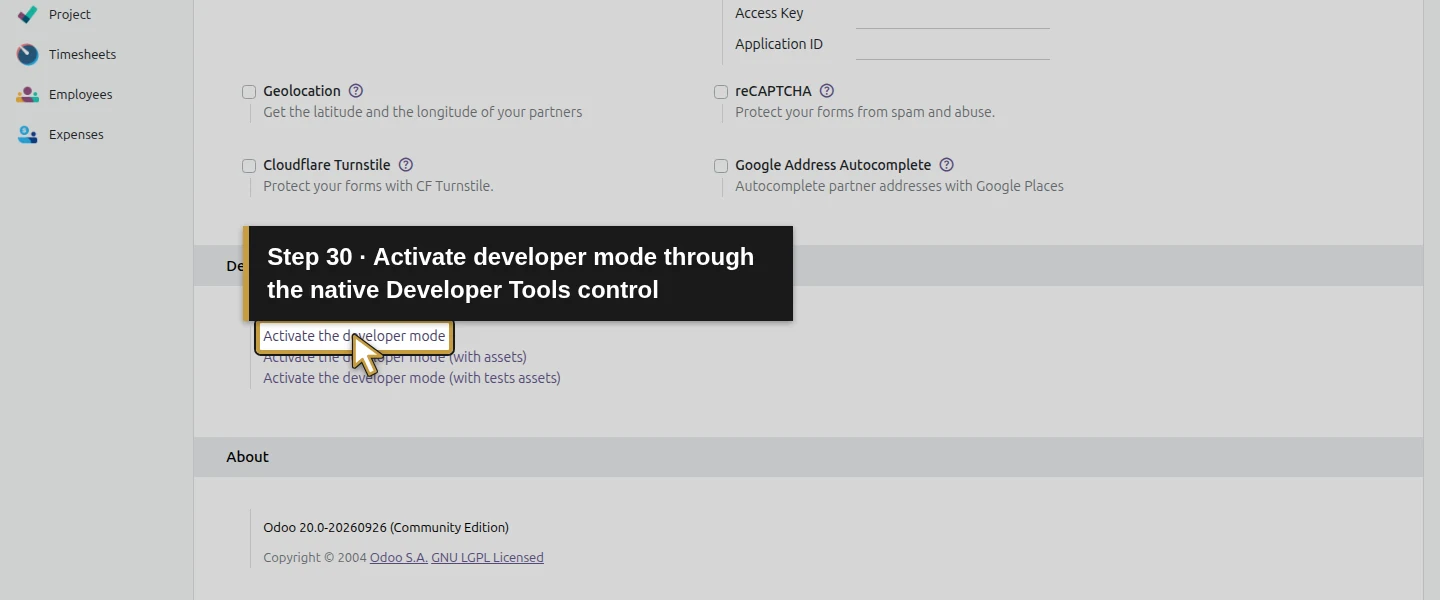
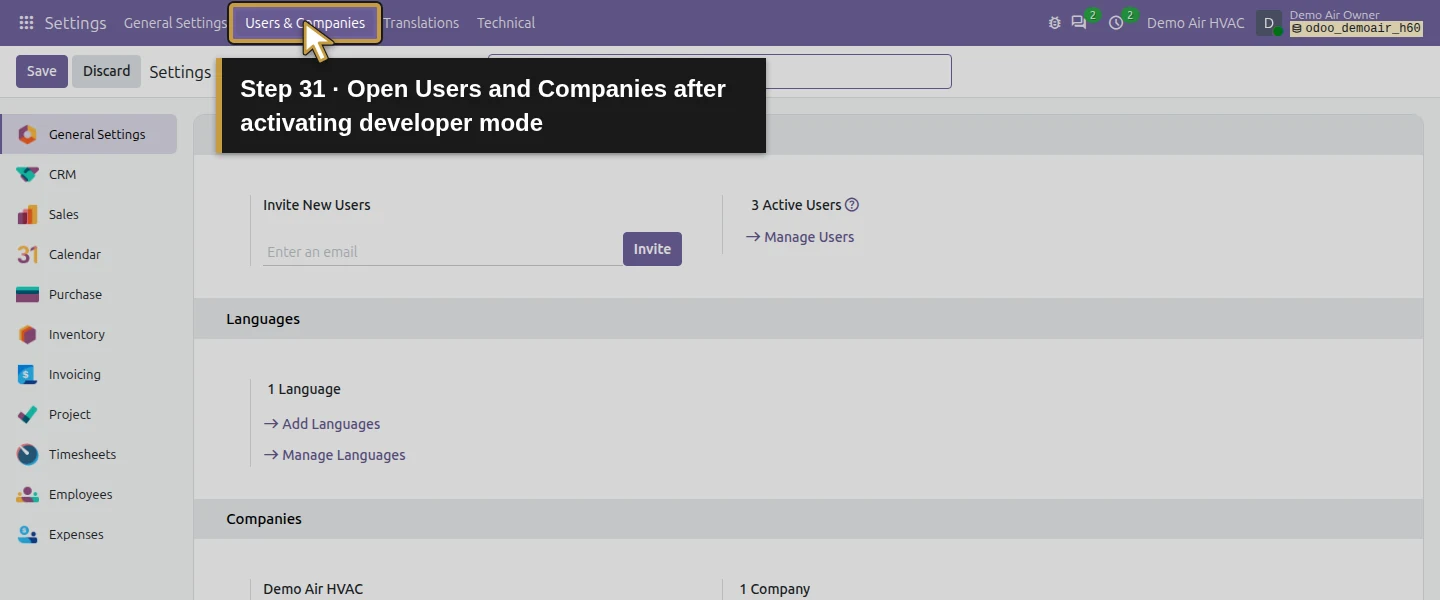
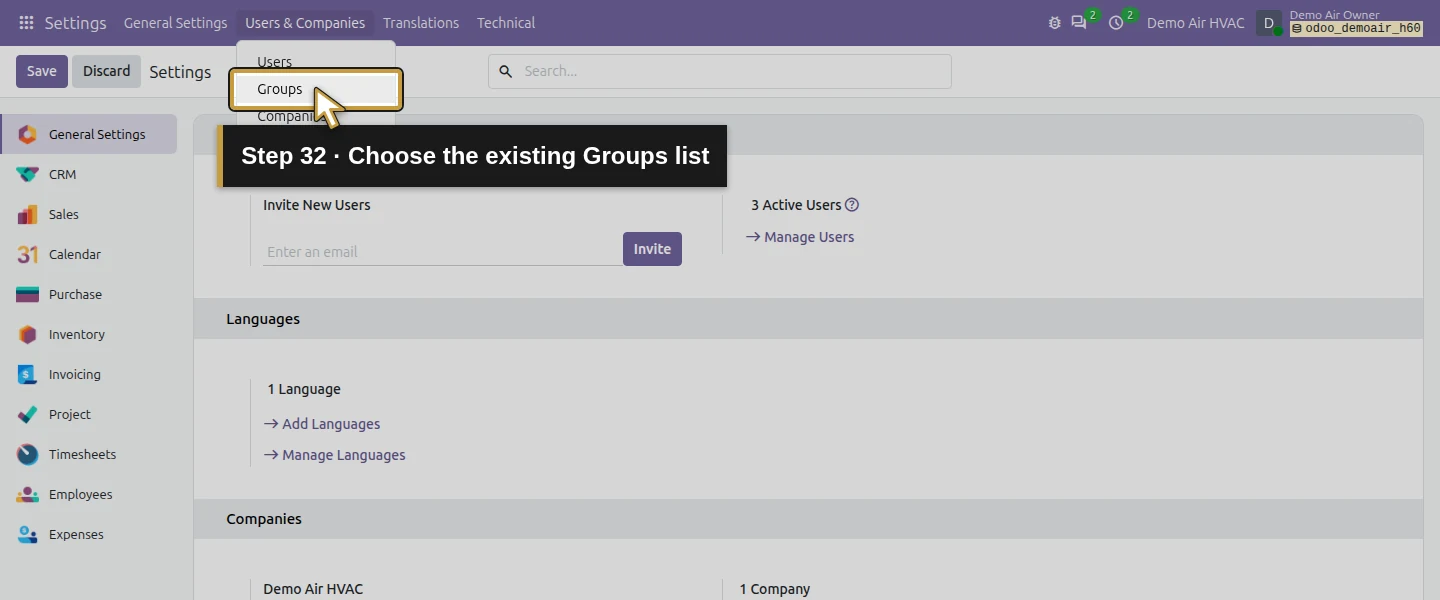
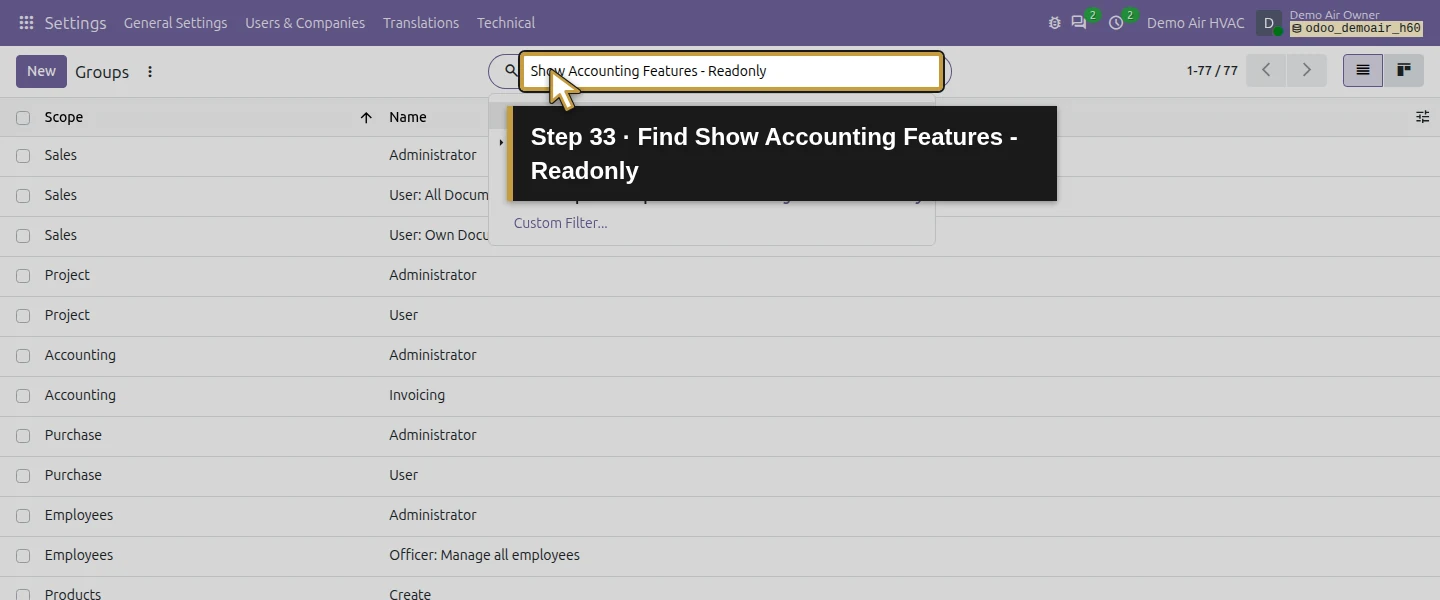
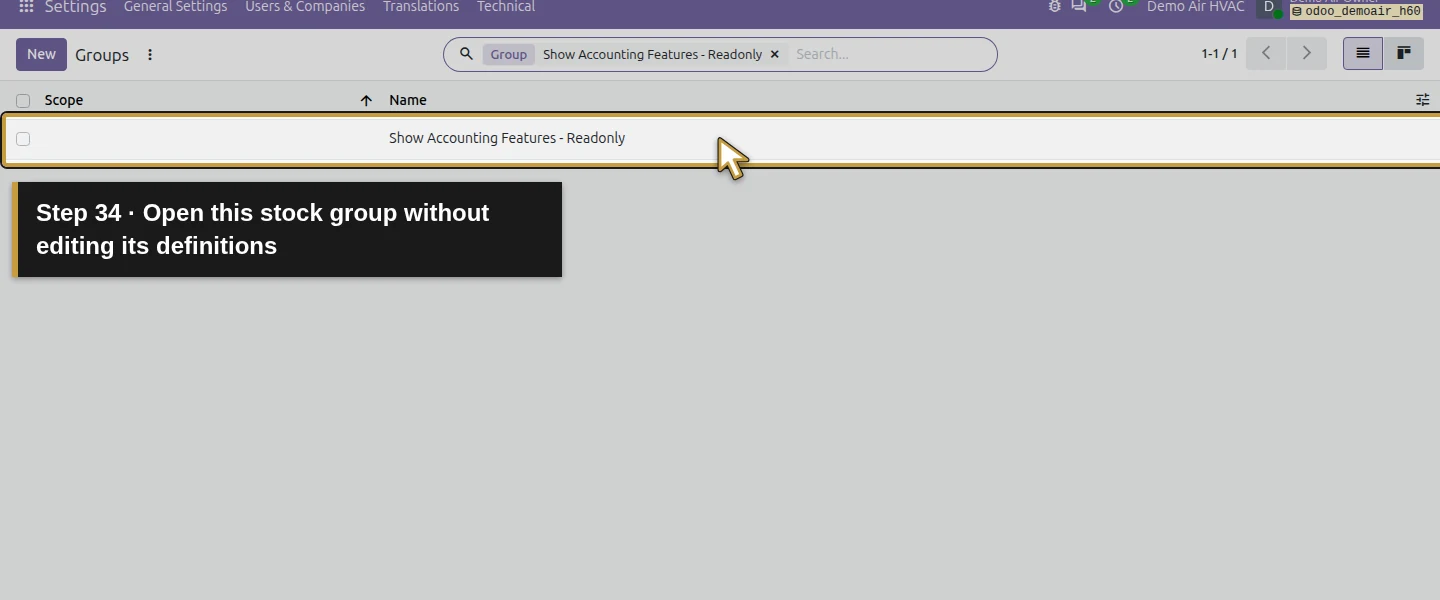
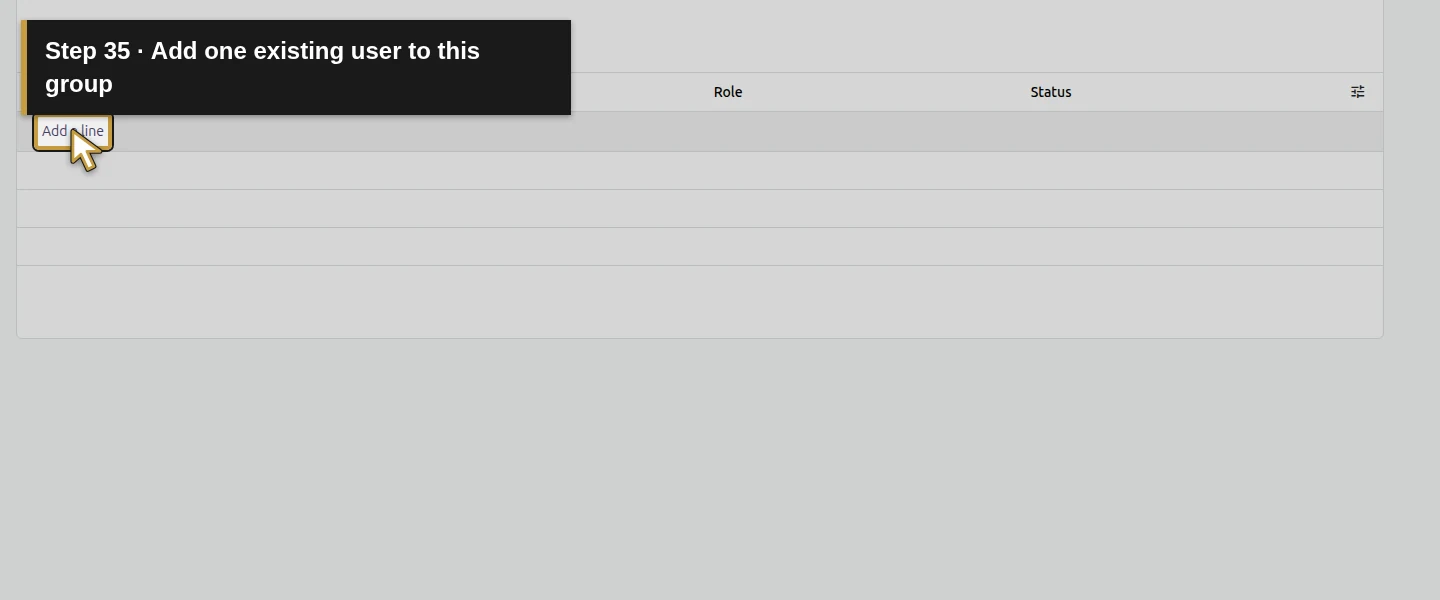
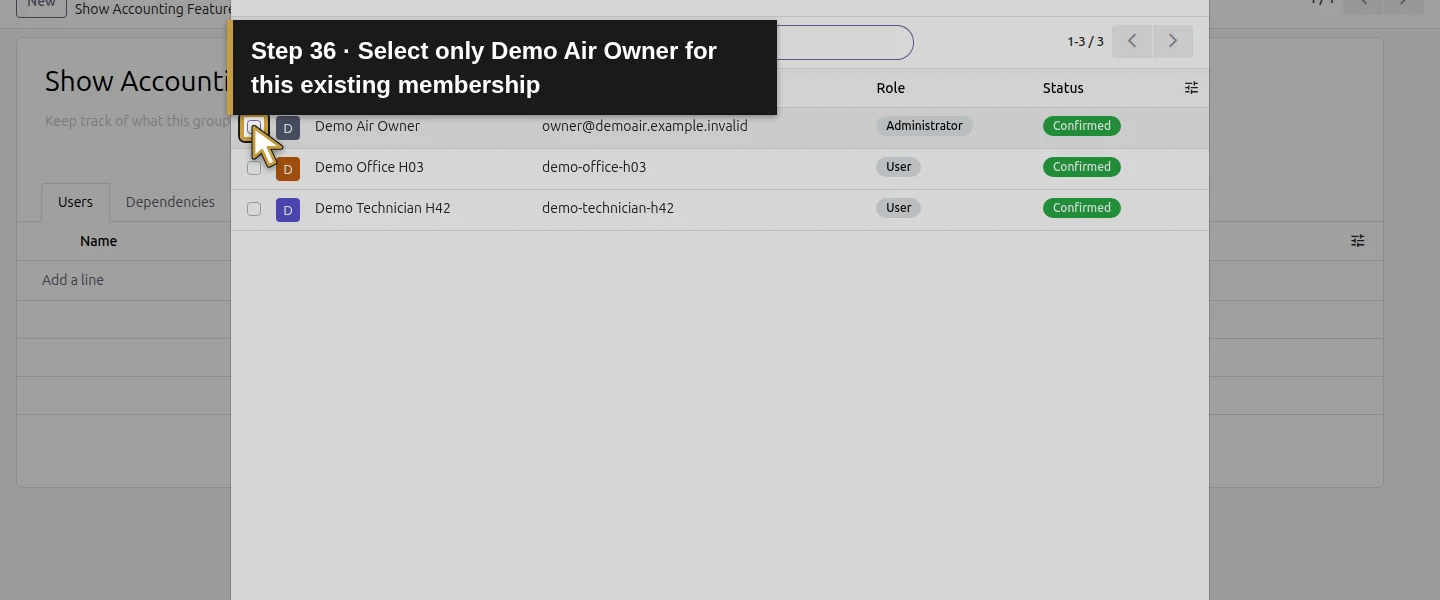
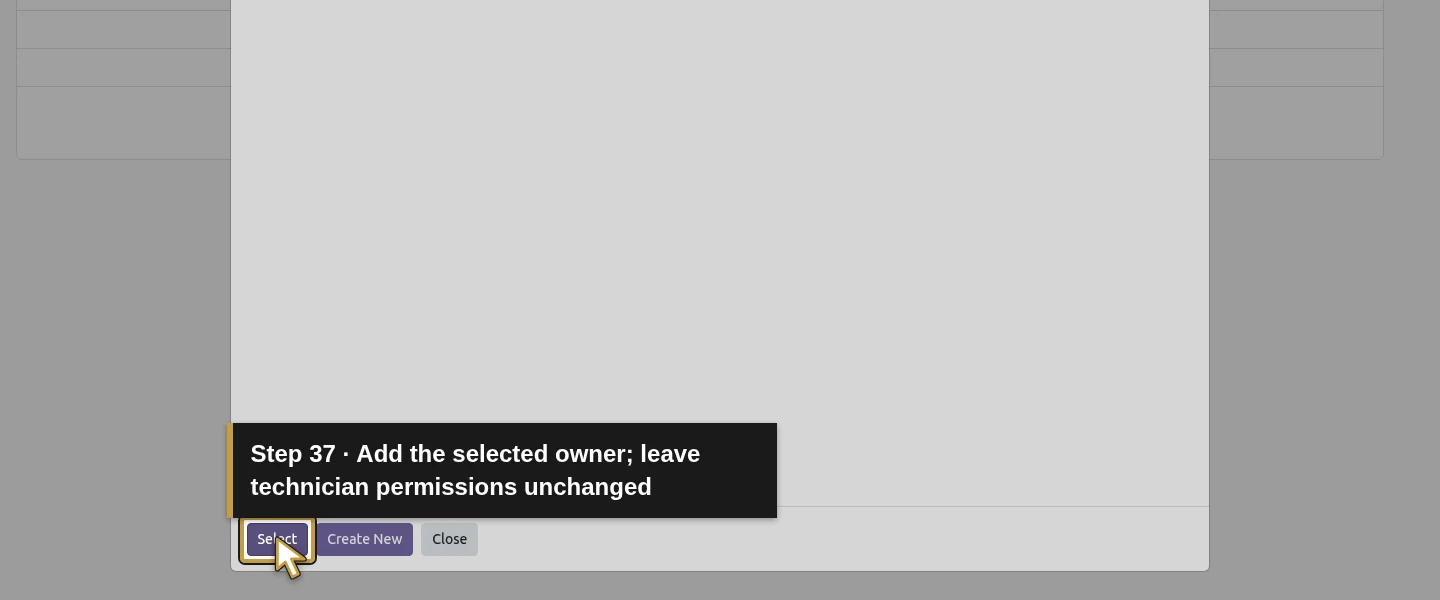
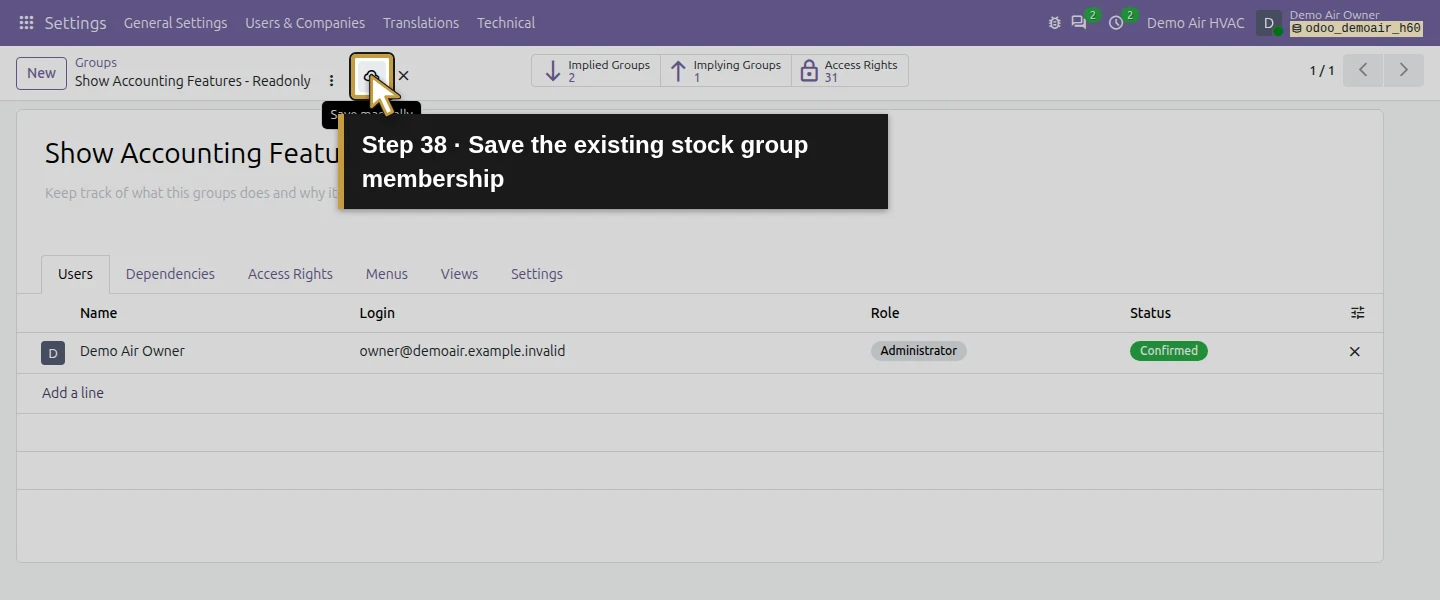
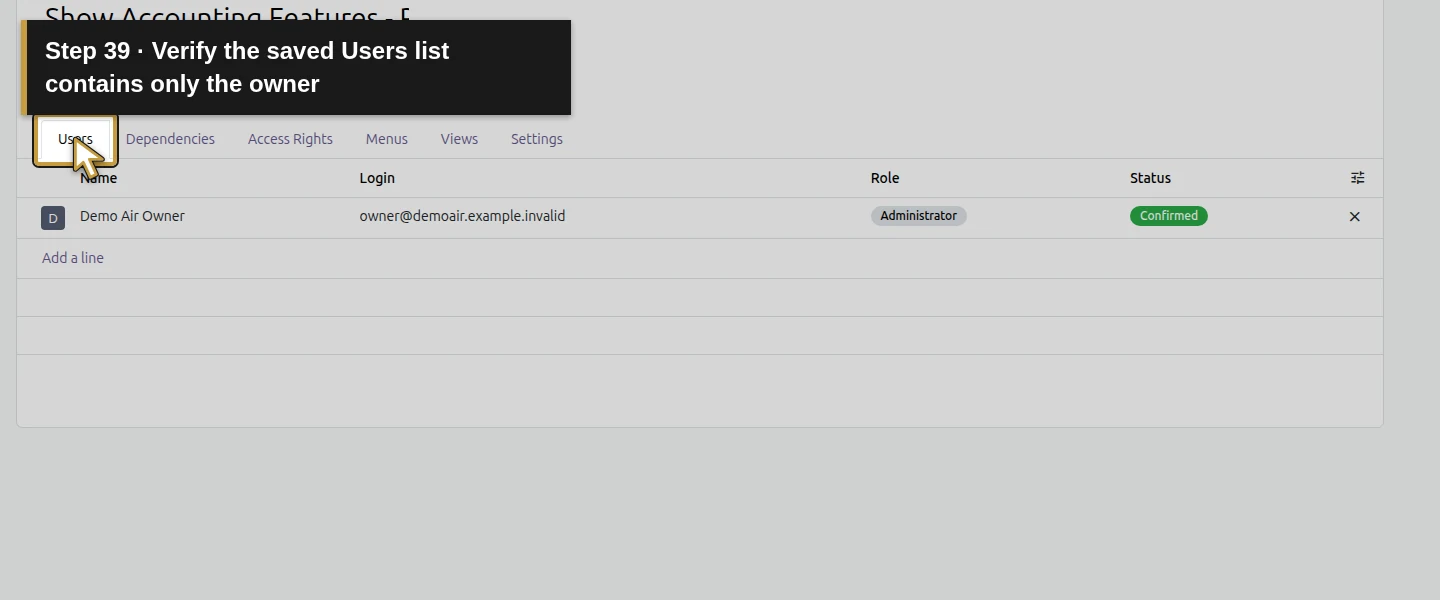
The owner’s initial Invoicing role did not display the expense Account field. As the administrator, open Settings → General Settings. If Users & Companies does not show Groups, scroll to Developer Tools, click Activate the developer mode, and wait for Settings to reload. Then open Users & Companies → Groups and the existing Show Accounting Features - Readonly group. Under Users, click Add a line, select only Demo Air Owner, click Select, and save. Refresh the owner session; after the saved permission change and reload, the Account control appears. This changes membership in an existing stock group, with its definitions unchanged. The technician receives no new role. The owner’s existing Invoicing permission supplies its accounting write access.
Step 9. Review both the expense account and its already-created draft line
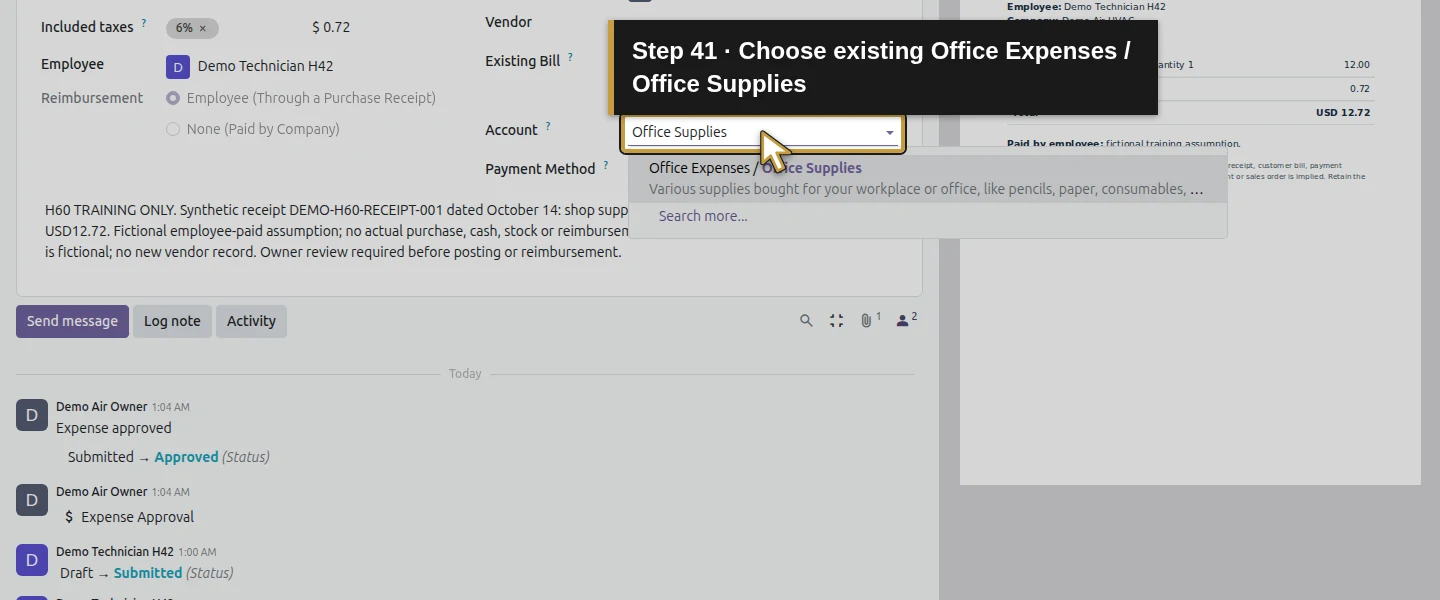
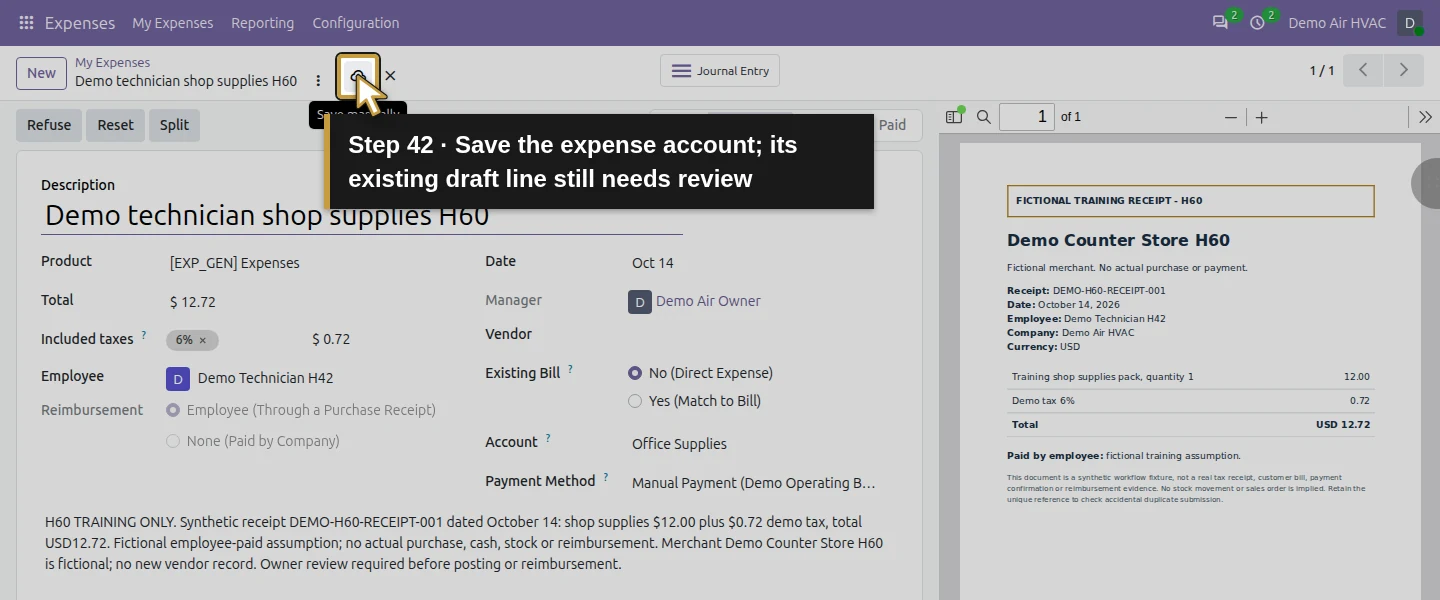
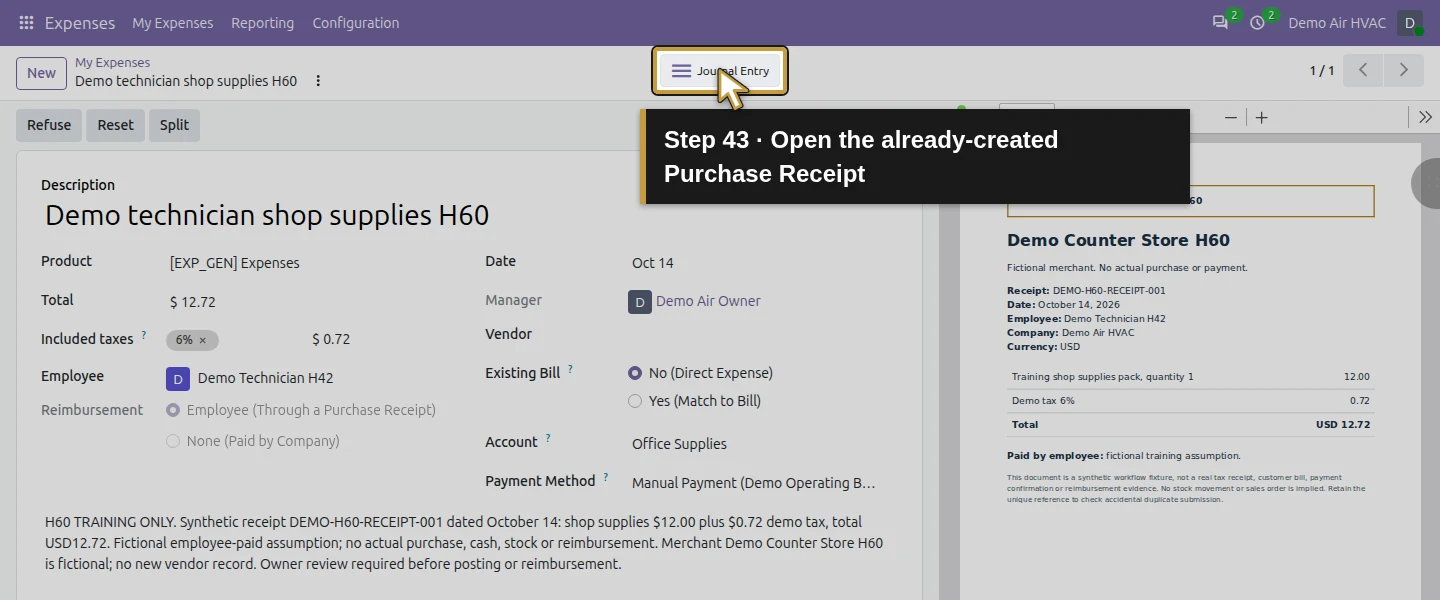
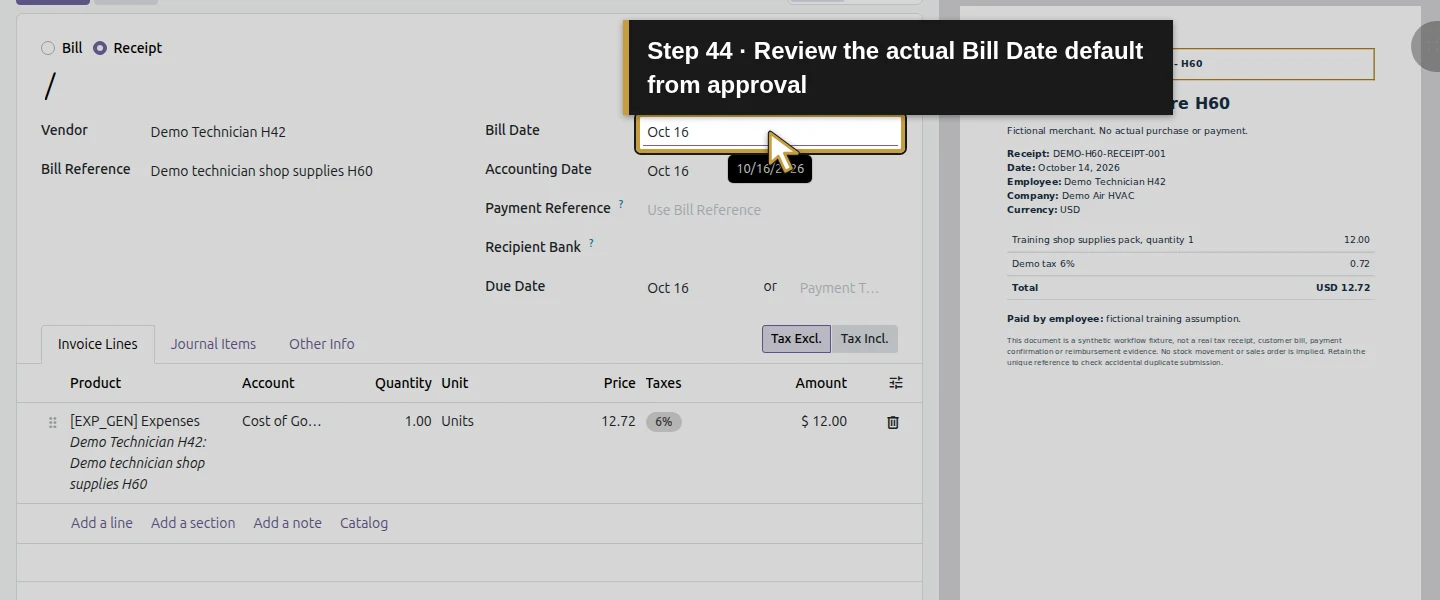
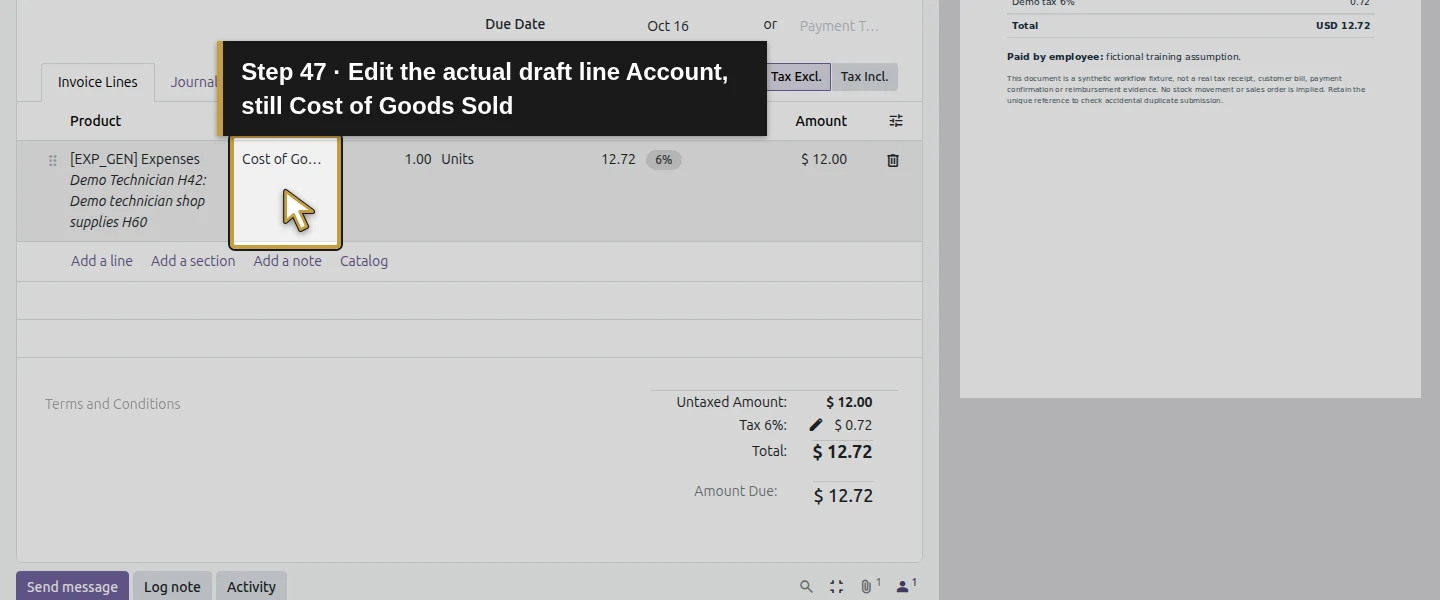
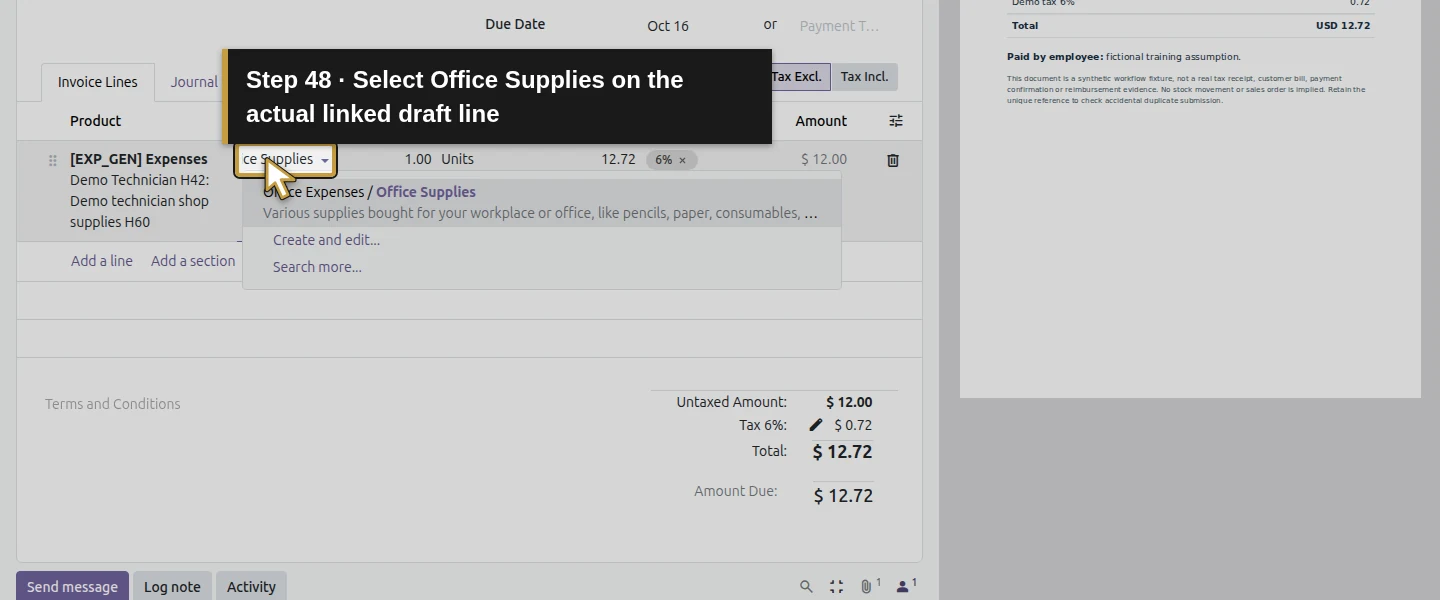
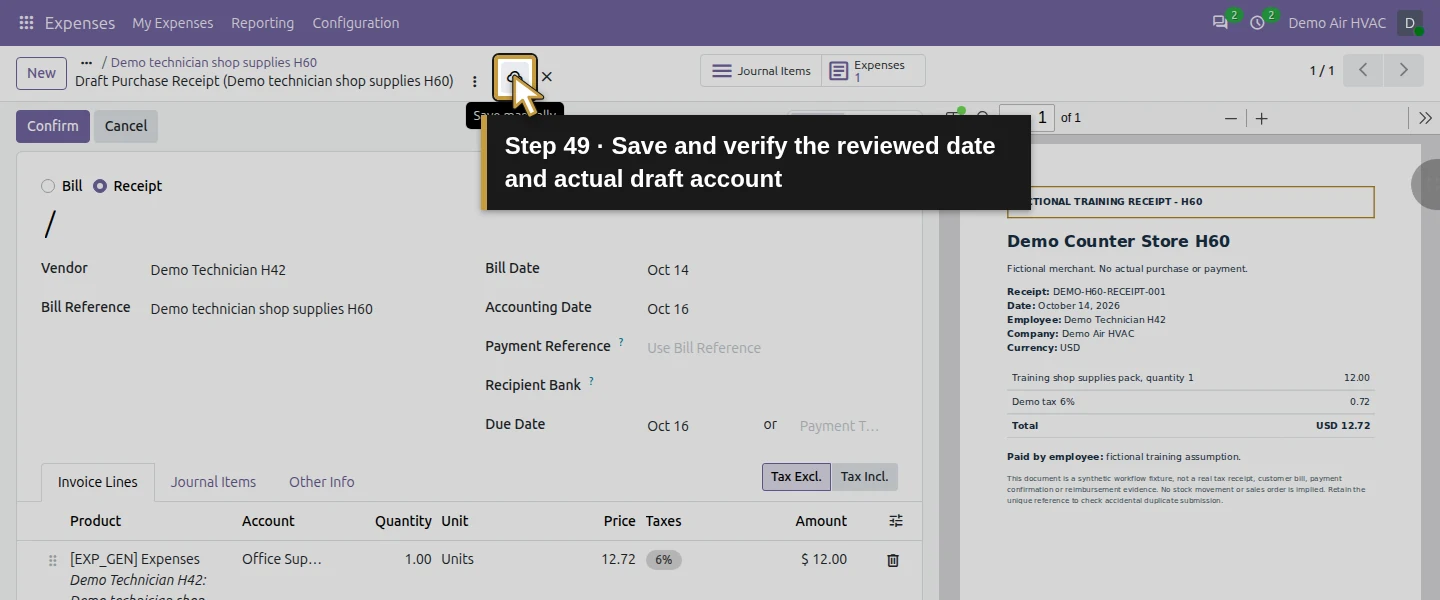
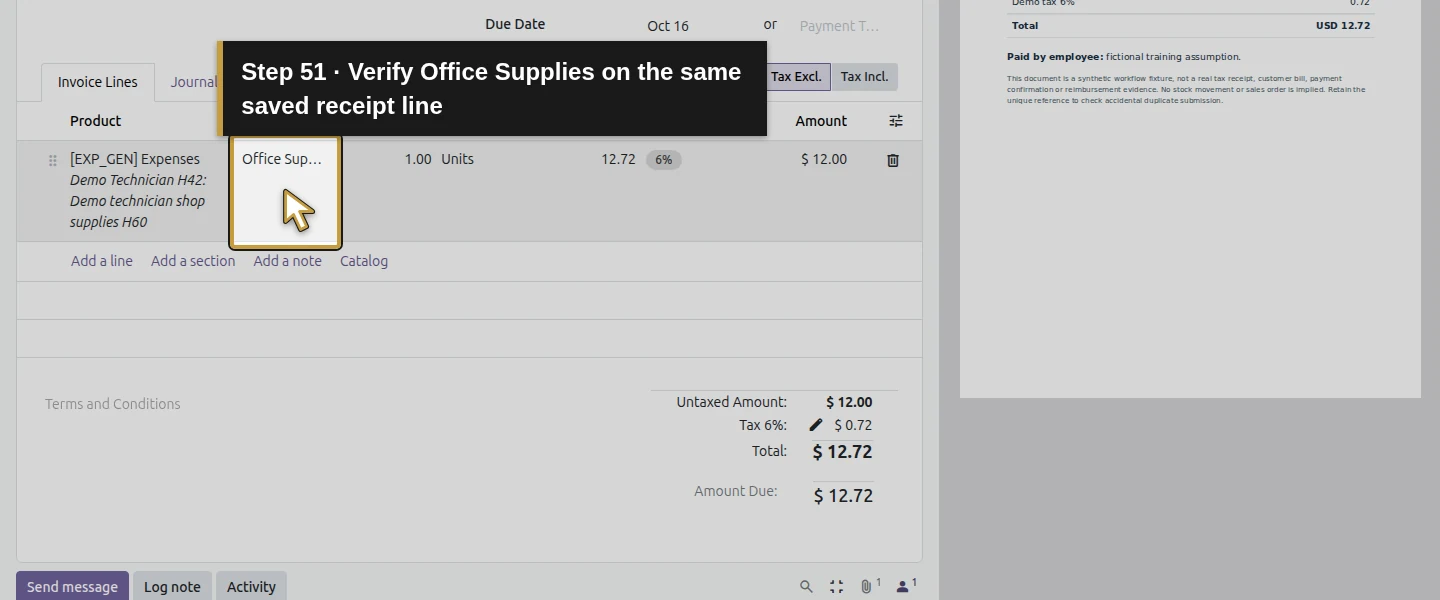
On the Approved expense, set Account to the existing Office Expenses / Office Supplies option and save. Then open Journal Entry. The draft has Receipt selected, vendor Demo Technician H42, Purchases journal, $12 untaxed, $0.72 demo tax and $12.72 total. Changing the expense’s Account after approval did not update this already-created draft’s line: it still showed Cost of Goods Sold. In Invoice Lines, click the actual Account cell and select Office Expenses / Office Supplies on that draft line as well. Click a stable heading to commit the cell, then save and wait for pending changes to clear.
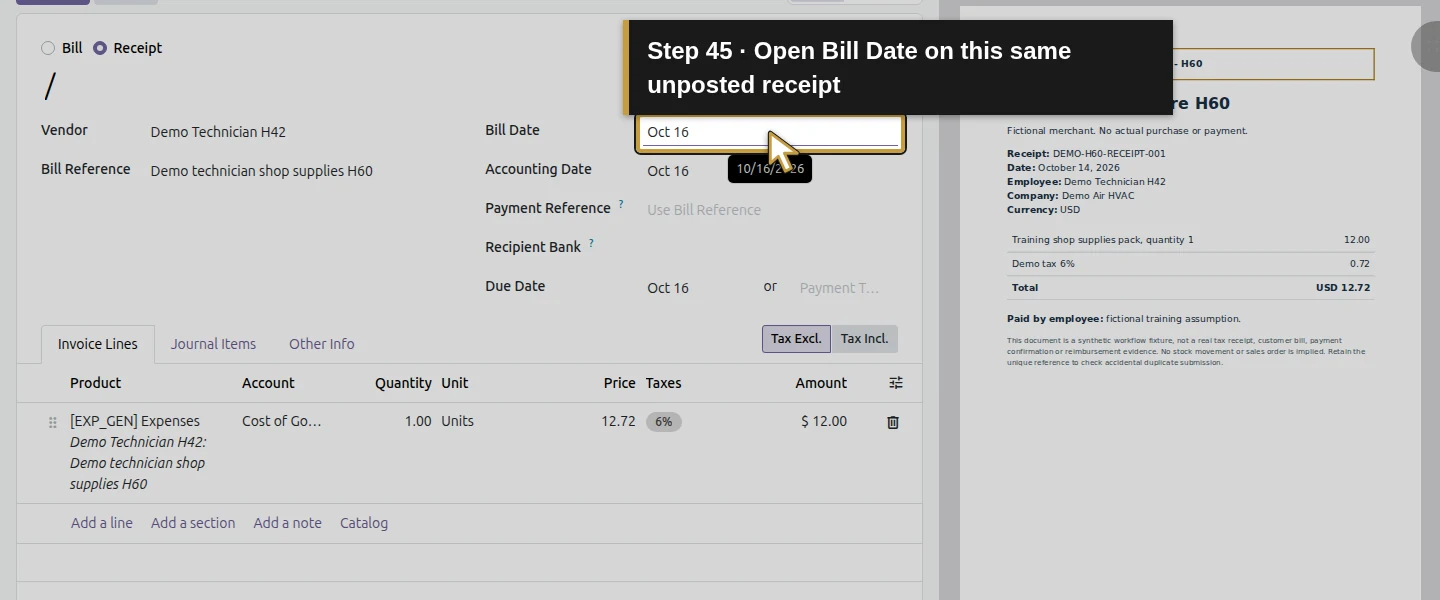
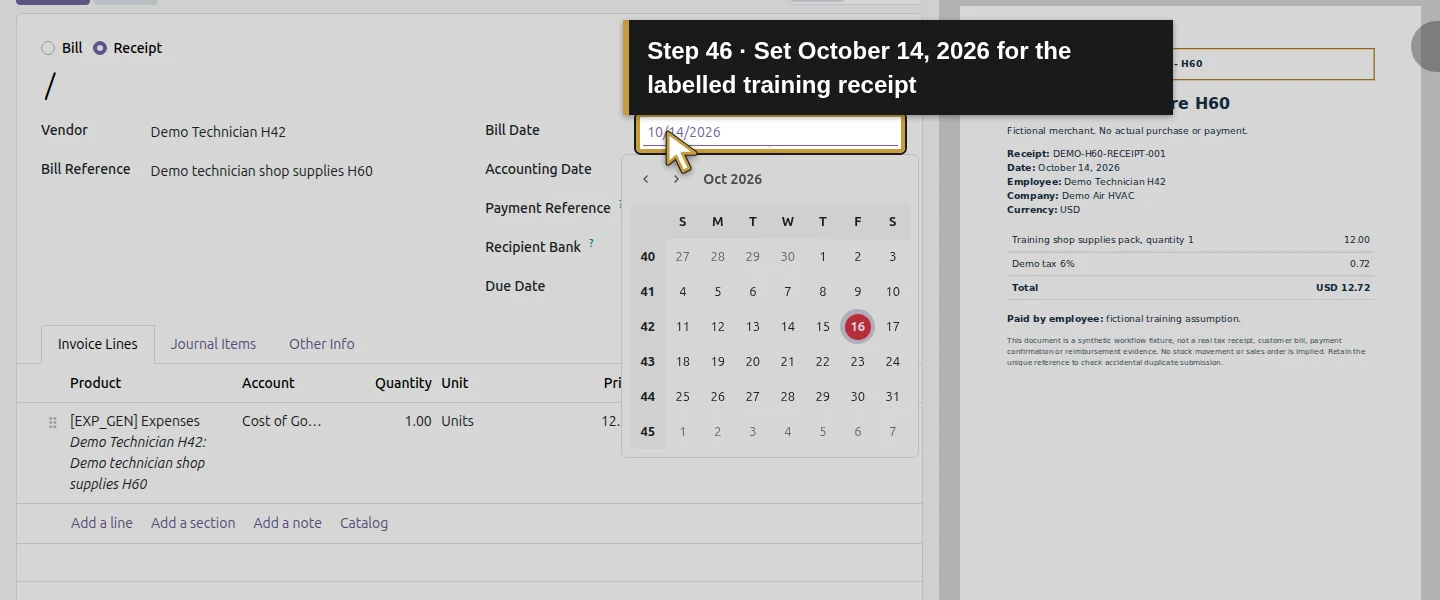
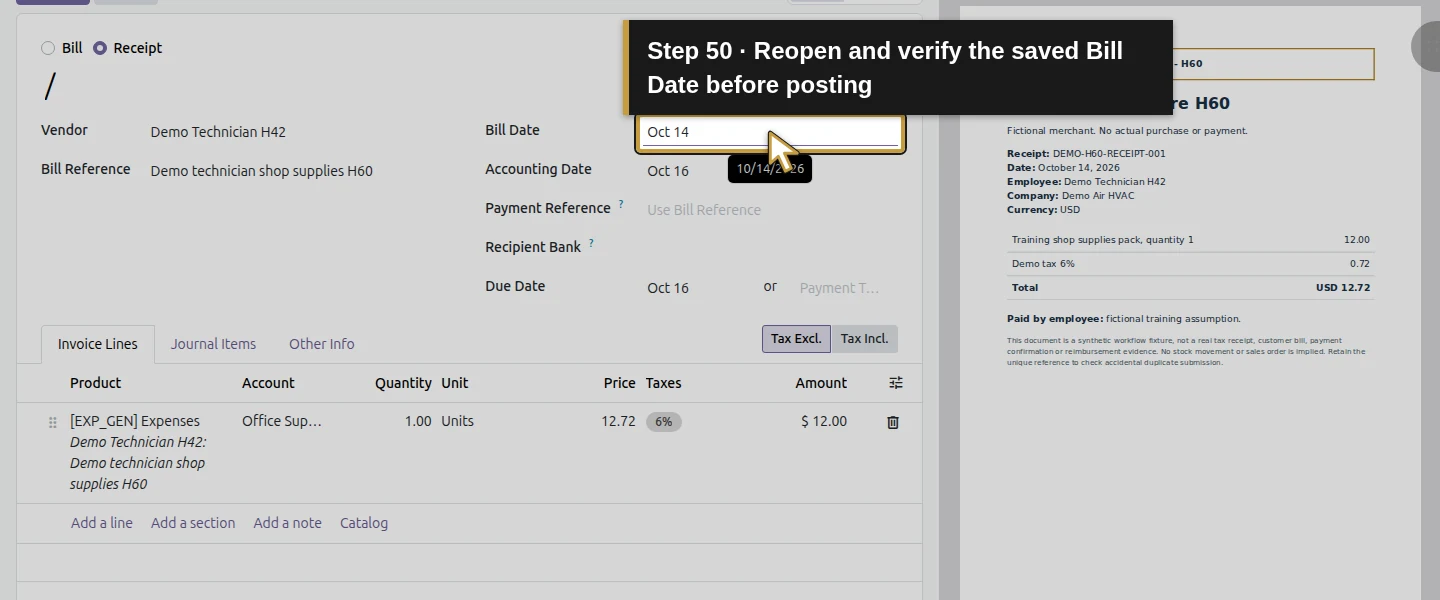
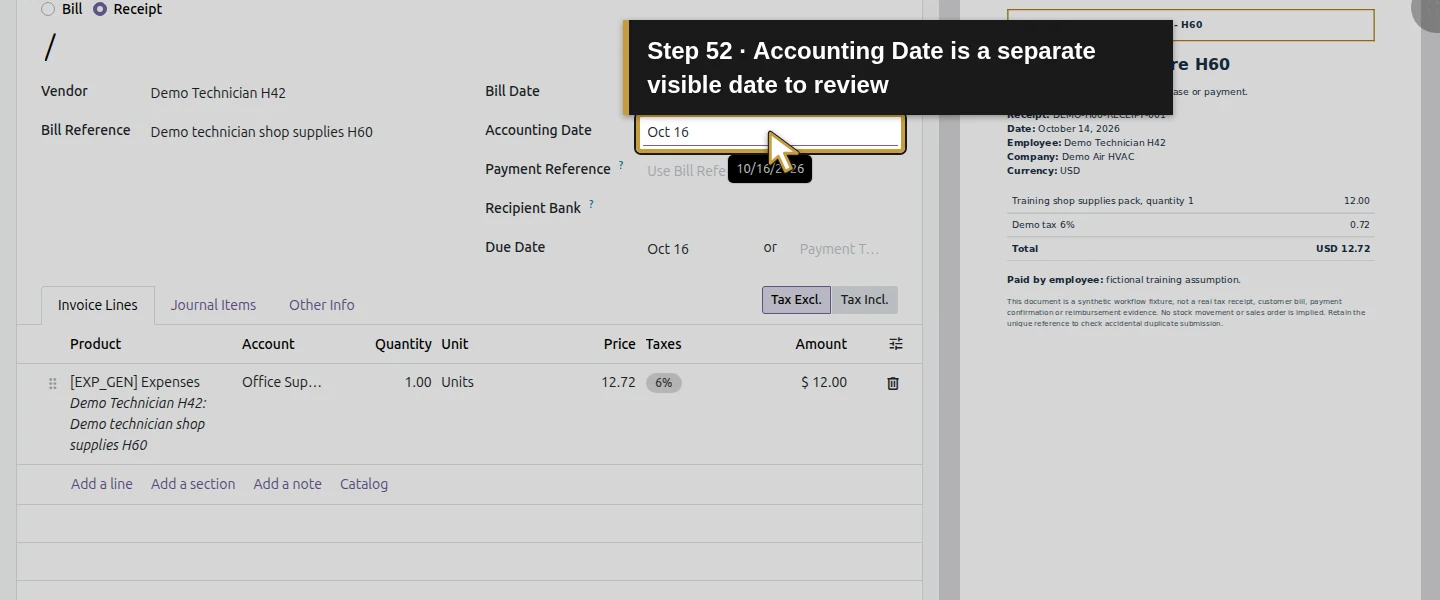
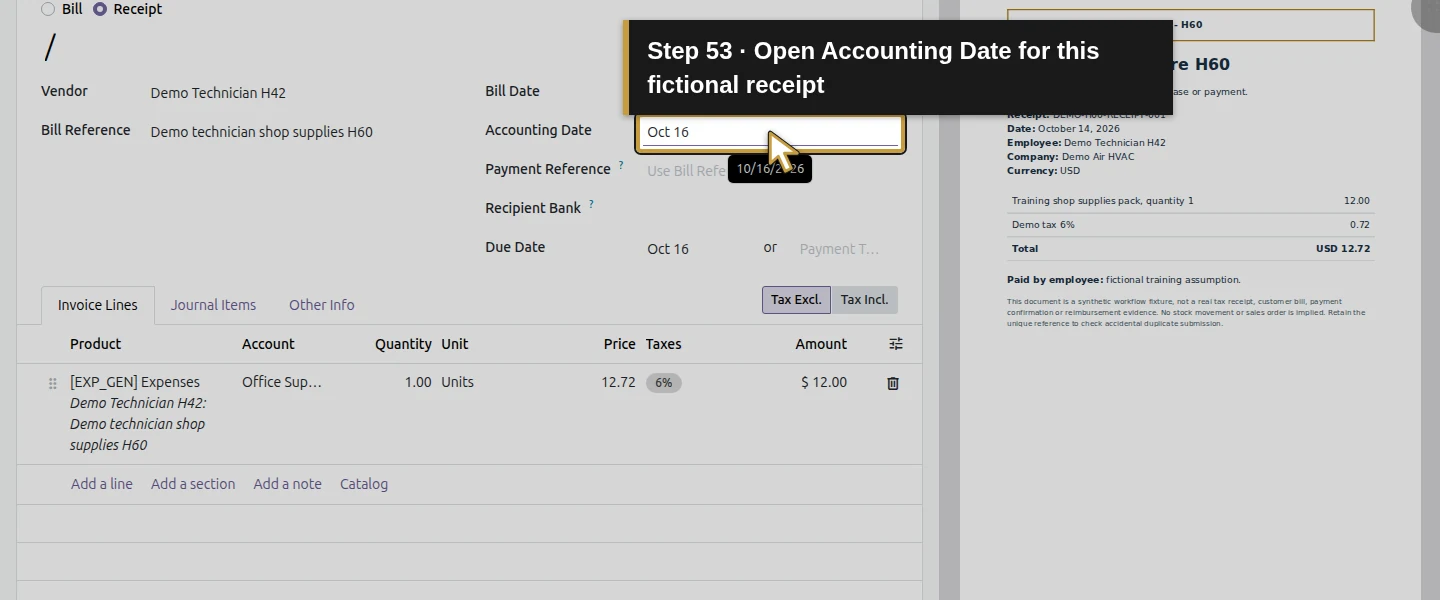
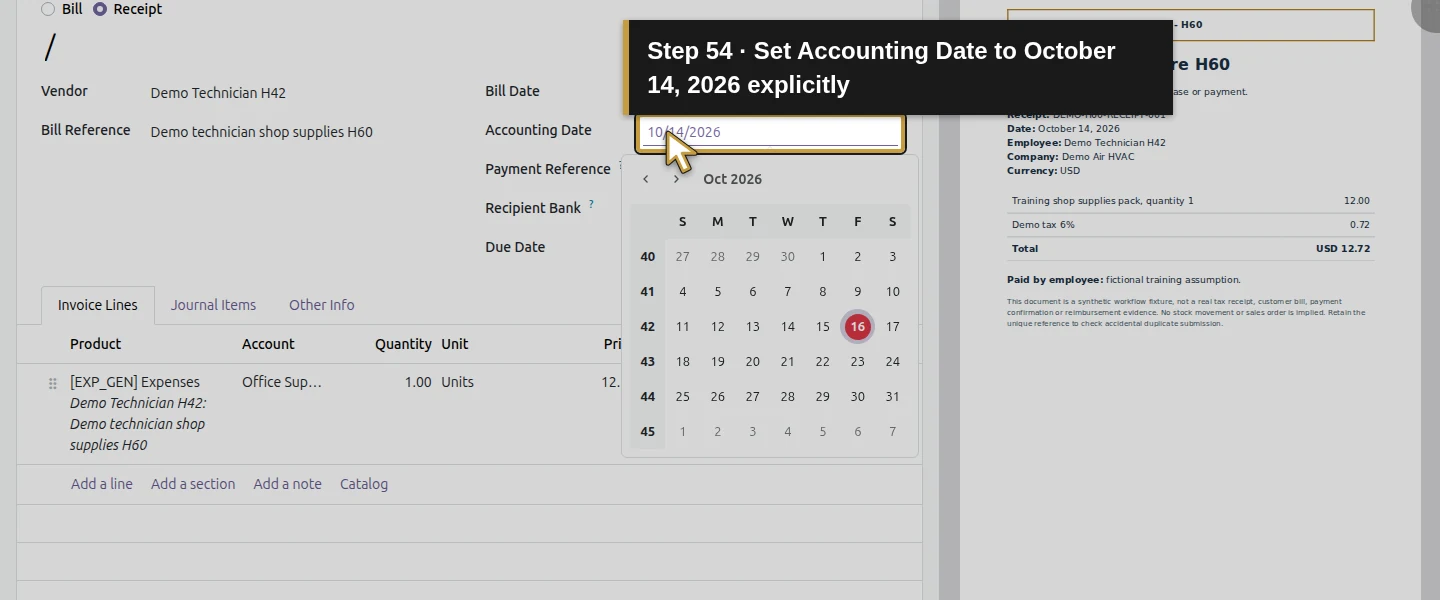
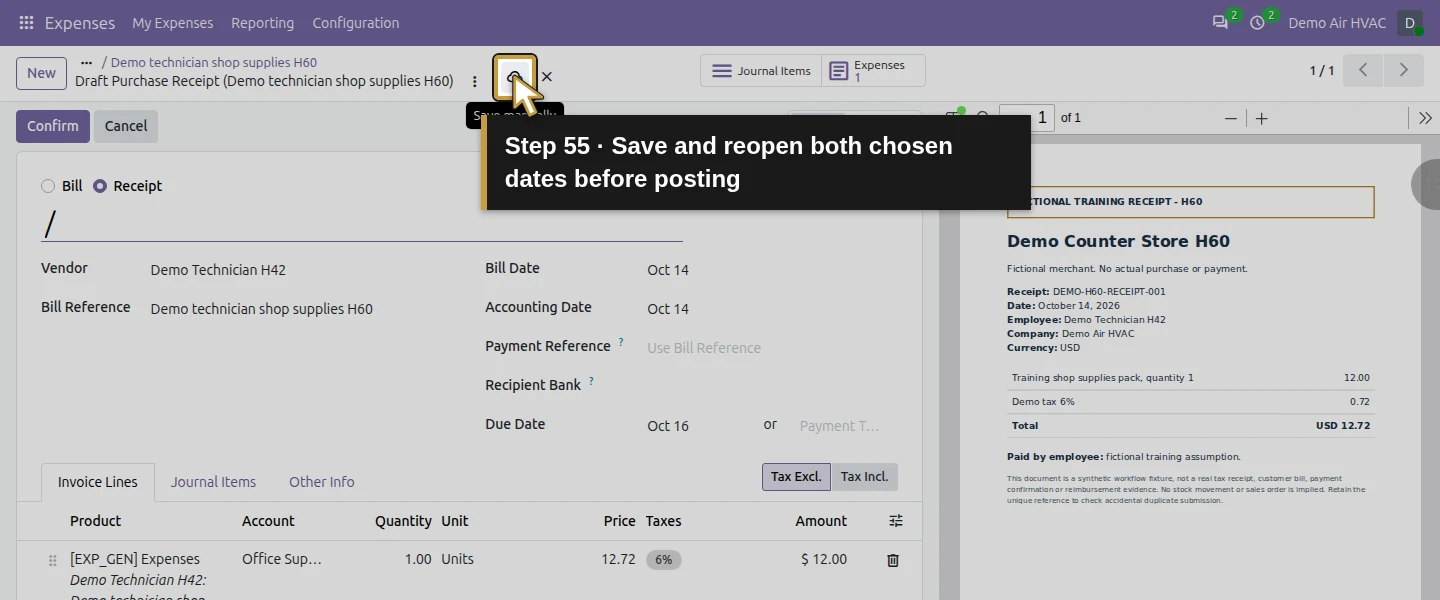
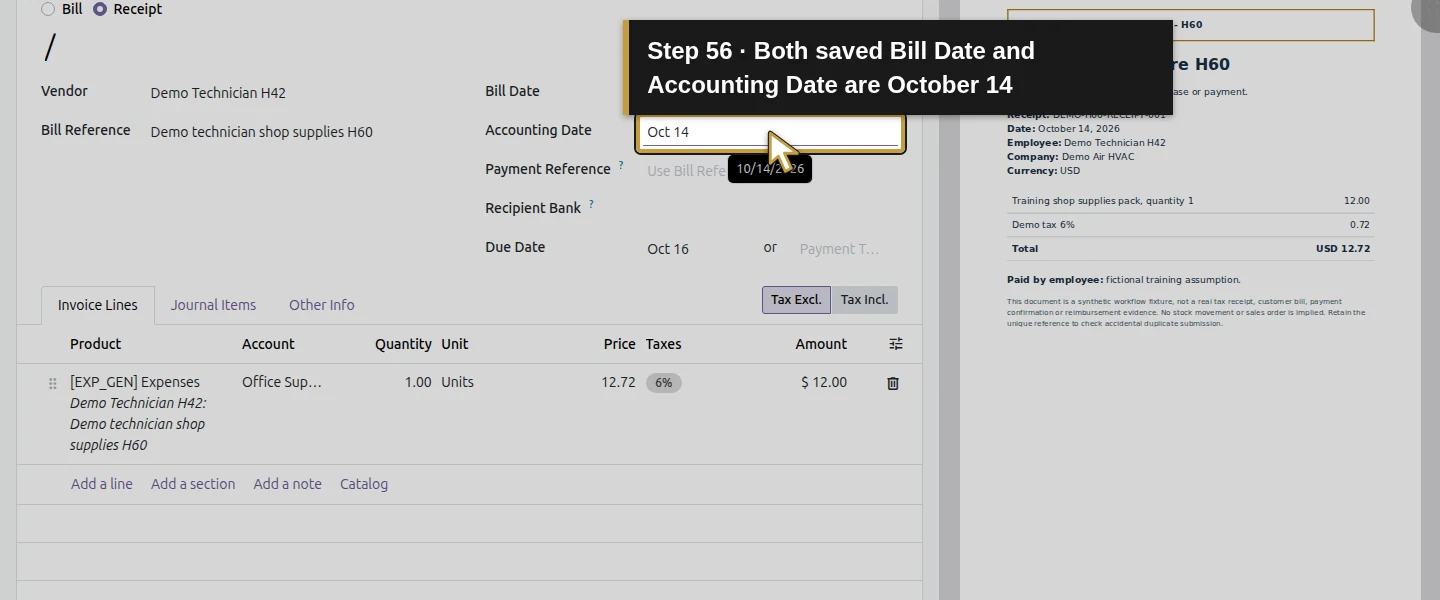
Review Bill Date, Accounting Date and Due Date separately before posting. In this capture, approval on October 16 created Bill Date and Accounting Date as October 16 even though the expense and receipt were dated October 14. For this fictional example, click Bill Date and choose October 14, 2026, then save. Reopen the draft and check Accounting Date; it still showed October 16. Click that field, choose October 14, 2026, and save again. These are explicit training inputs; the dates did not automatically copy from the expense or from one another.
Reopen the same draft before Confirm. Verify Bill Date: October 14, Accounting Date: October 14, the actual Office Supplies line, the same expense link and the unchanged $12.72 total. Due Date remained October 16 in the captured example; review it separately against the payment terms. Use dates and account/tax treatment appropriate to the real business’s records.
Step 10. Post the reviewed Purchase Receipt
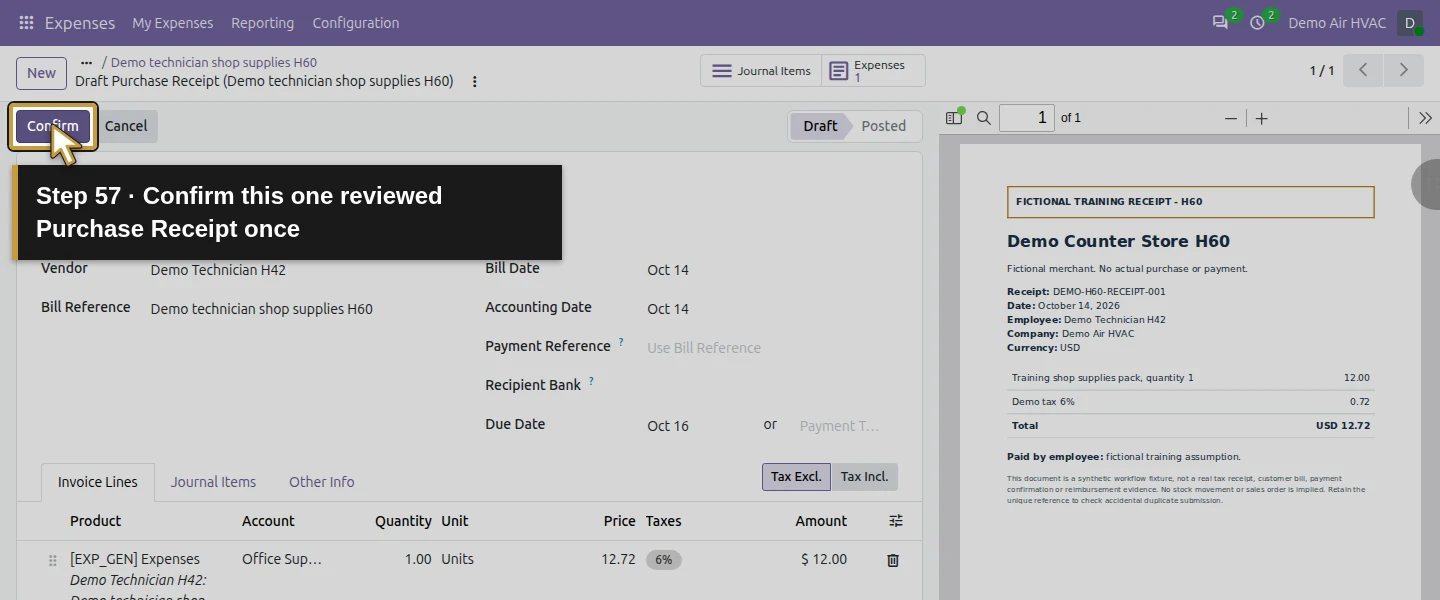
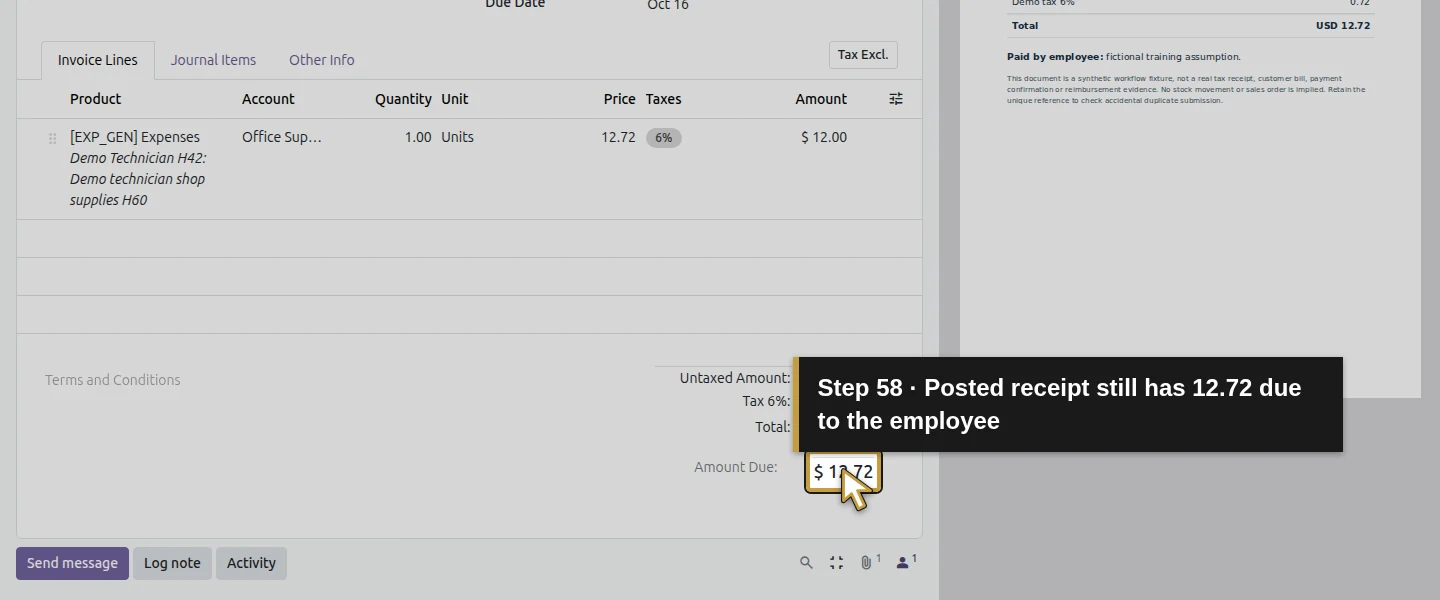
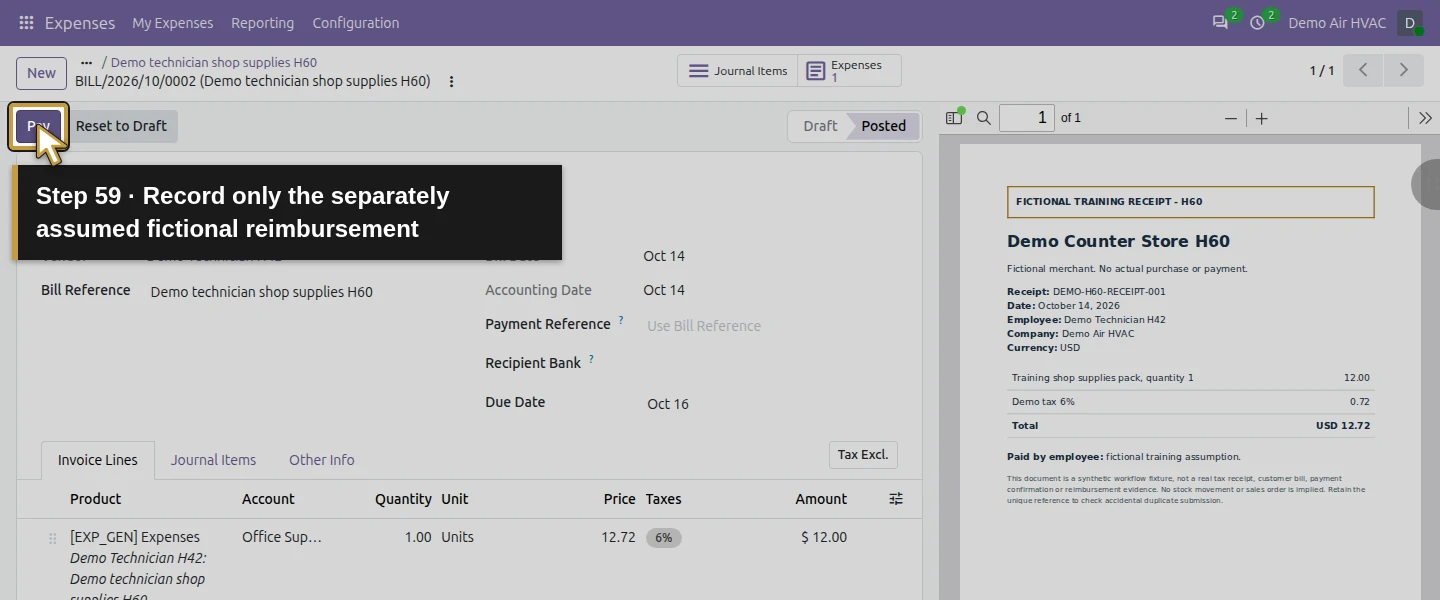
On this same draft Purchase Receipt, click Confirm. It becomes Posted, number BILL/2026/10/0002. The expense becomes Posted, still with $12.72 Amount Due. Its ledger contains $12 Office Supplies, $0.72 Tax Paid and $12.72 Accounts Payable to Demo Technician H42. Payment count remains unchanged. This native route uses the linked receipt’s Confirm control; it does not rely on an unobserved Post button on the expense form.
Step 11. Record the separate confirmed reimbursement
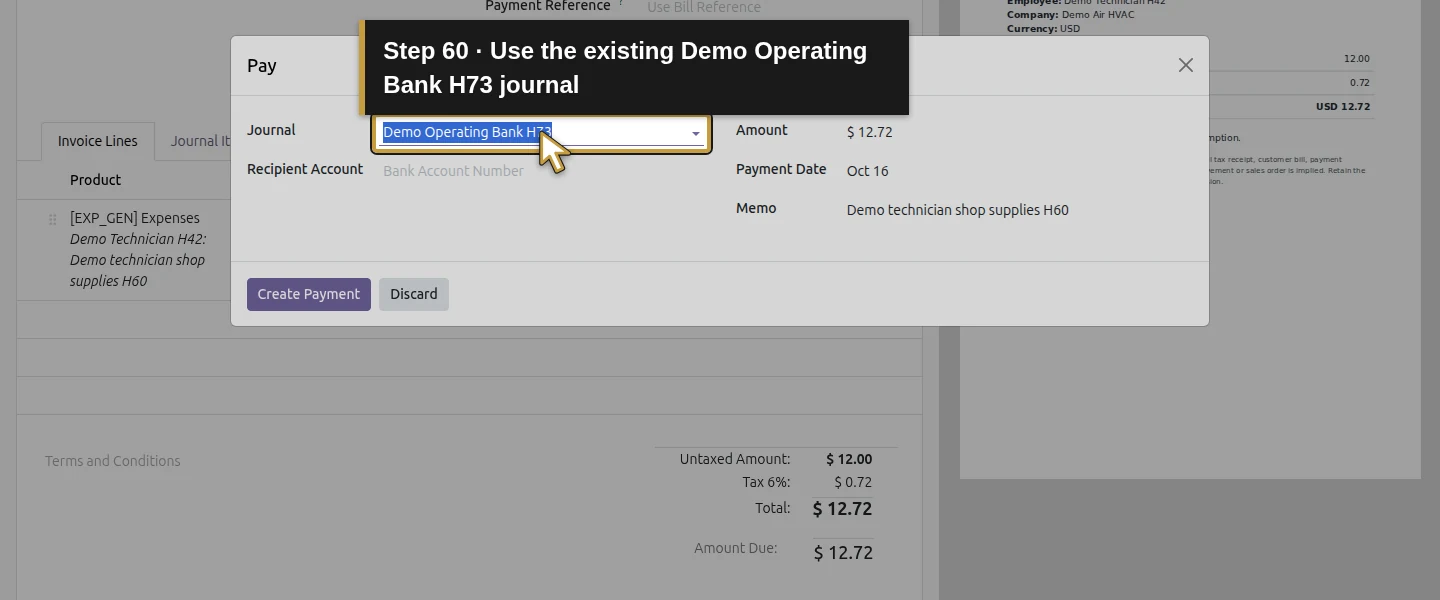
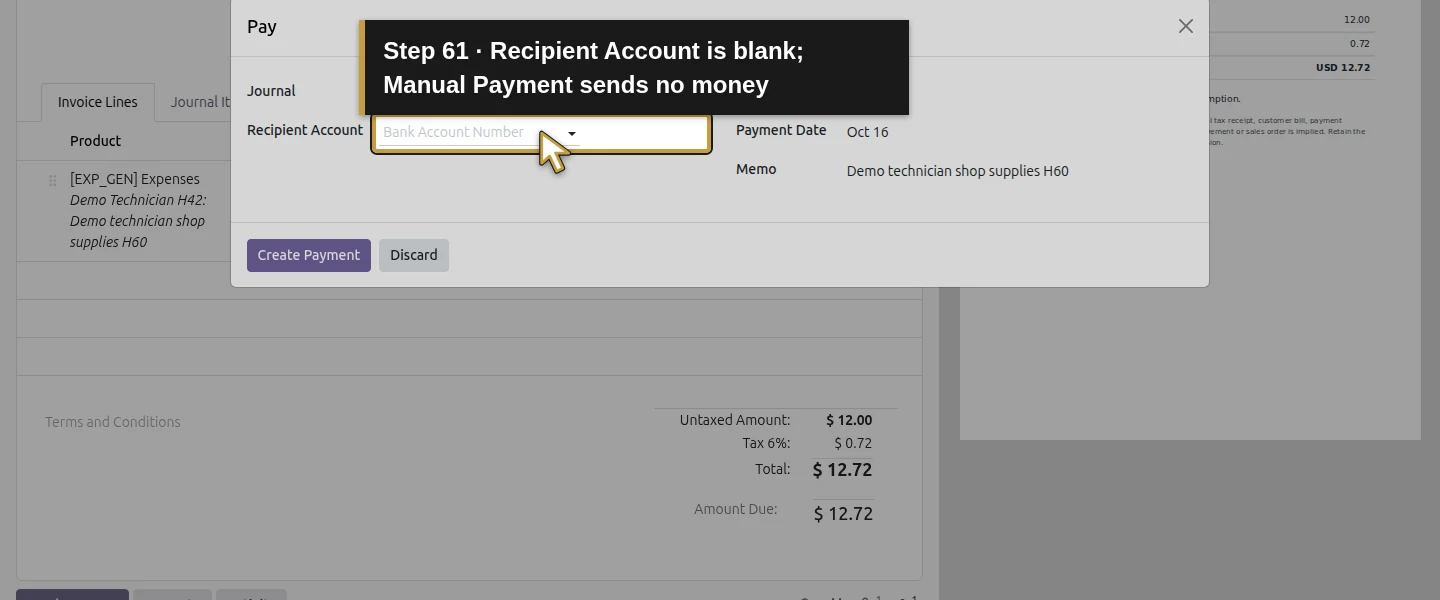
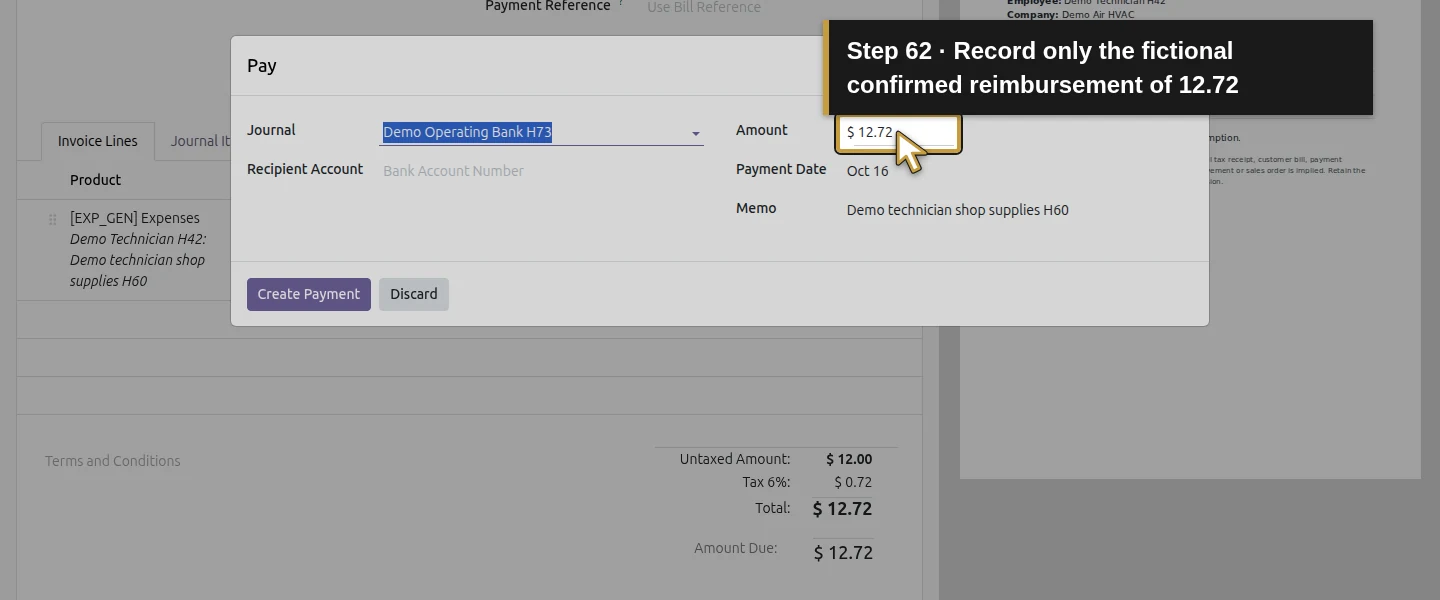
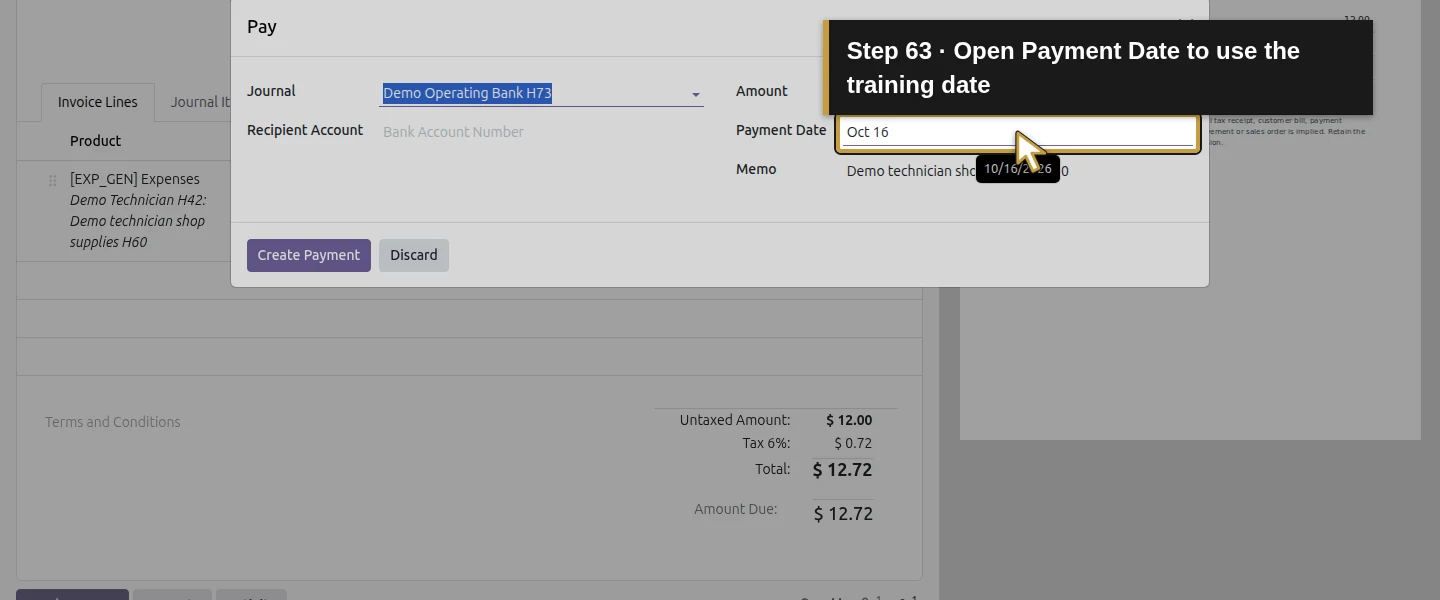
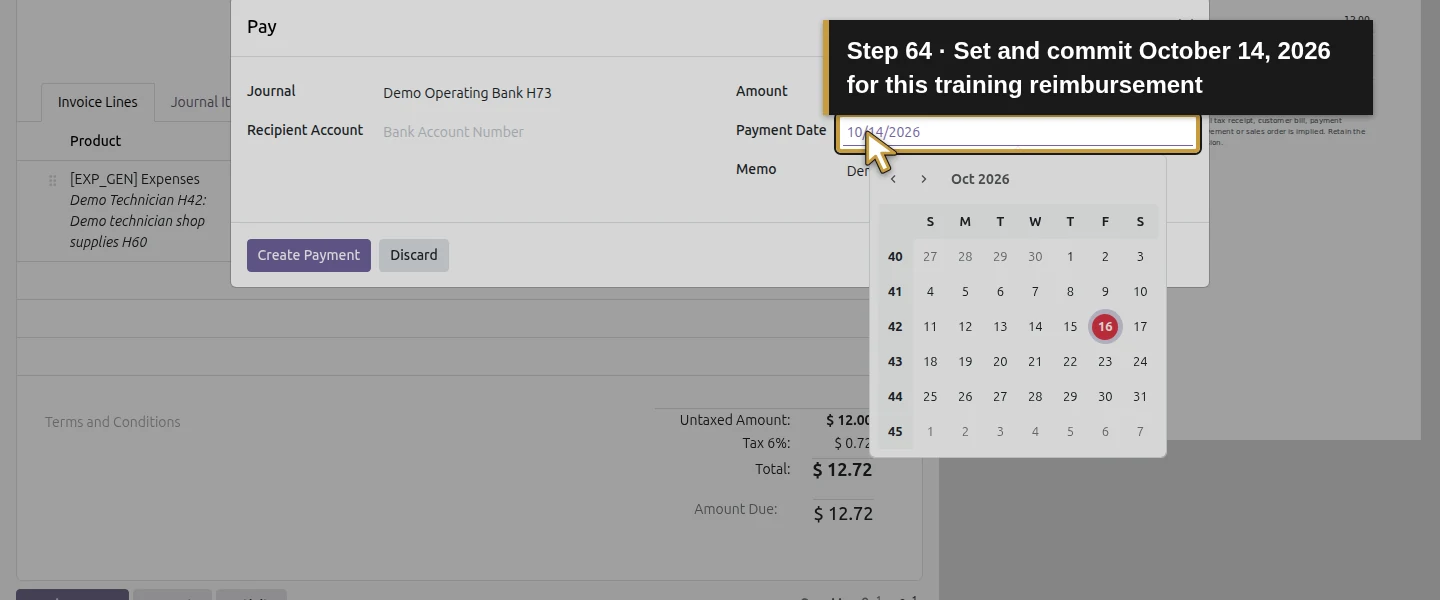
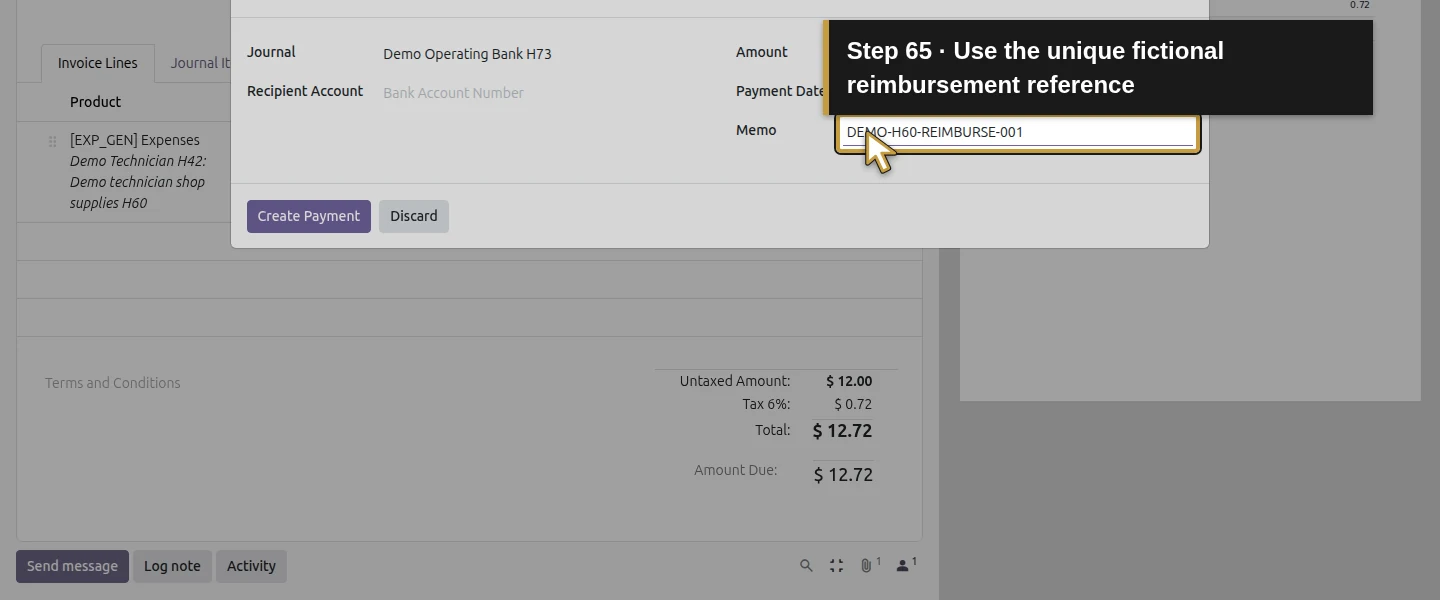
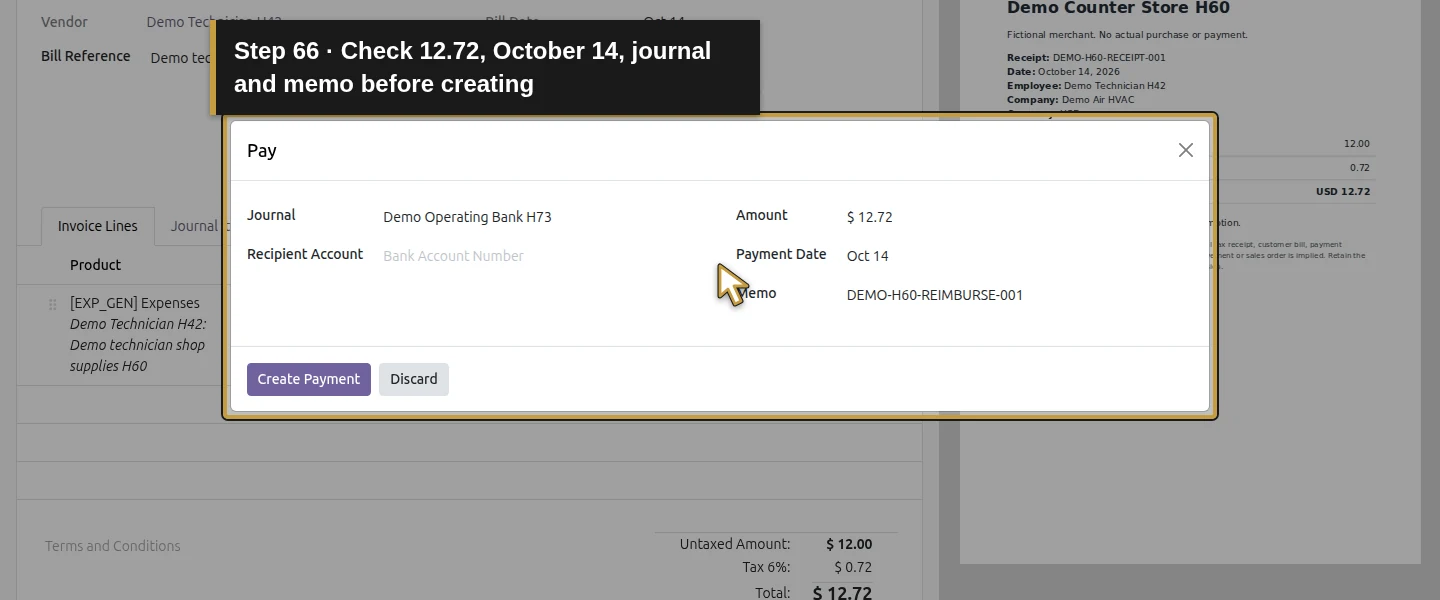
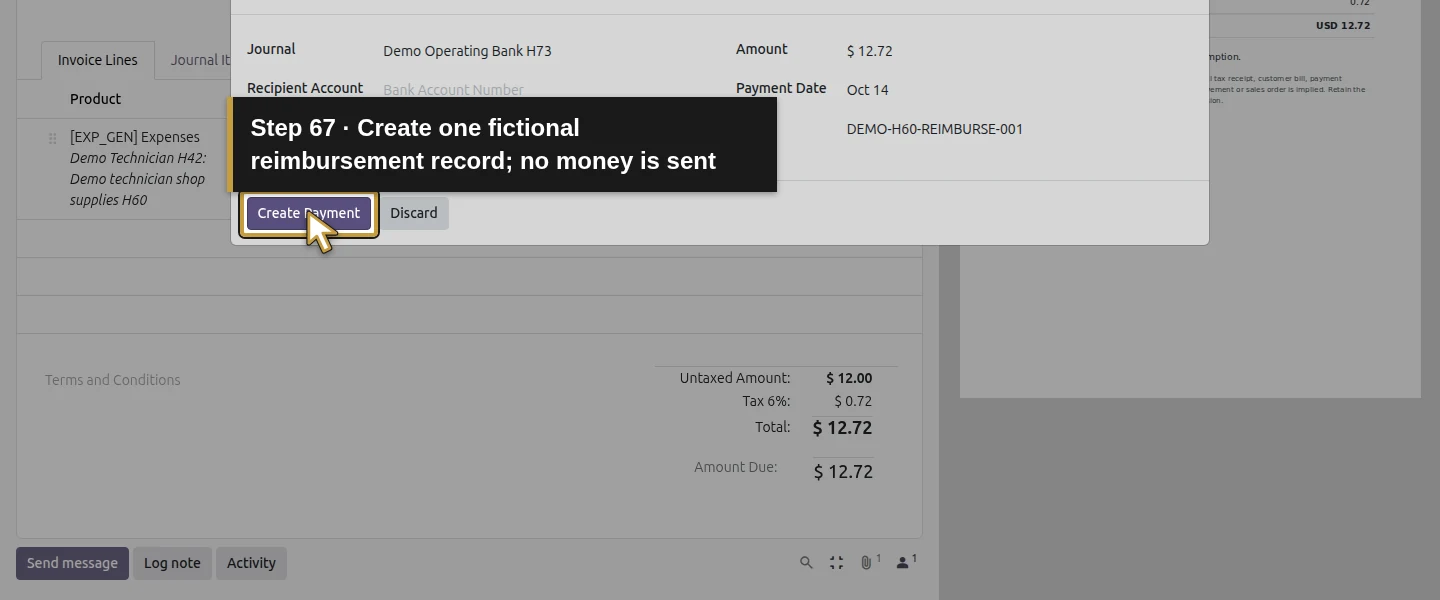
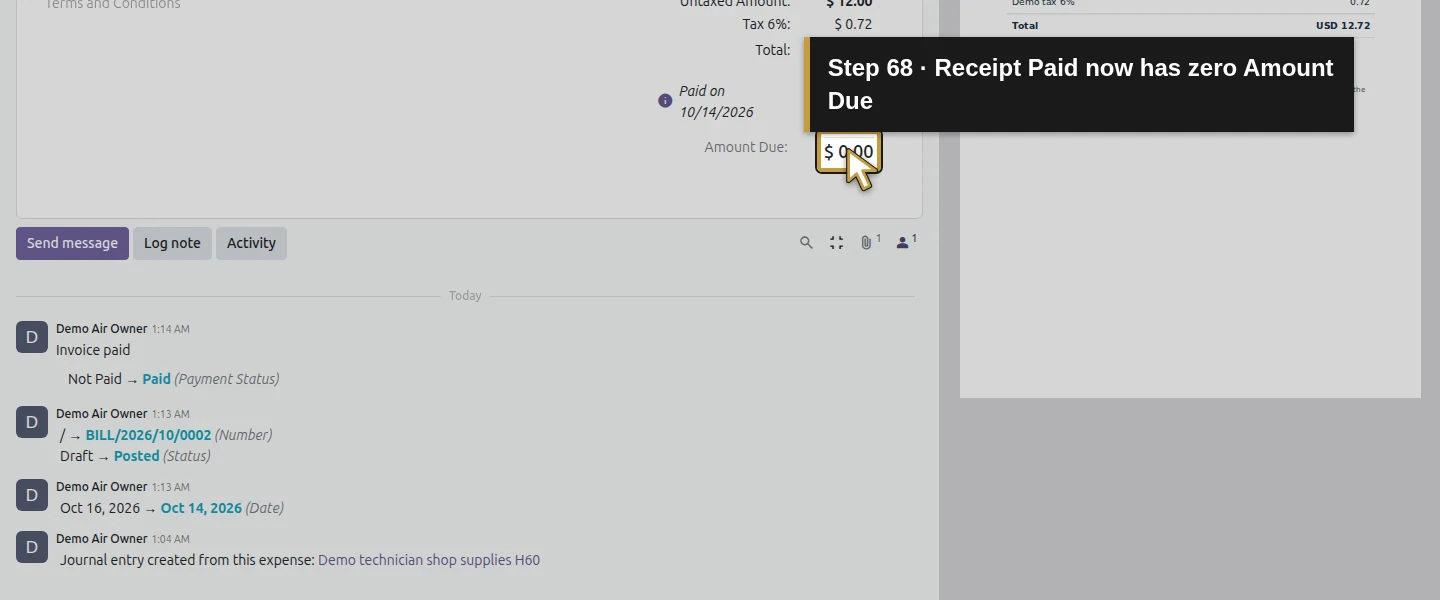
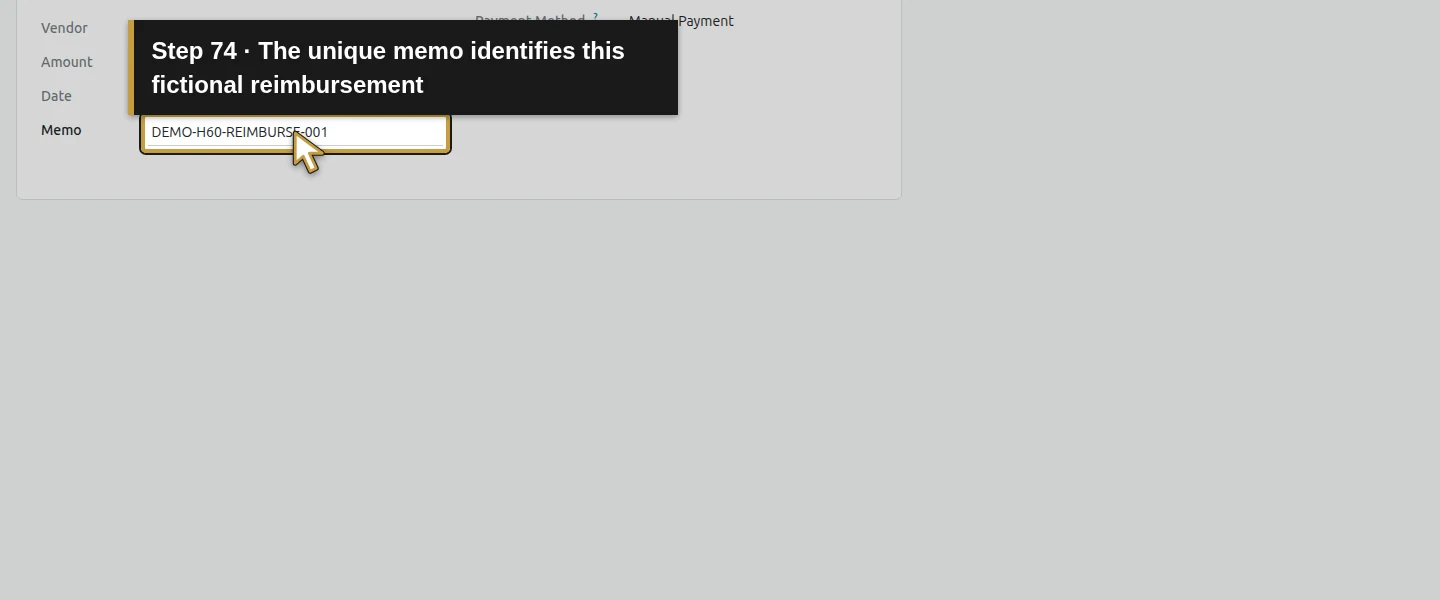
Confirm the real repayment independently before recording it. The training input supplies only a fictional $12.72 reimbursement dated October 14. On the posted Purchase Receipt click Pay. Verify Demo Operating Bank H73, Amount 12.72 and the date; enter DEMO-H60-REIMBURSE-001 in Memo and click Create Payment once. Recipient Account is blank in this Manual Payment case. The receipt changes to Paid/$0 due and the expense changes to Paid. No bank transfer is initiated by this record.
Step 12. Reopen as both roles and separate payable matching from bank settlement
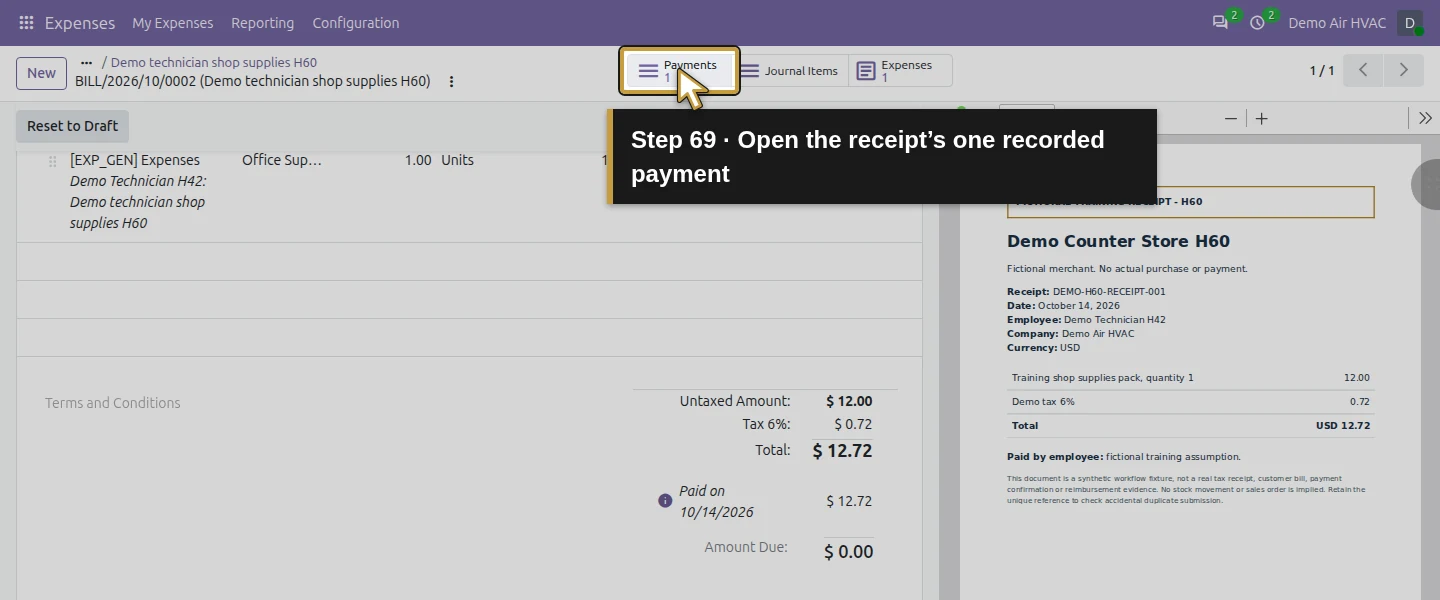
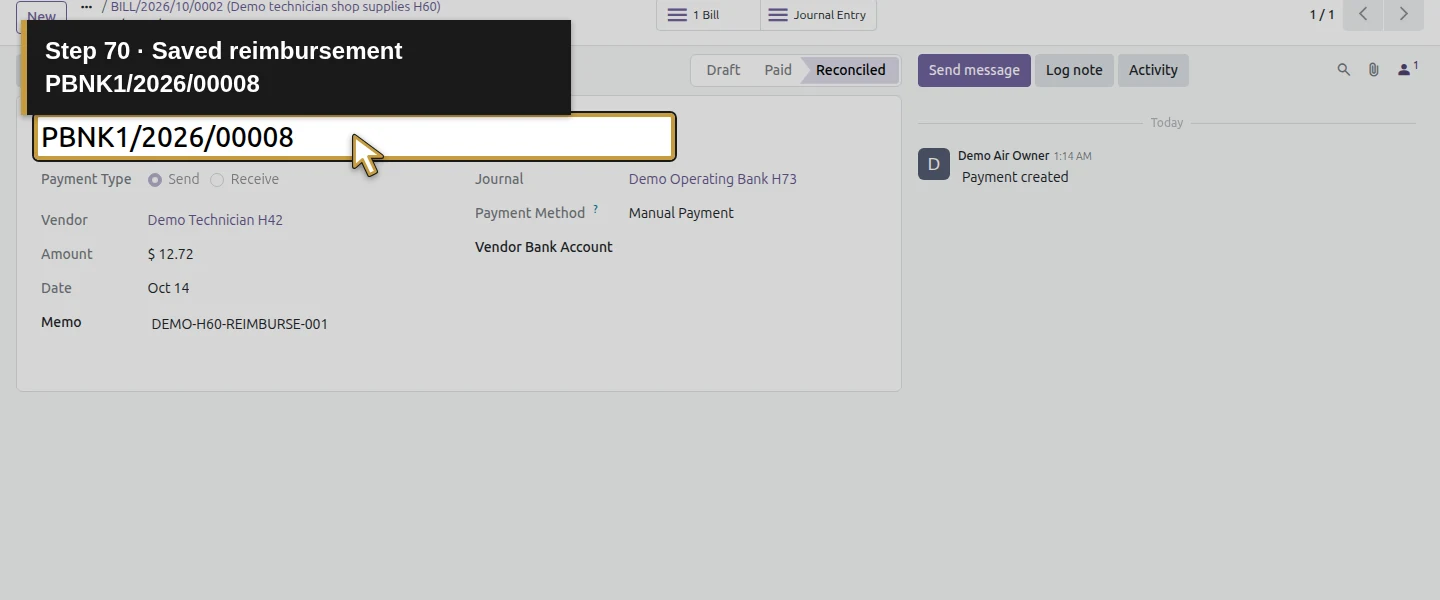
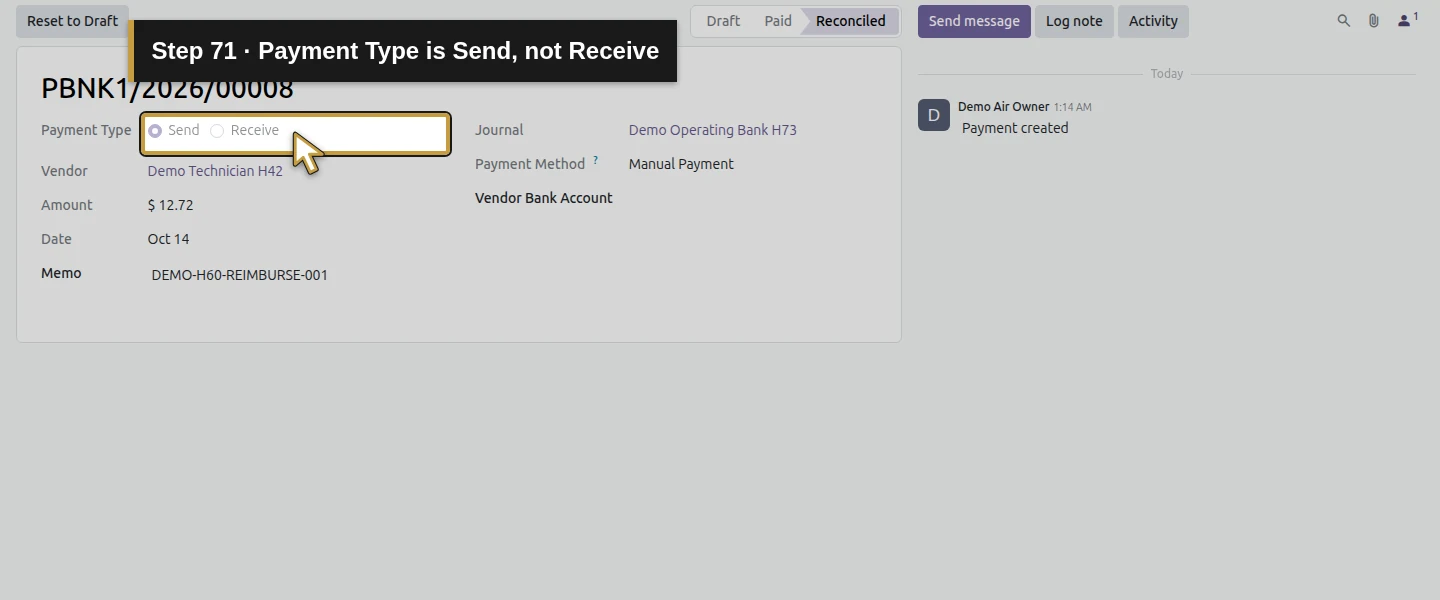
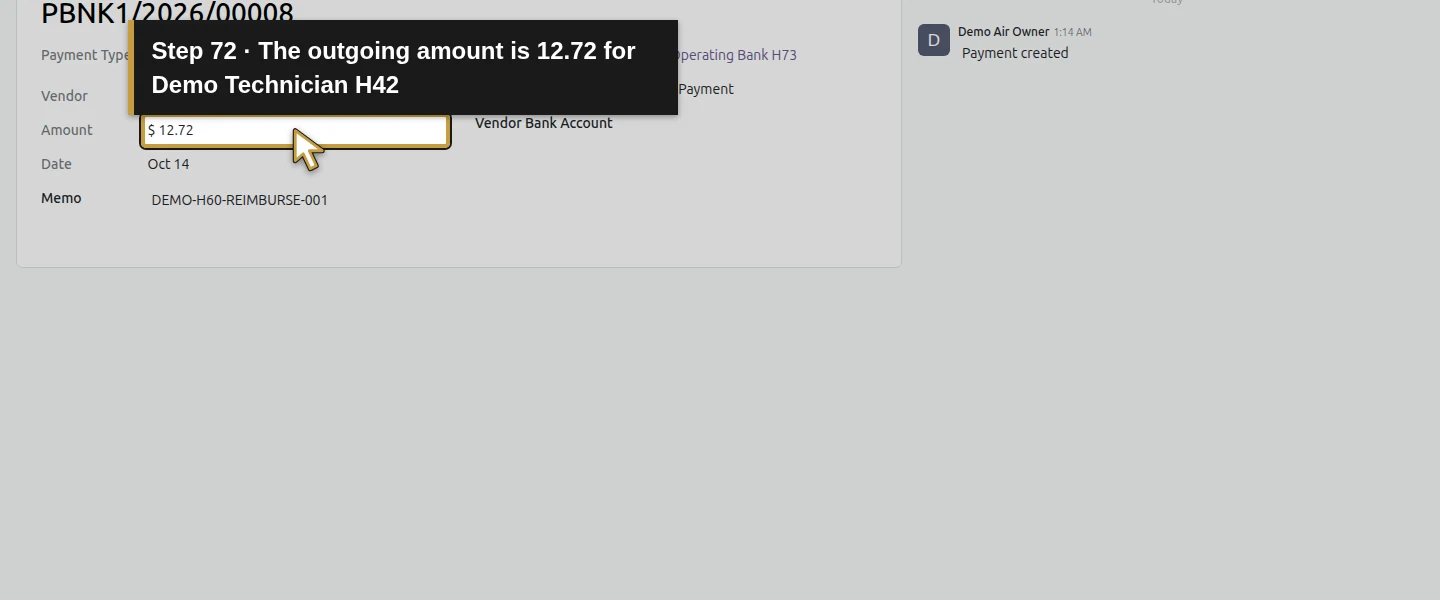
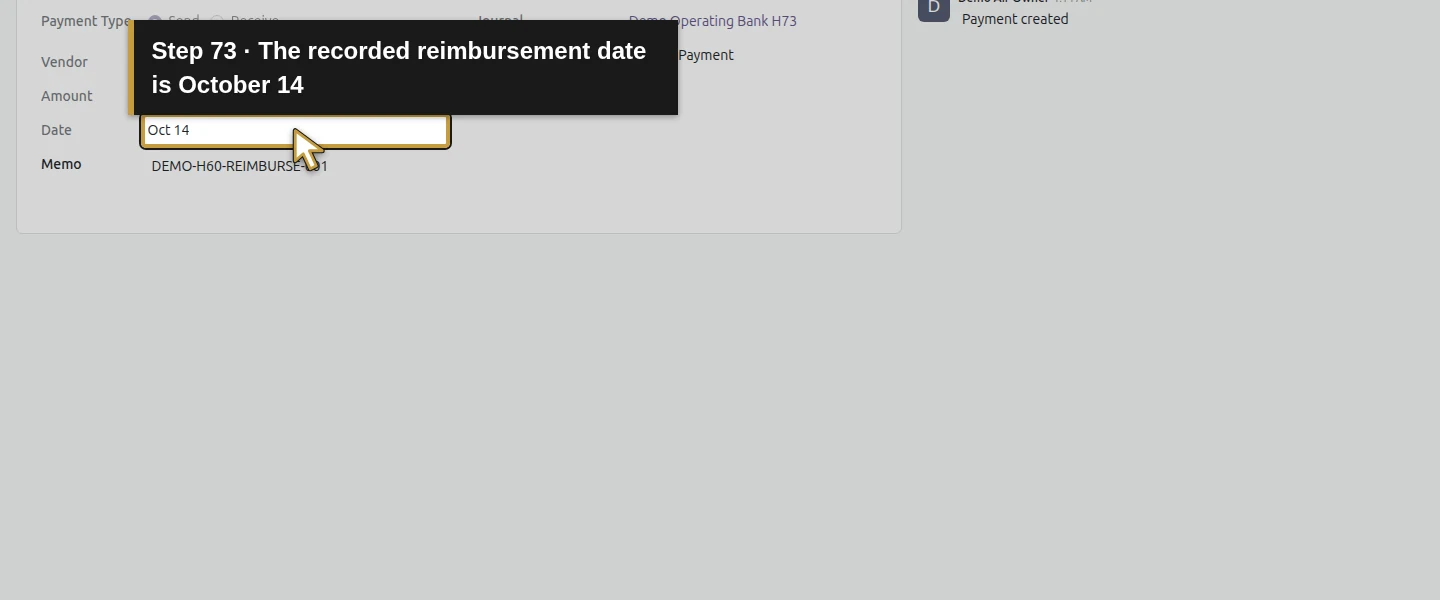
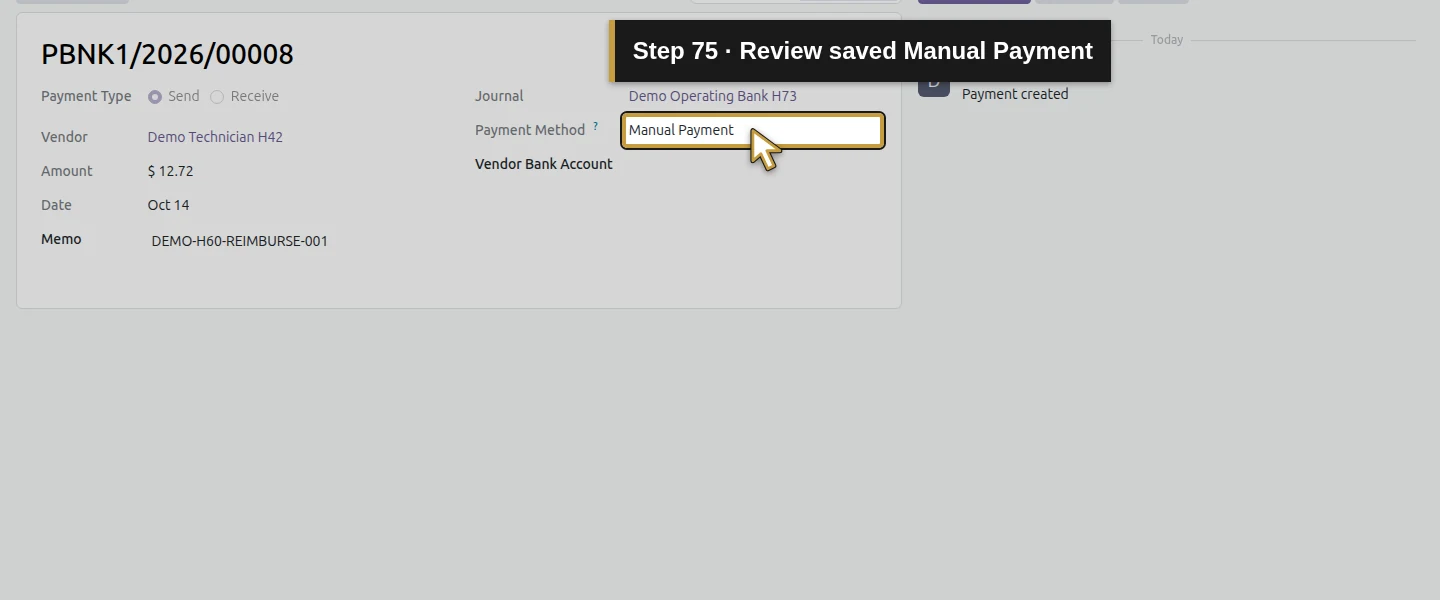
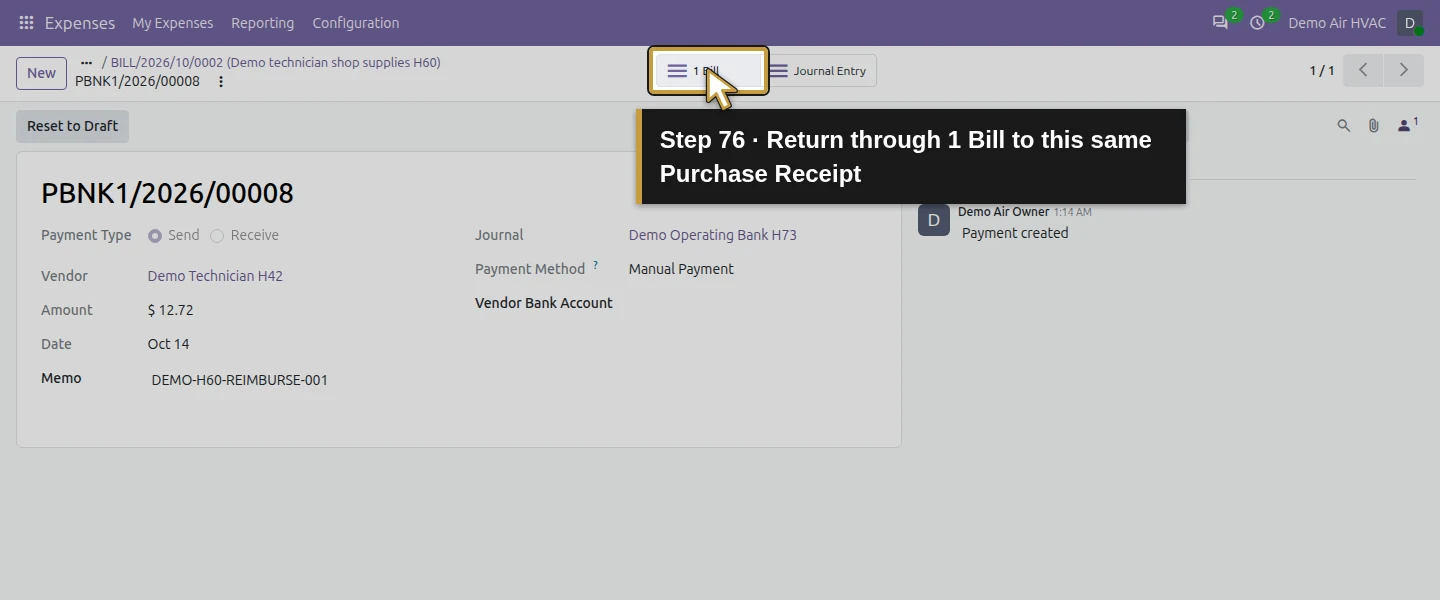
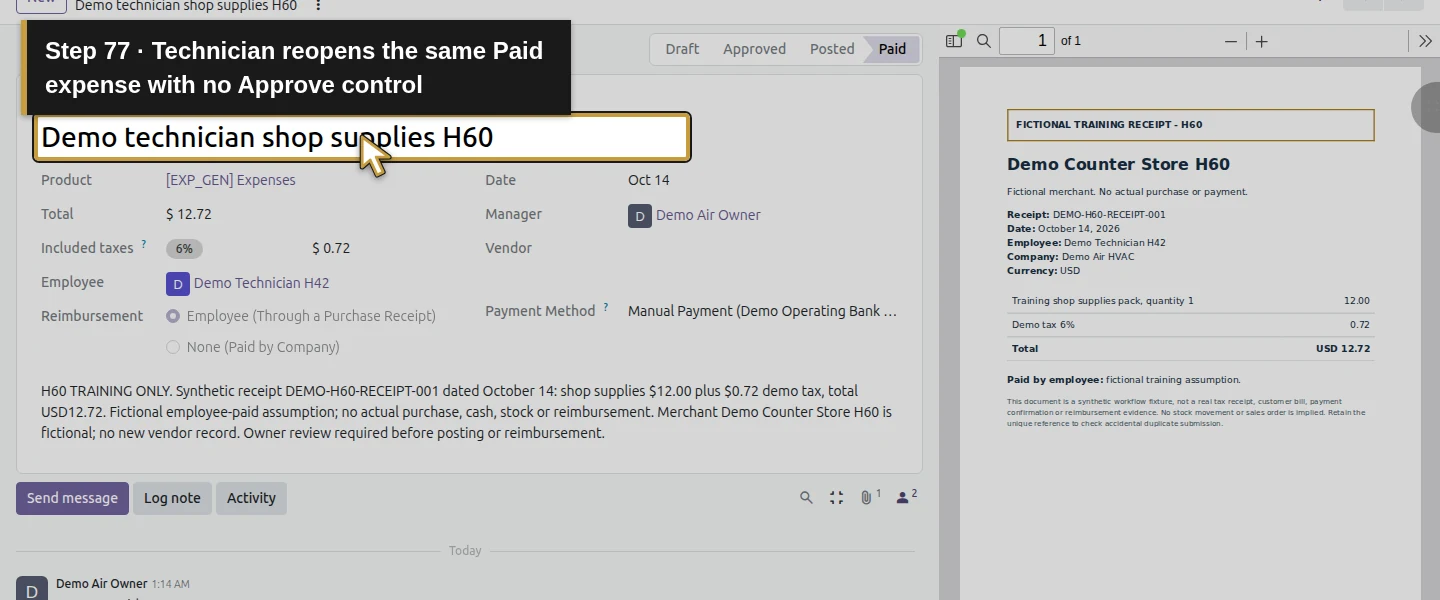
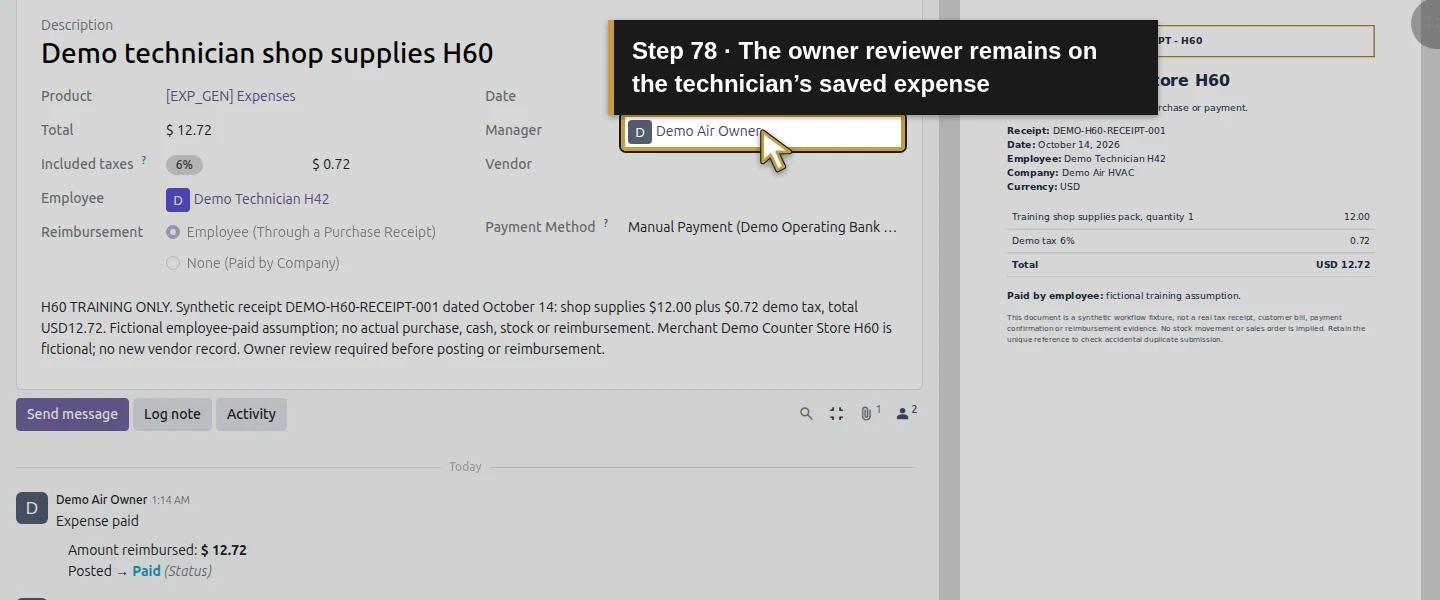
On the receipt, open 1 Payments. With one result, it opens the payment directly: PBNK1/2026/00008, Send, vendor Demo Technician H42, $12.72, October 14, the unique memo, Manual Payment and Reconciled. Its 1 Bill button links to the same Purchase Receipt. Refresh the technician’s expense: it also shows Paid and retains its receipt/reviewer, with no Approve control. The $12.72 payable is matched, while Outstanding Payments retains an unmatched $12.72 credit and Bank has no entry. Reopening retains one expense, one purchase receipt and one reimbursement payment; no broader duplicate guarantee is established.
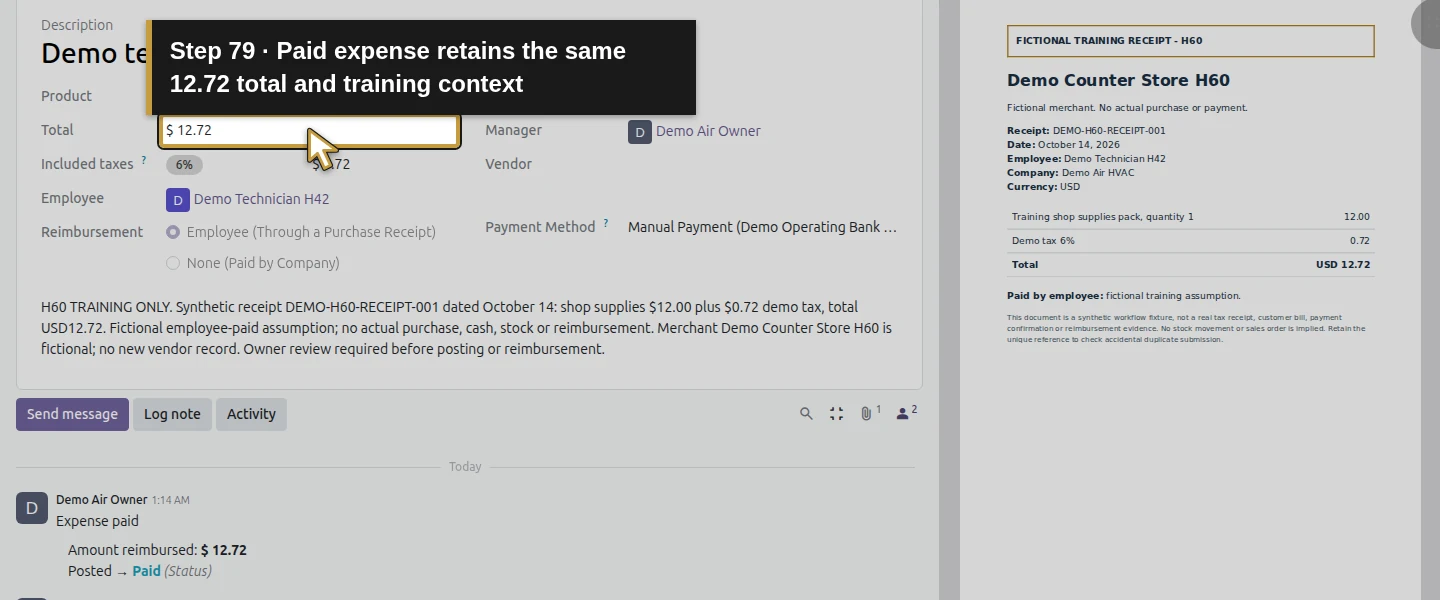
Check the result
One technician-created $12.72 employee-paid expense retains the matching synthetic receipt and the owner reviewer. The ordinary technician submission waits in Submitted with no approval control; the owner reviews and approves it. Approval creates a draft Purchase Receipt. The existing accounting-view group exposes Account; a separate correction of the actual draft line is needed after changing the expense account. Confirm posts $12 Office Supplies plus $0.72 demo tax against the employee payable. One separately recorded outgoing Manual Payment clears the receipt and expense to Paid/$0 due. The same receipt is accessible to the owner and retained on employee reopen. Outstanding Payments remains unmatched and Bank is unchanged. Prior payments, invoice balances and the two existing open reviews remain intact.
If your screen differs
Only one ordinary technician and the owner administrator were tested, with the employee’s Expense reviewer configured before submission. Team Approver, All Approver, no-approver/self-approver configurations, another employee’s access, refusal and duplicate-receipt blocking were not exercised. Company-paid expenses, existing-bill matching, other currencies, payroll reimbursement and electronic disbursement need their own checks. An empty Manager or an administrator’s own expense must not be used as proof of a separated approval process. Approval created a draft accounting document; the already-created line did not follow a later parent Account edit. Check and correct the actual draft before posting. Office Supplies and 6% tax are synthetic example choices, not tax/accounting advice. Paid/Reconciled reflects the recorded employee-payable match; the $12.72 outstanding entry is still unmatched and no actual repayment or bank settlement is established. Later native bank/reporting controls under the added accounting-view group have not been reverified here.
Frequently asked questions
How do I submit employee expenses in Odoo?
Verify the employee/reviewer setup, create the expense in My Expenses, choose the product and who paid, enter total/date and attach the real receipt. Save and use Submit. In this test the technician’s one $12.72 expense waited in Submitted for the configured owner, who could review it under Expenses to Process.Can employees approve their own Odoo expenses?
The tested ordinary technician had no expense-approver role, no Approve button and Can Approve false. Its submitted expense waited for the configured owner, whose view exposed Approve/Refuse. This does not establish behavior for administrators or no-approver/self-approver arrangements; configure the employee’s Expense reviewer and check the actual saved route.Does approving an Odoo expense reimburse the employee?
Approval here created a Draft Purchase Receipt. Confirm posted the reviewed cost and $12.72 employee payable, still unpaid. A separate Pay/Create Payment step recorded the independently assumed synthetic reimbursement and cleared that payable. The resulting Paid/Reconciled state left Outstanding Payments unmatched and created no Bank entry or actual transfer.Continue building the business
Continue with How do I sell an HVAC maintenance agreement in Odoo?. The expense reimbursement’s outstanding entry belongs in the separate What can I do for bank reconciliation in Odoo? (guide coming later); its Paid label does not settle the bank.
Talk to an Odoo partner
Bring your current process and the result you need to Onward to plan your Odoo workflow. Talk to an Odoo partner.