
Getting started with Odoo · Lesson 3
How do I set user access rights in Odoo?
Open the user’s Access Rights tab, choose their role and app permissions, then save and test a separate login. For this HVAC example, we give an office user access to their assigned sales work and verify the boundaries.
A saved User role with a tested Sales permission, plus evidence of one permitted action and two denied actions.
Alex Rivera runs Demo Air HVAC, a fictional heating and cooling company. An office worker needs to handle sales enquiries. Alex keeps the owner’s administrator account for system setup.
Follow the nine permission stepsBefore you begin
Complete the company-profile lesson and the app checklist. This lesson uses stock Odoo 20.0-20260926 Community, with native CRM and Sales already installed. No Enterprise feature, custom group or added access rule is used.
Sign in as an administrator. Keep a working administrator account separate from the account you edit.
In Settings, select Manage Users, then search for the person whose permissions you want to change. The recording starts with the Users list already filtered to Demo Office H03, our existing synthetic office account.
For the local demonstration, we created that account with the non-email login demo-office-h03 and an empty email field. Its private password was set through Security → Change password before recording. In the password wizard, click the New Password table cell to open its editor; complete any administrator identity confirmation. Login screens and passwords are excluded from the media.
Real team onboarding and invitation delivery need their own setup. Use a separate browser or private window to test the employee’s login after saving access rights.
Set and verify the user’s access rights
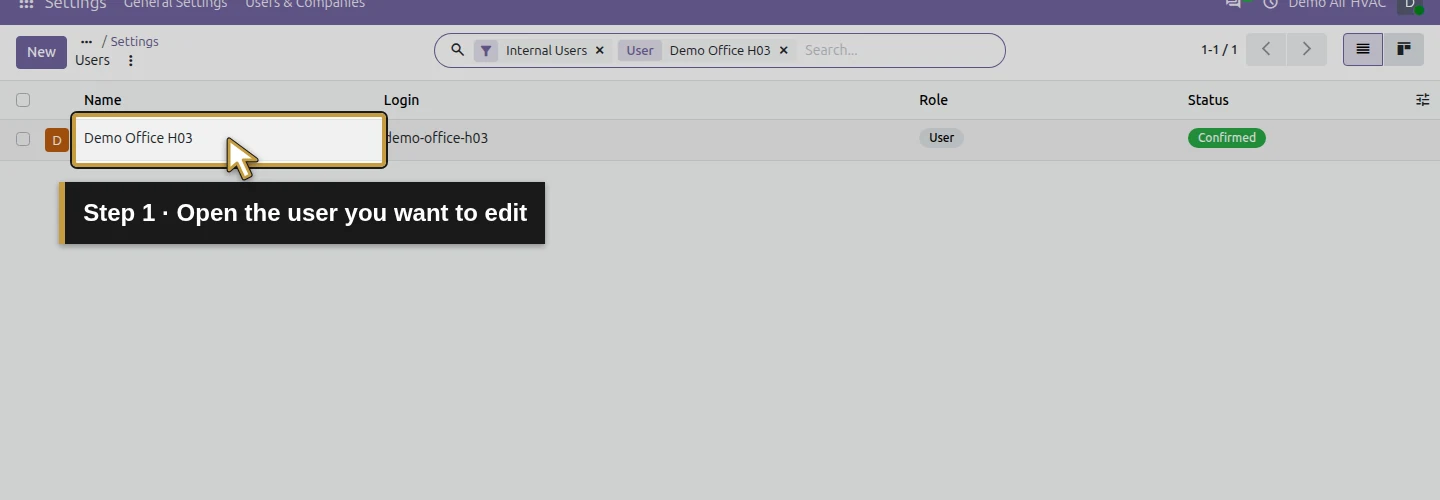
Step 1. Open the user you want to edit
Click Demo Office H03 in the filtered Users list. Check that you have opened the intended person’s account before changing permissions.
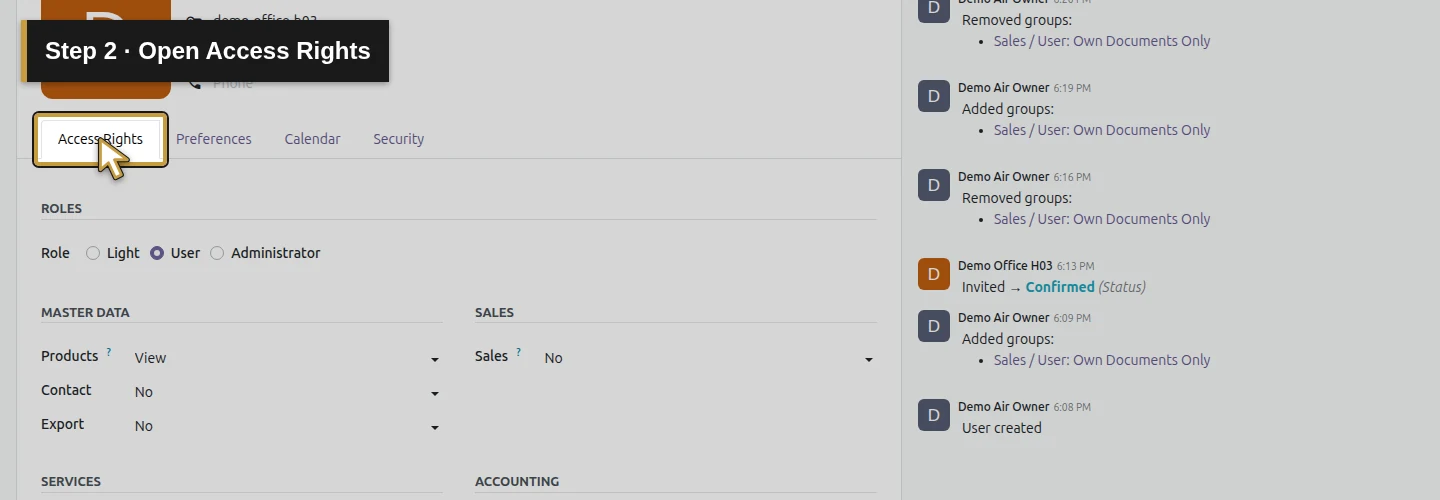
Step 2. Open Access Rights
Select the Access Rights tab. This separates the user’s role and installed-app permissions from their preferences and security settings.
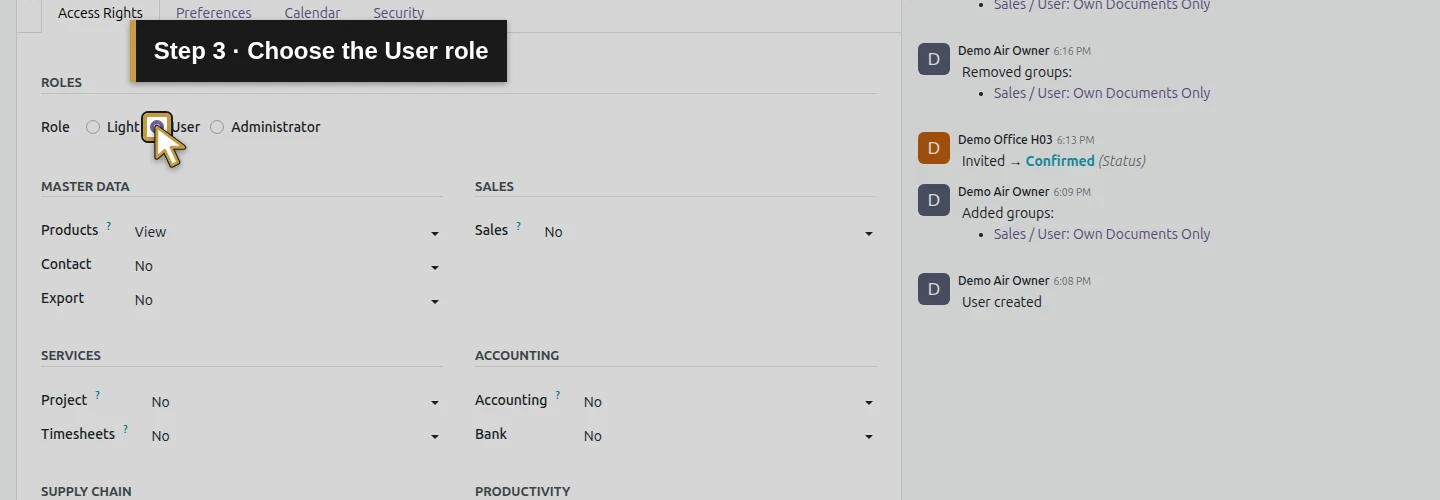
Step 3. Choose the User role
Choose User in the Role row. In this example, the office worker handles sales work while the owner keeps system administration.
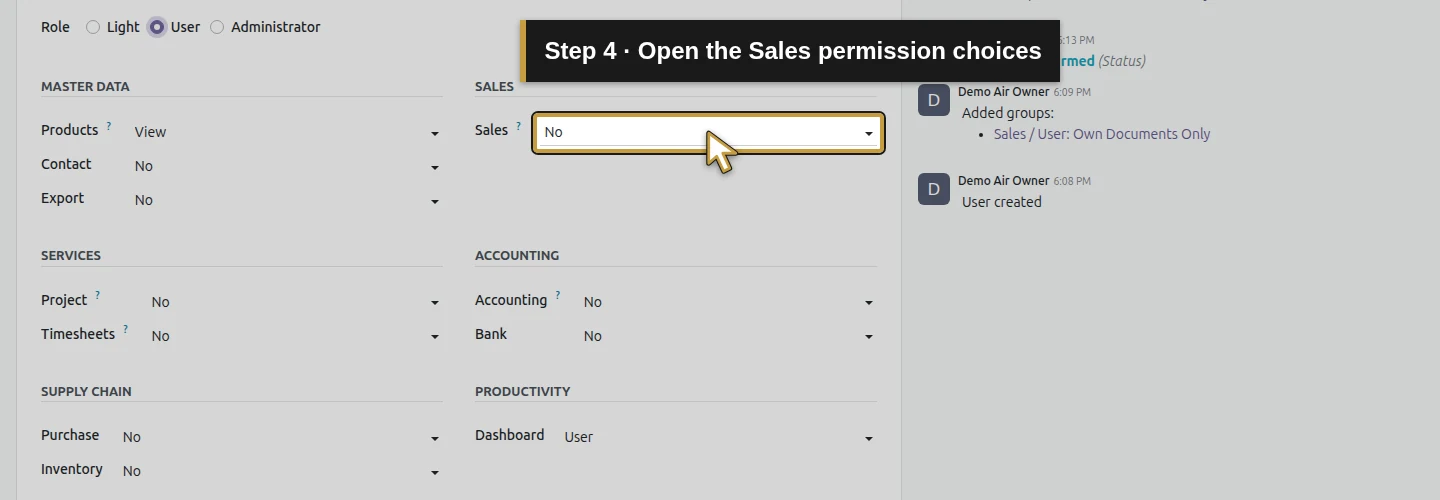
Step 4. Open the Sales permission choices
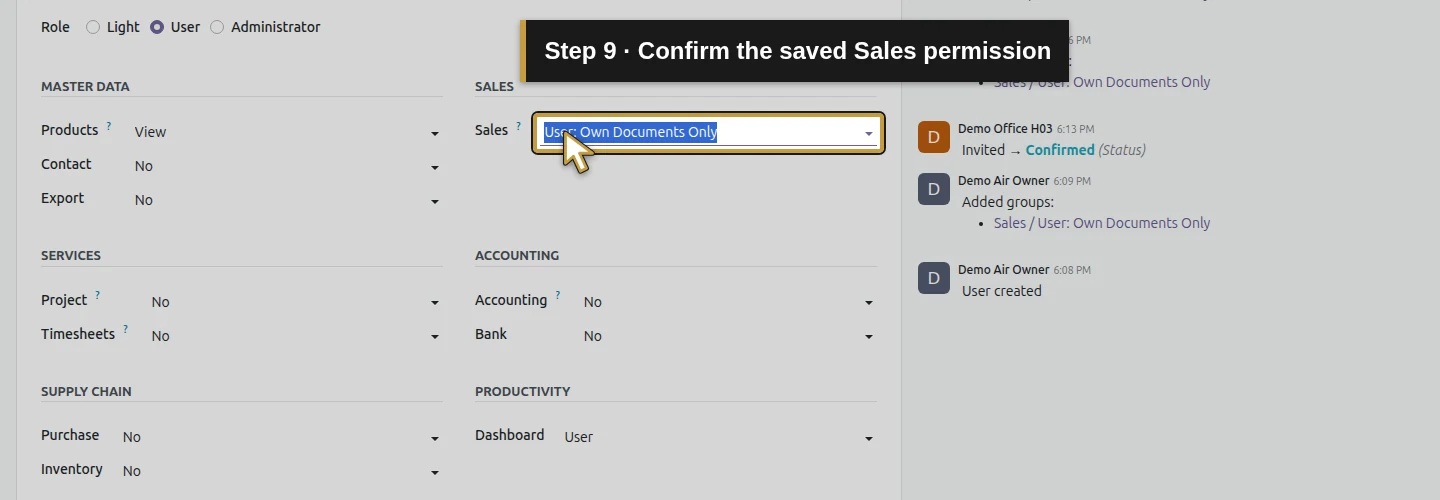
Click the Sales permission field. The tested build offers No, User: Own Documents Only, User: All Documents and Administrator.
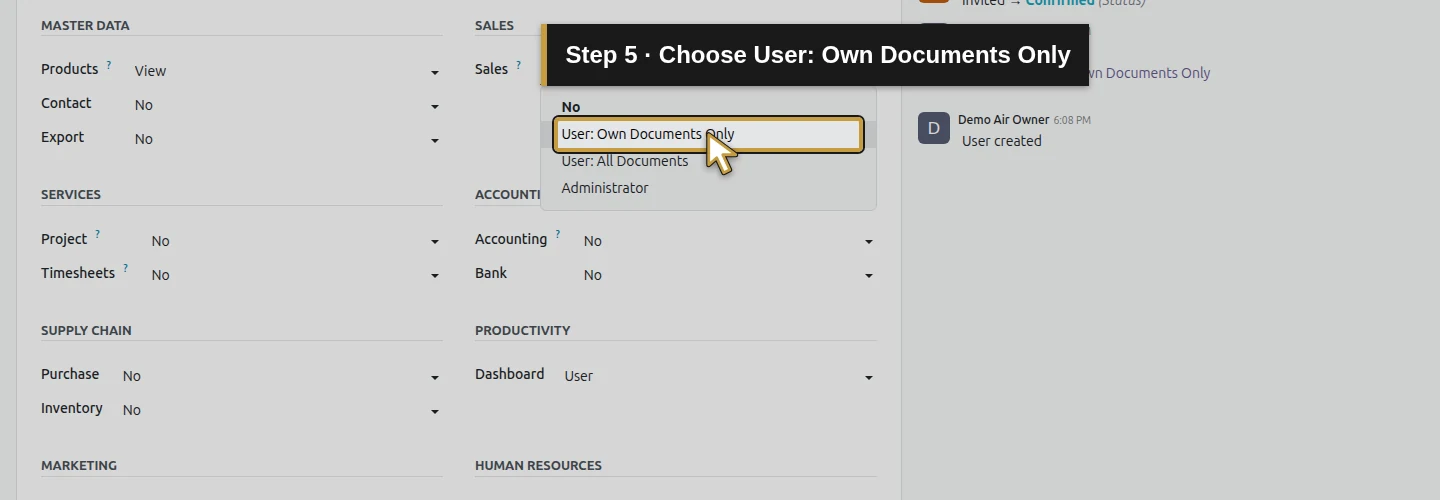
Step 5. Choose User: Own Documents Only
Select User: Own Documents Only. This example starts with the office worker’s assigned sales work. Choose permissions around the person’s actual duties, then test them.
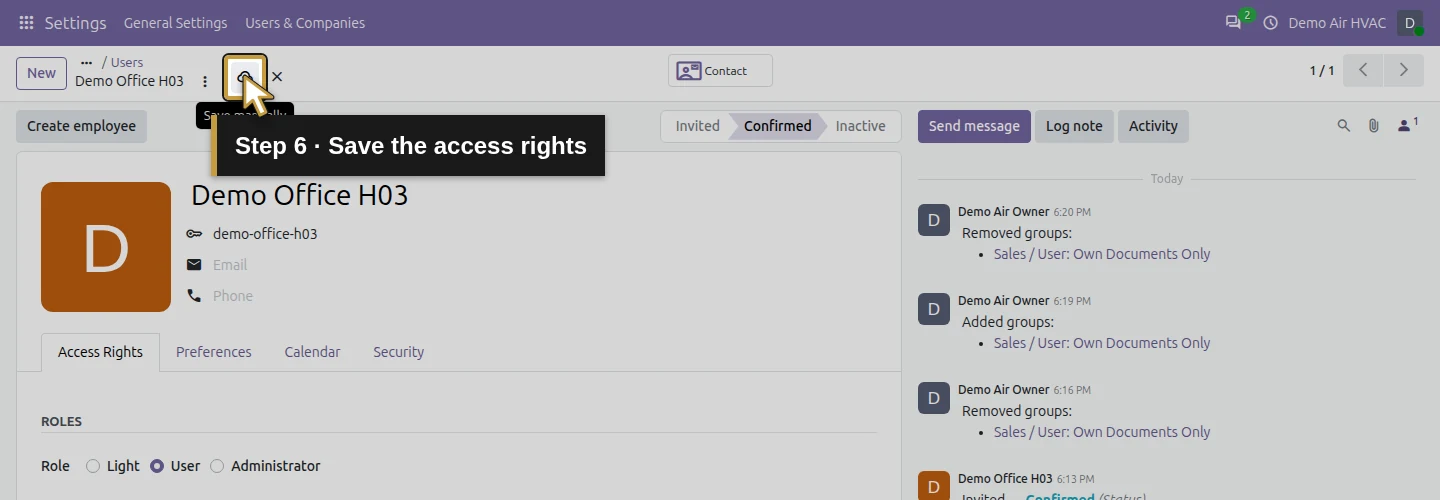
Step 6. Save the access rights
Click the cloud-shaped Save manually control beside the user’s name in the top control bar. The permissions are saved to this account.
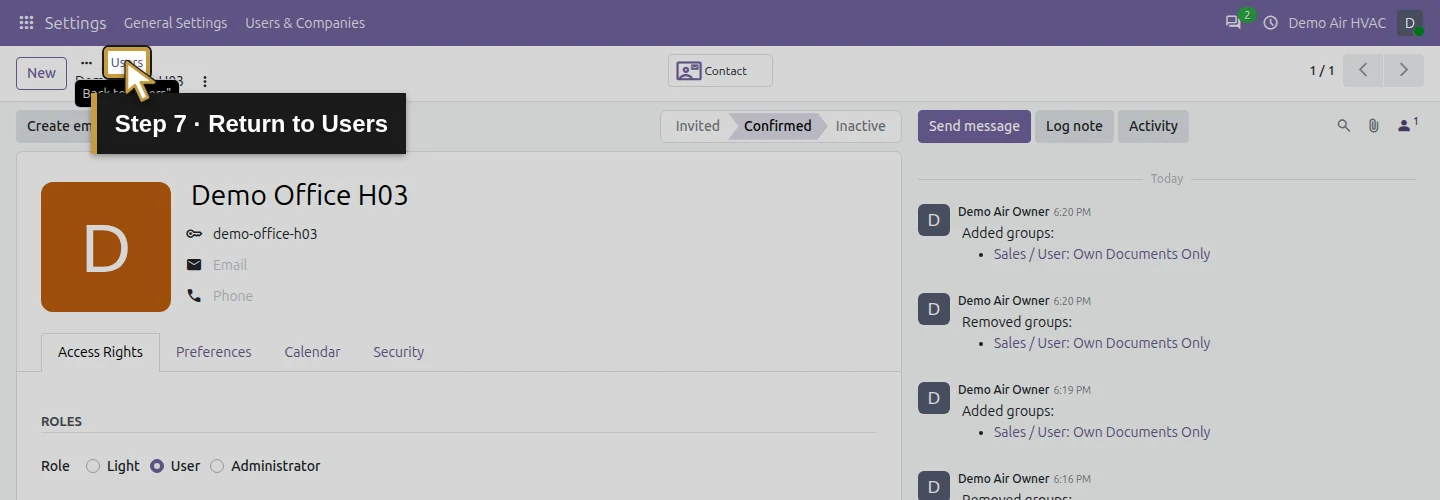
Step 7. Return to Users
Click the Users breadcrumb. The list returns with the account search retained in this walkthrough.
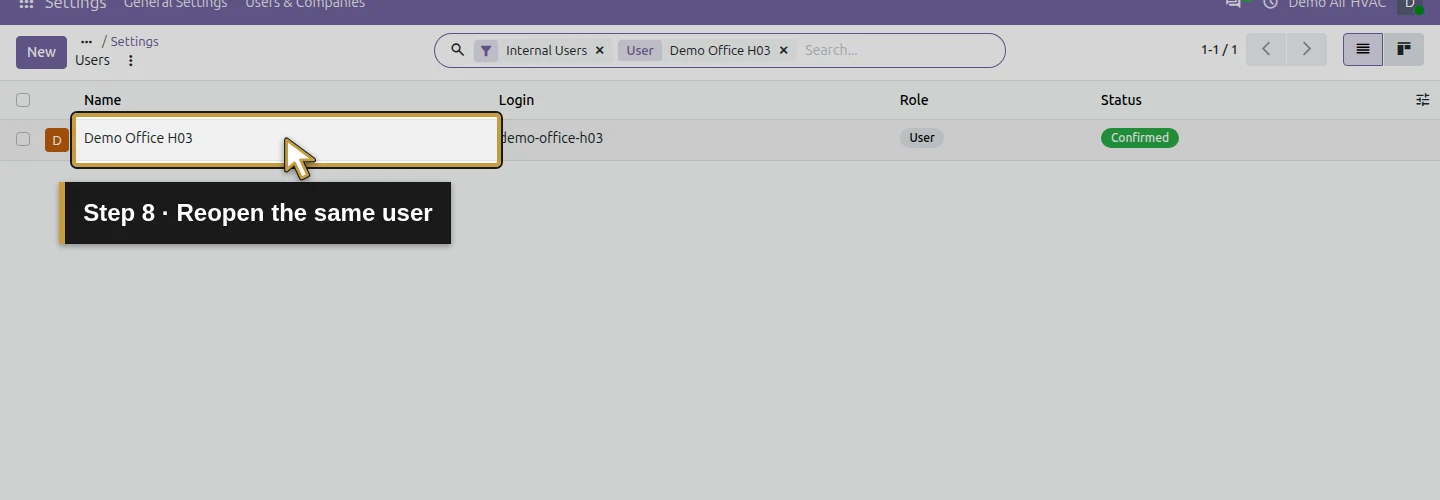
Step 8. Reopen the same user
Click Demo Office H03 again. Reopening the record checks the saved settings rather than relying on an unsaved form.
Step 9. Confirm the saved Sales permission
Check that Sales still says User: Own Documents Only and Role still says User. Keep the owner’s administrator account separate.
Test the account in a separate session
Sign in as the office user in a separate browser or private window. Testing through the administrator’s session would give the wrong result.
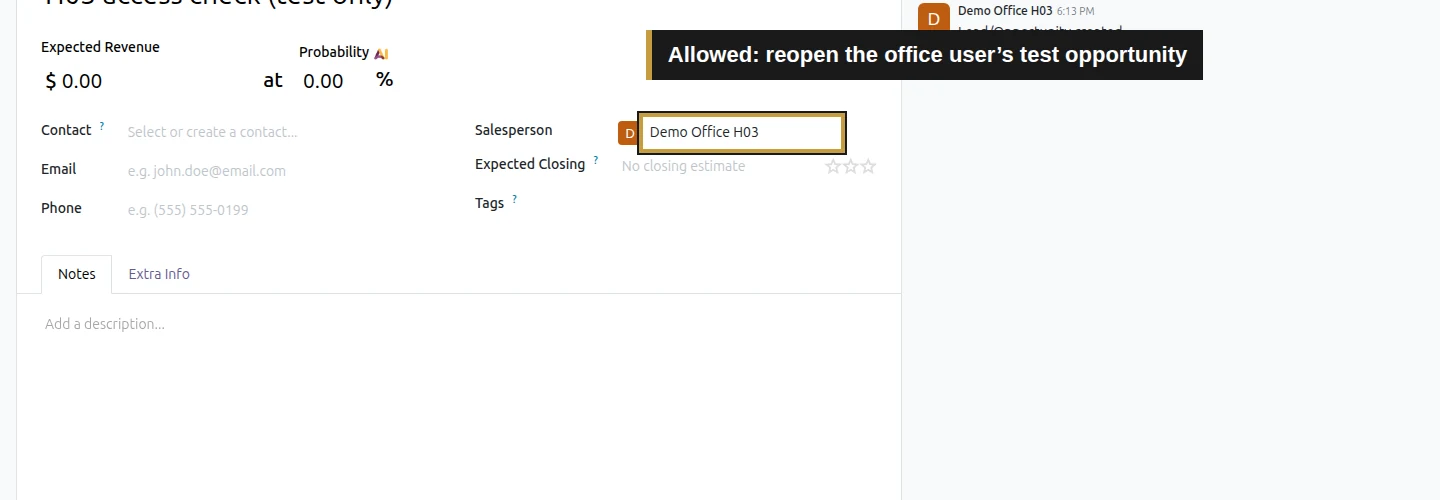
- Open CRM, select New, enter a clearly labeled test opportunity and click Add. Leave customer contact, email and phone blank for this check.
- Open that opportunity. Confirm that it belongs to the office user and can be reopened.
- Have the administrator create a second test opportunity assigned to the owner. Try its record URL while signed in as the office user.
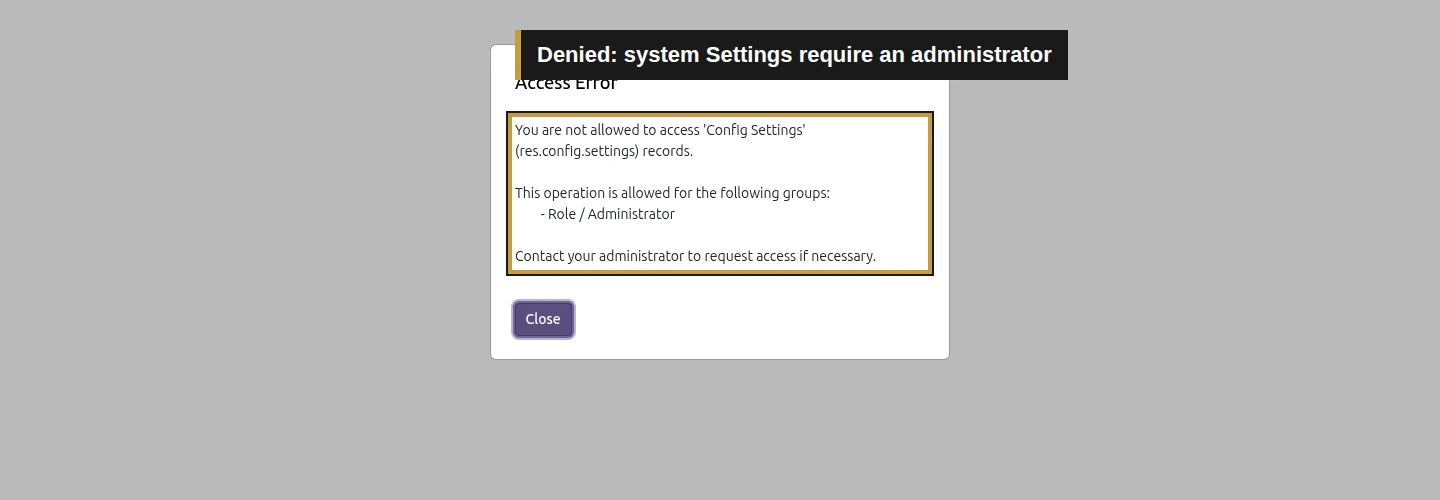
- In the office session, open the same Odoo host’s
/odoo/settingsaddress. Check the actual result.
Our two test opportunities are labeled test only. They are permission fixtures, rather than customer requests, quotations or invoices.
| Test | Observed result |
|---|---|
| Create and reopen the office user’s own opportunity | Allowed; the record shows Demo Office H03 as salesperson |
| Read an opportunity assigned to the owner | Denied; Odoo returns a read-access error for Lead |
| Open system Settings | Denied; Odoo returns an Access Error for Config Settings |

These checks establish this account’s tested behavior. Other apps, unassigned records, exports, deletion and multiple companies need their own checks. Review the whole Access Rights tab when duties change, then repeat the separate-session tests.
Questions about Odoo user permissions
How do I change a user's access rights in Odoo?
As an administrator, open Settings, select Manage Users, find the user and open Access Rights. Choose the role and relevant app level, save, then reopen the account. Test the resulting permissions with that user’s own login.
What is the difference between an Odoo user and an administrator?
The tested Odoo 20 screen has separate User and Administrator roles. Our User account can perform its permitted sales work but receives an Access Error for Config Settings. The Sales dropdown has its own permission levels; choose them alongside the role rather than treating every employee as a system administrator.
Why can't an Odoo user open Settings?
Check the access error and the user’s saved role. In this Community walkthrough, Config Settings explicitly requires Role / Administrator. Keep the owner’s administrative access separate and grant the employee the permissions needed for their duties.
Does Own Documents Only hide every other record in Odoo?
That label is a Sales permission level. Our office user could reopen its own CRM opportunity and was denied an owner-assigned one. This does not establish all other app permissions or the treatment of unassigned records. Test those cases in your installed apps before relying on a broader restriction.
How do I create an Odoo user without sending an invitation?
For this local test, we used a non-email login and kept the email field empty when saving the new user. Stock signup creation sends invitations for users with an email. We set the password through the native Security wizard and tested the login separately. Use this as a local-test procedure; real employee invitation delivery belongs in your email and onboarding setup.
Continue setting up the team
You have saved a specific sales role and checked it with a separate login. The next planned lesson covers employee records, so the series can build the team’s operational setup.
Get help setting up Odoo for your HVAC business
Tell us who needs to handle enquiries, job records and billing. An Odoo partner can help you plan permissions and test the workflows your team will use.
Talk to an Odoo partner