
Running an HVAC business with Odoo · Customer setup
How do I add a customer with different billing and service addresses in Odoo?
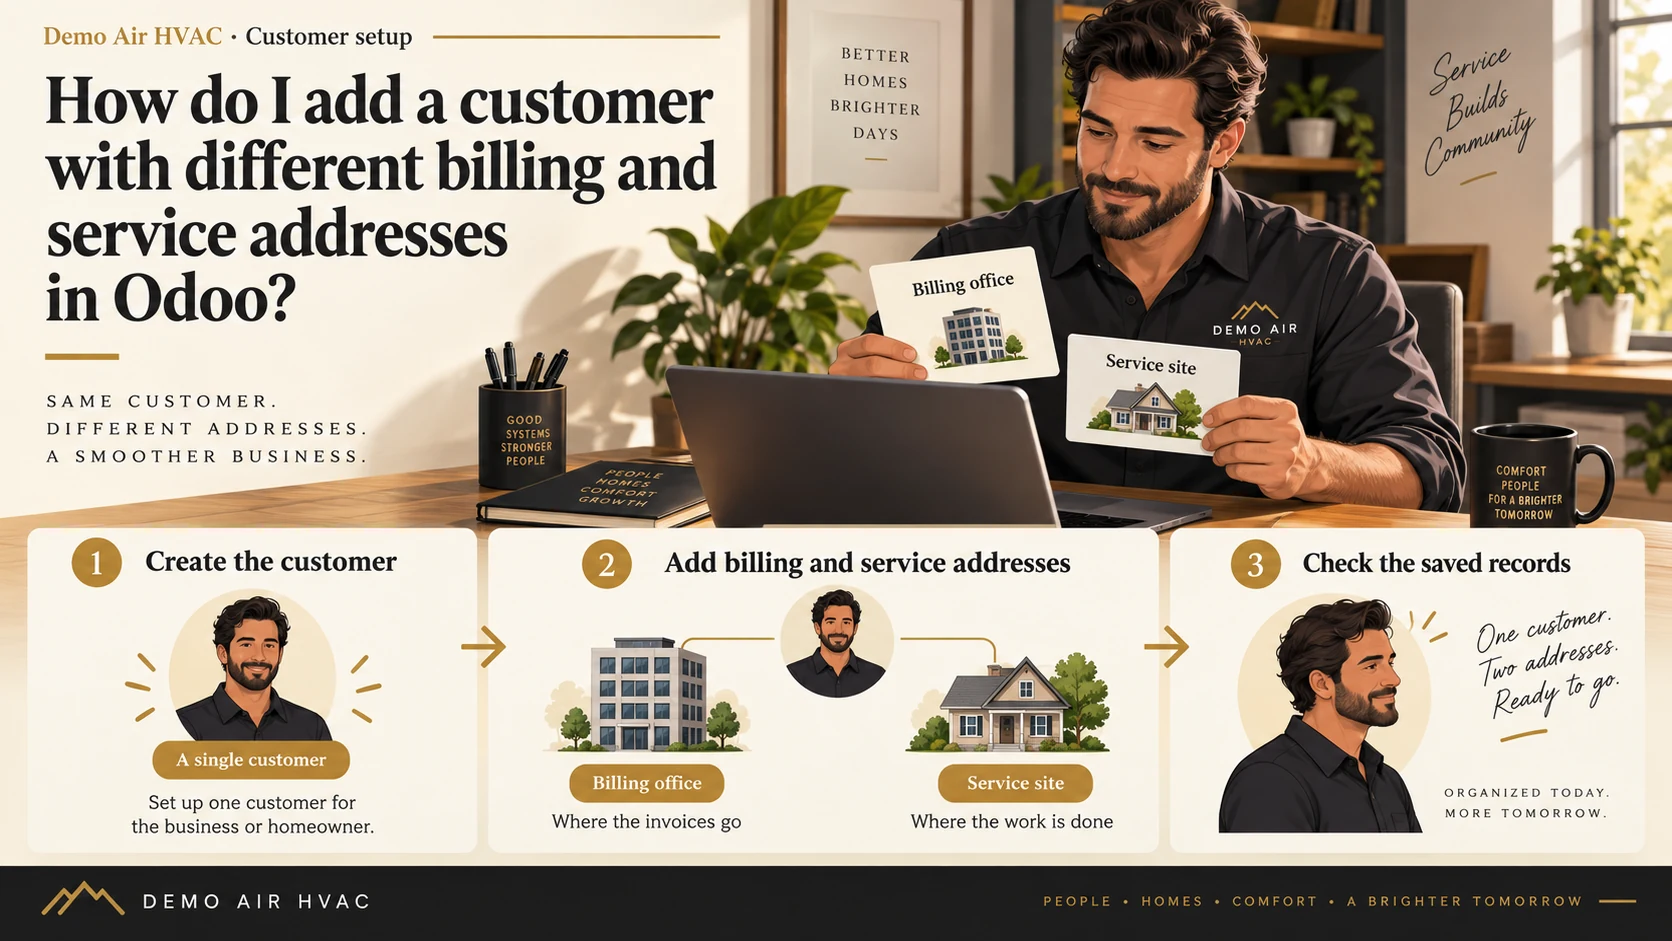
Create the customer in Contacts, then use Add Related Contacts to add an Invoice address for billing and a Delivery address for the service site. Save the customer and reopen both addresses to check their details.
One customer with a saved billing-office address and a separate service-site address, ready for the later quotation workflow.
Alex Rivera runs Demo Air HVAC, a fictional heating and cooling business. His first customer, Demo Property H08, needs invoices sent to its billing office while the HVAC work happens at a different property. All example names and street addresses are fictional.
Follow the step-by-step setupBefore you begin
Complete the company-profile lesson and install the apps covered in the app-selection lesson. The demo has Contacts, Sales and Invoicing installed. Sign in with permission to create and edit contacts; this walkthrough uses the owner administrator.
The screenshots show Odoo 20.0-20260926 Community, using standard fields and native related contacts without Enterprise or customization. Have the correct customer name, billing address and service address ready. Search Contacts before using New to avoid creating a second copy of an existing customer.
Odoo calls the address types Invoice and Delivery. Here, Delivery represents the service site's address. This contact setup does not create an equipment register, dispatch a technician or automatically set a Project task's location.
Create the customer contact
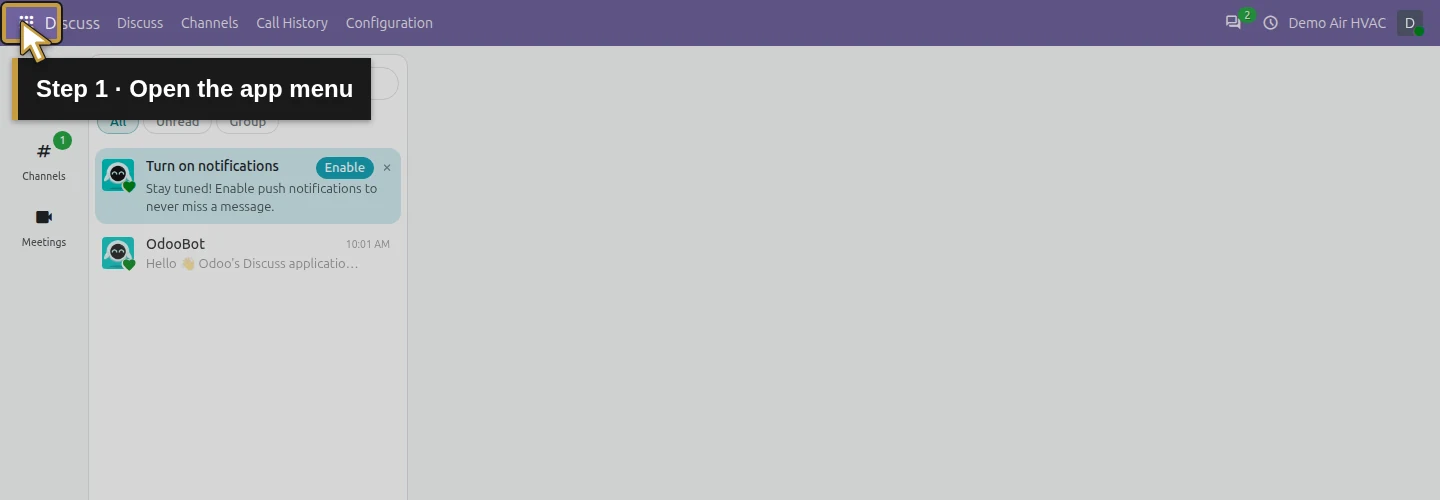
Step 1. Open the app menu
Click the grid-shaped app menu at the top left.
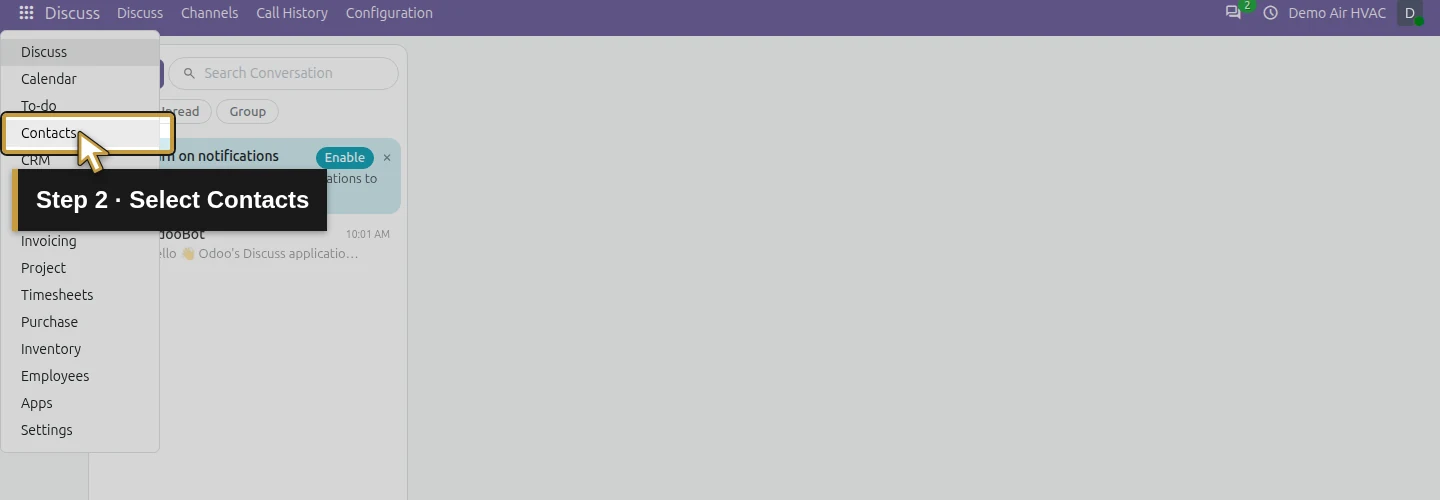
Step 2. Select Contacts
Select Contacts. Search for your customer before creating a new record. The example has no existing Demo Property H08 contact.
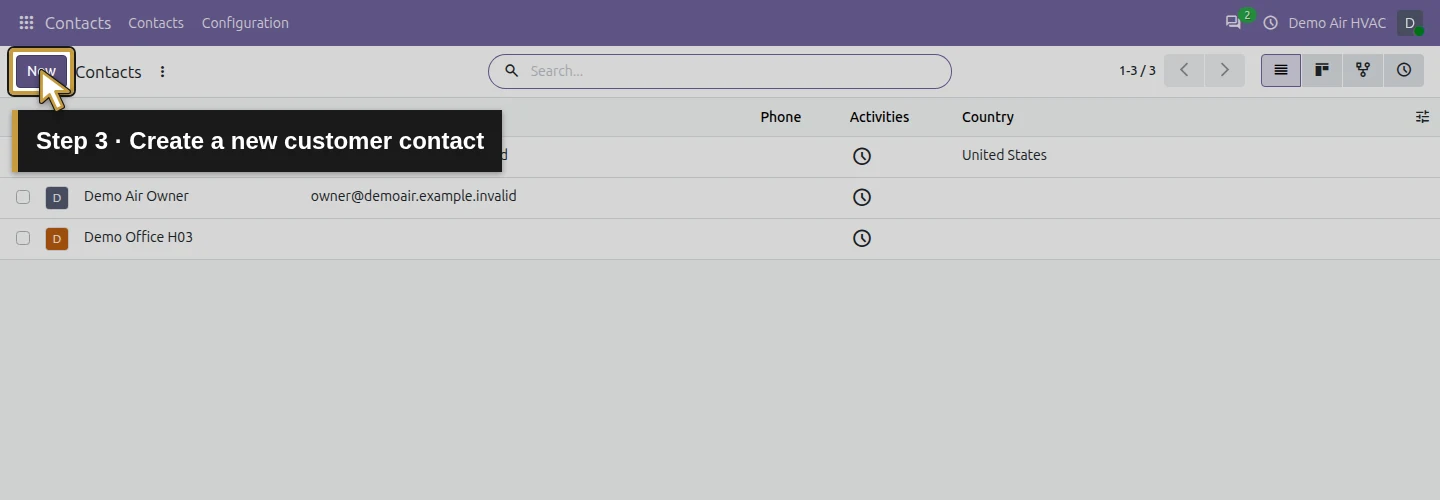
Step 3. Create a new customer contact
Click New. Odoo opens a blank contact form.
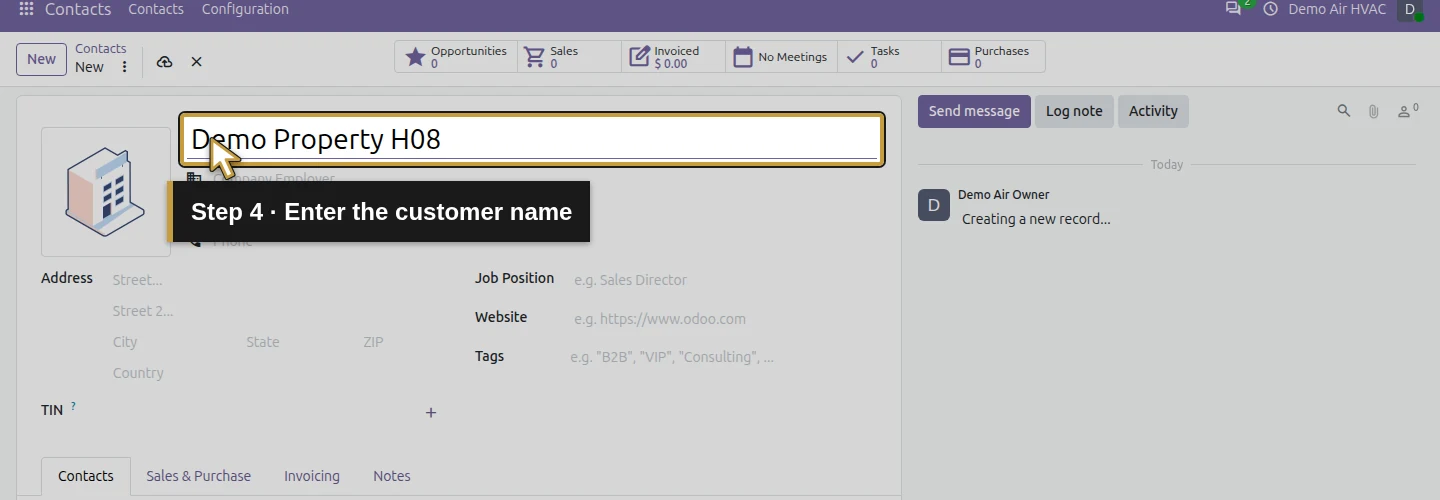
Step 4. Enter the customer name
Enter Demo Property H08 in Name (company or person). Use your own customer’s name in a real setup. The demo leaves email and phone blank.
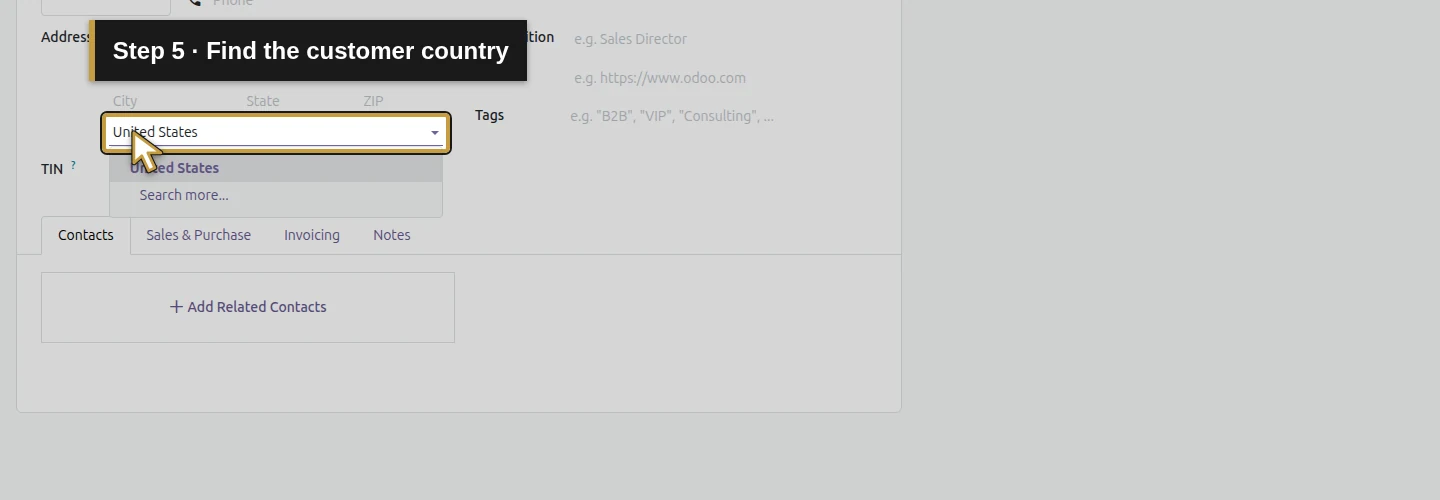
Step 5. Find the customer country
Click Country and type United States. The matching country appears in the dropdown.
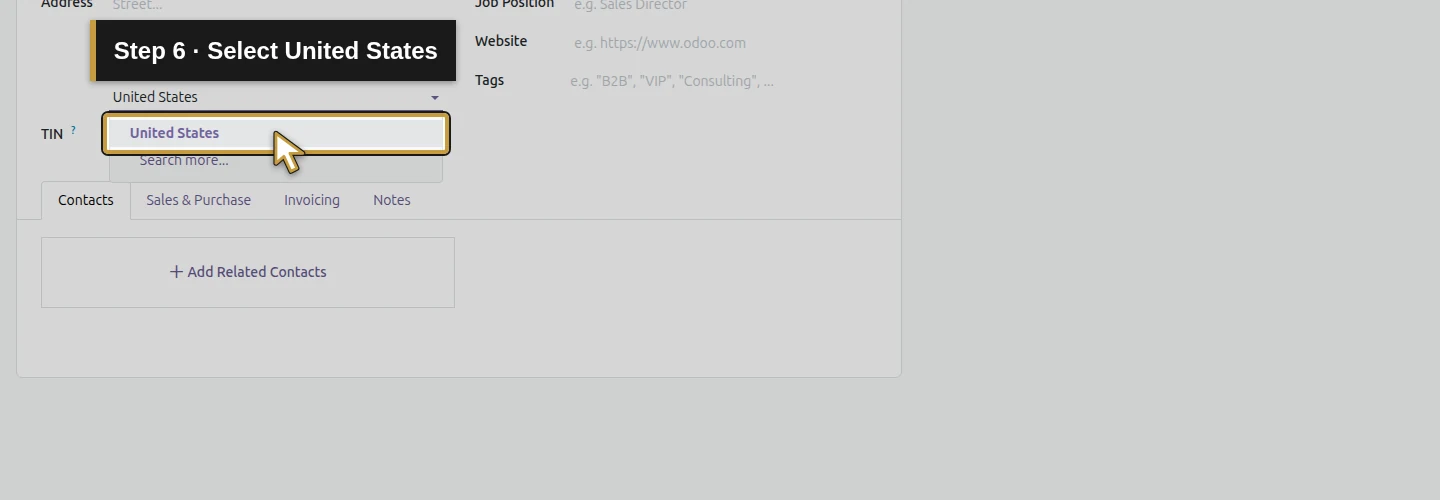
Step 6. Select United States
Select United States from the dropdown. This is the customer’s country for the example.
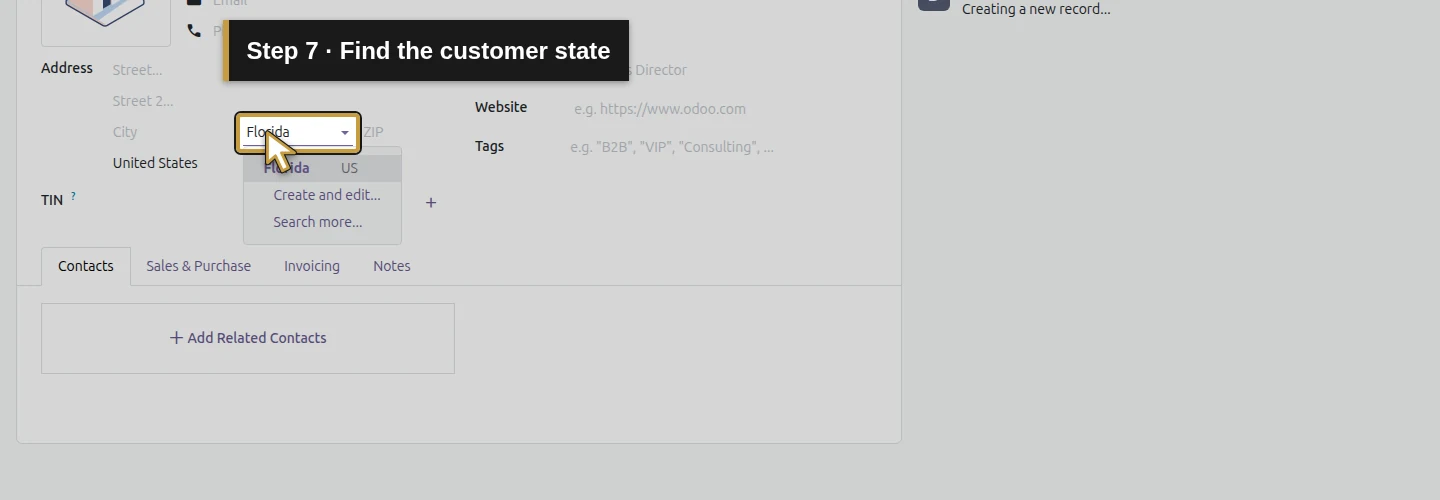
Step 7. Find the customer state
Click State and type Florida.
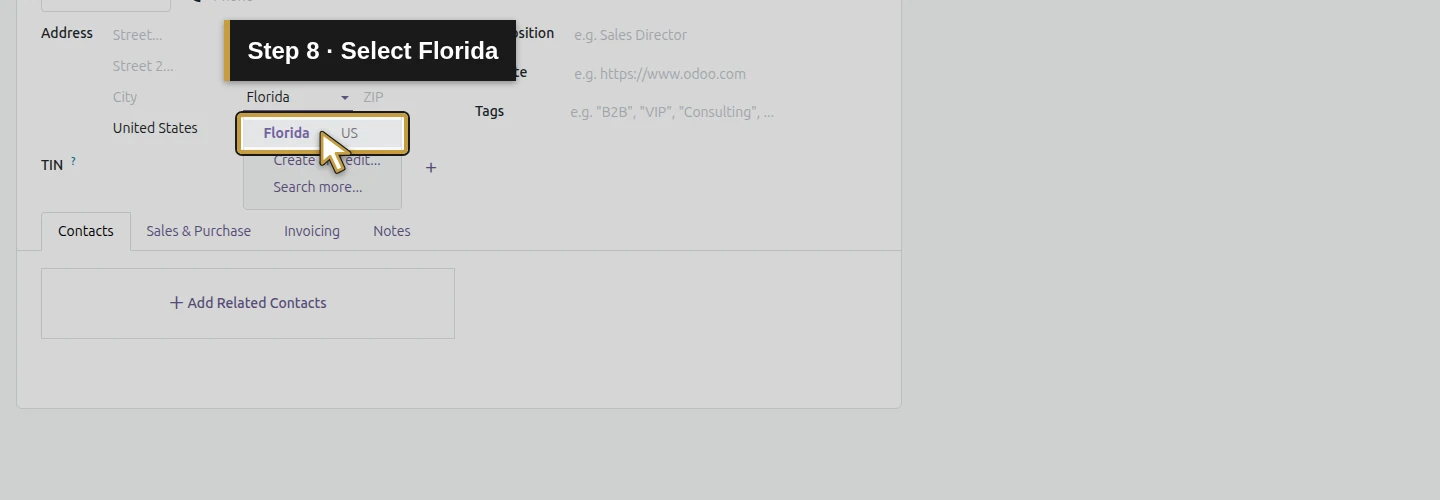
Step 8. Select Florida
Select Florida, shown with its US designation. Related addresses inherit these region values initially.
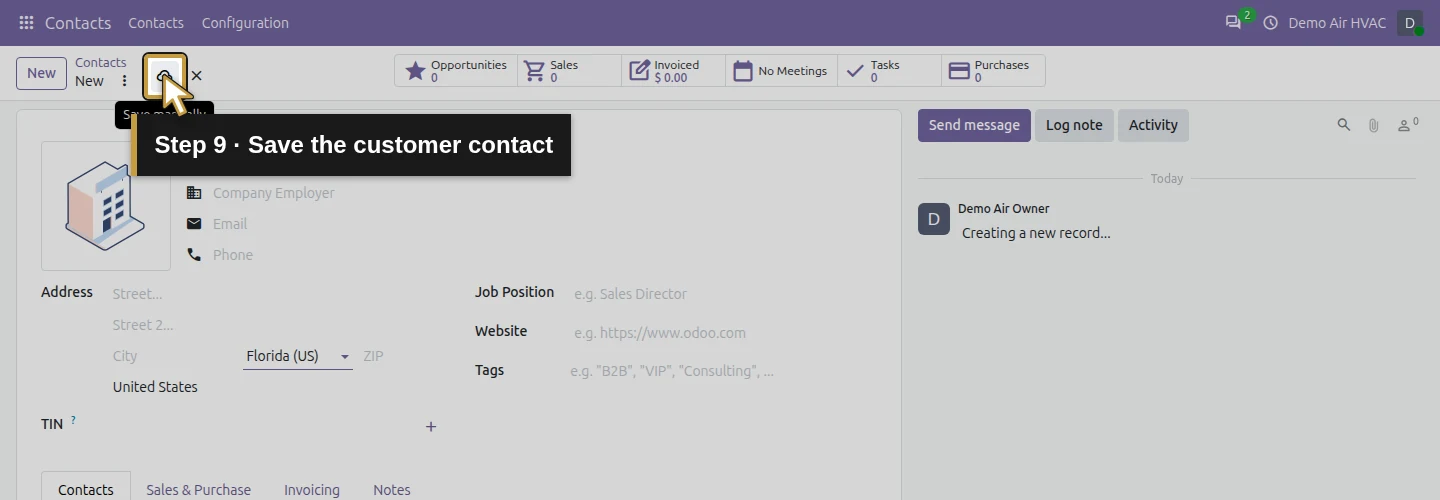
Step 9. Save the customer contact
Click the cloud-shaped Save manually control beside the customer name in the top bar. The customer is now saved.
Add the billing-office address
Step 10. Add the billing address
On the Contacts tab, click Add Related Contacts. The Create Related Contacts dialog opens.
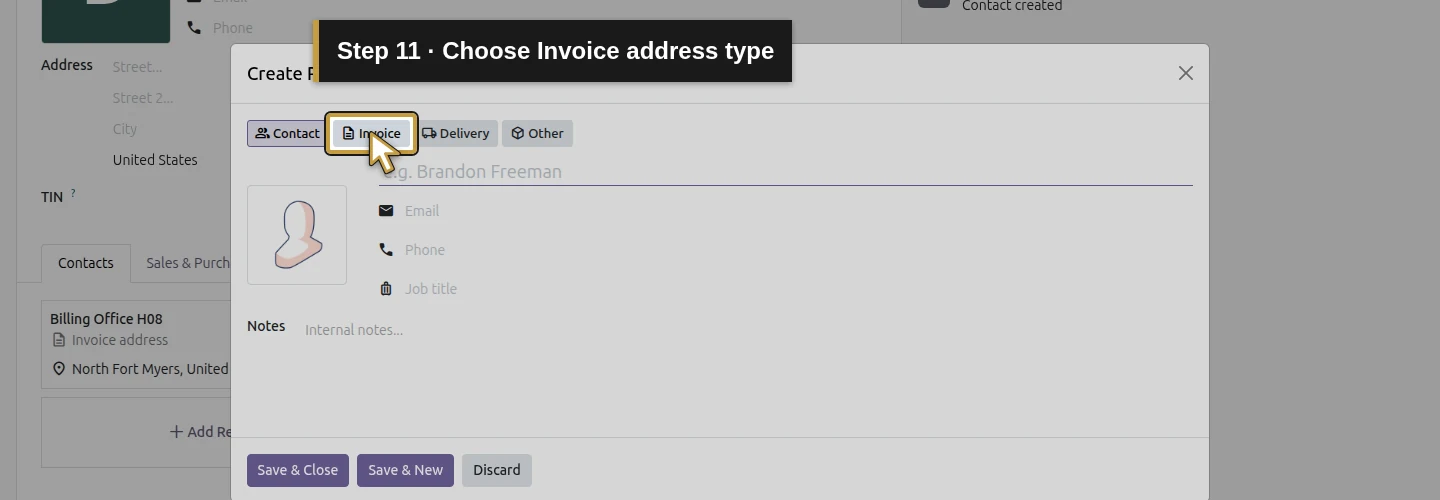
Step 11. Choose Invoice address type
Select the Invoice badge. The dialog now shows invoice-address fields.
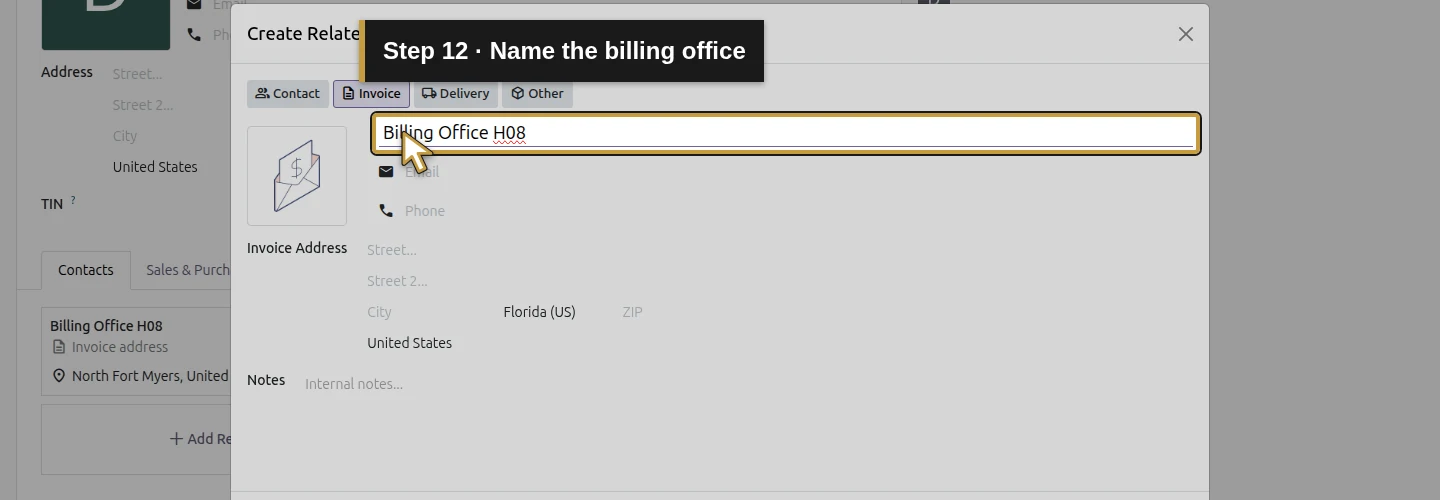
Step 12. Name the billing office
Enter Billing Office H08 in the name field so you can identify this address later.
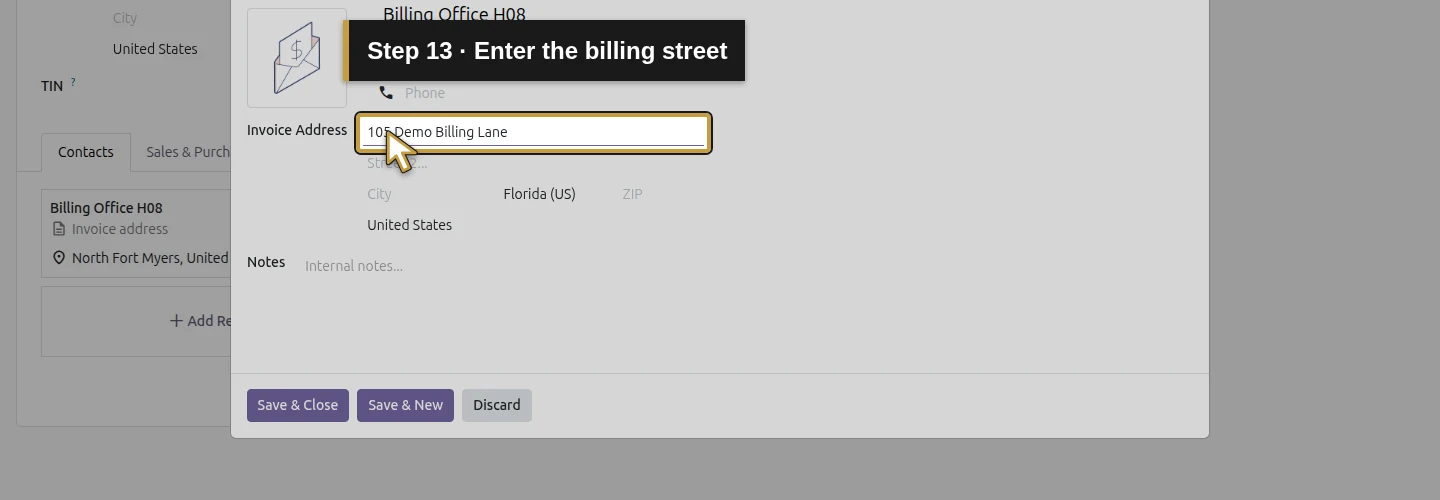
Step 13. Enter the billing street
Enter 105 Demo Billing Lane in Street. This is a fictional example; use the actual billing street for your customer.
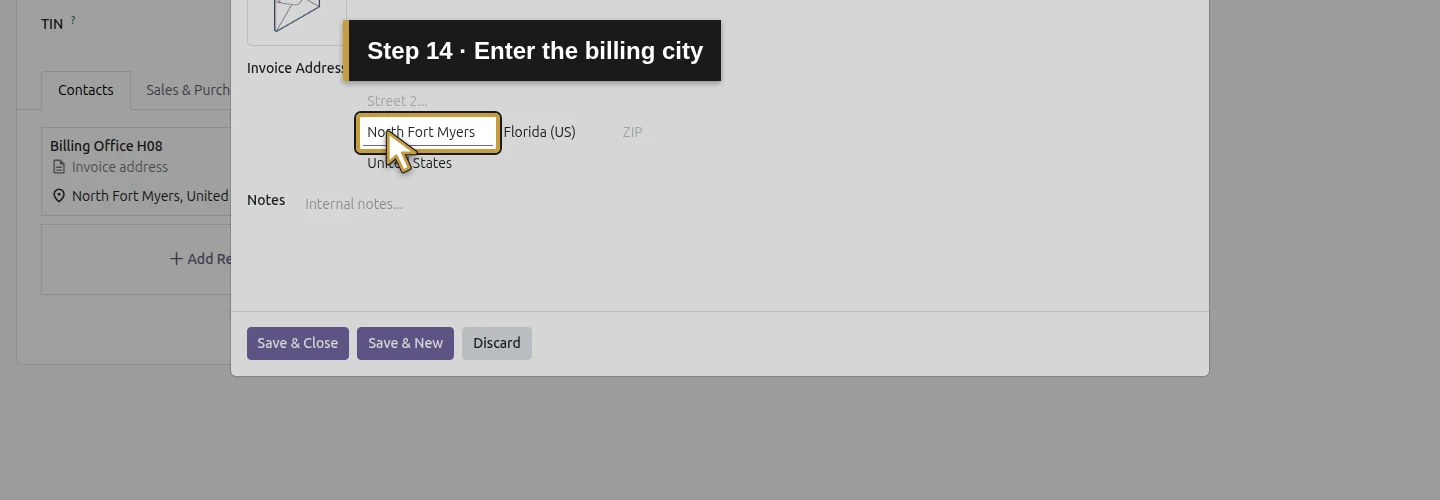
Step 14. Enter the billing city
Enter North Fort Myers in City.
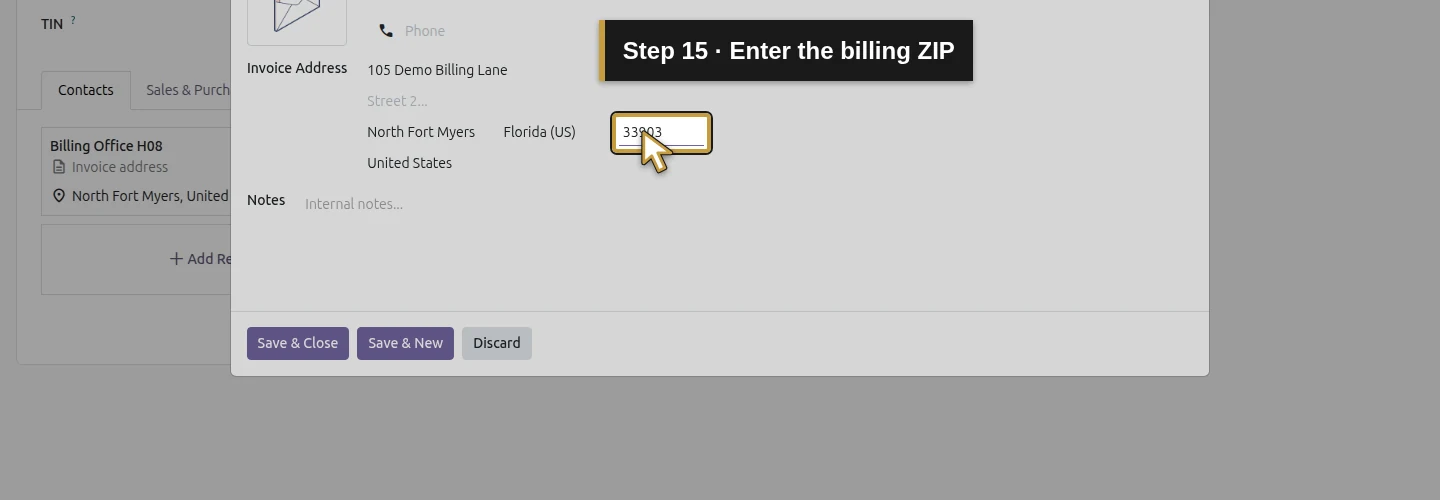
Step 15. Enter the billing ZIP
Enter 33903 in ZIP.
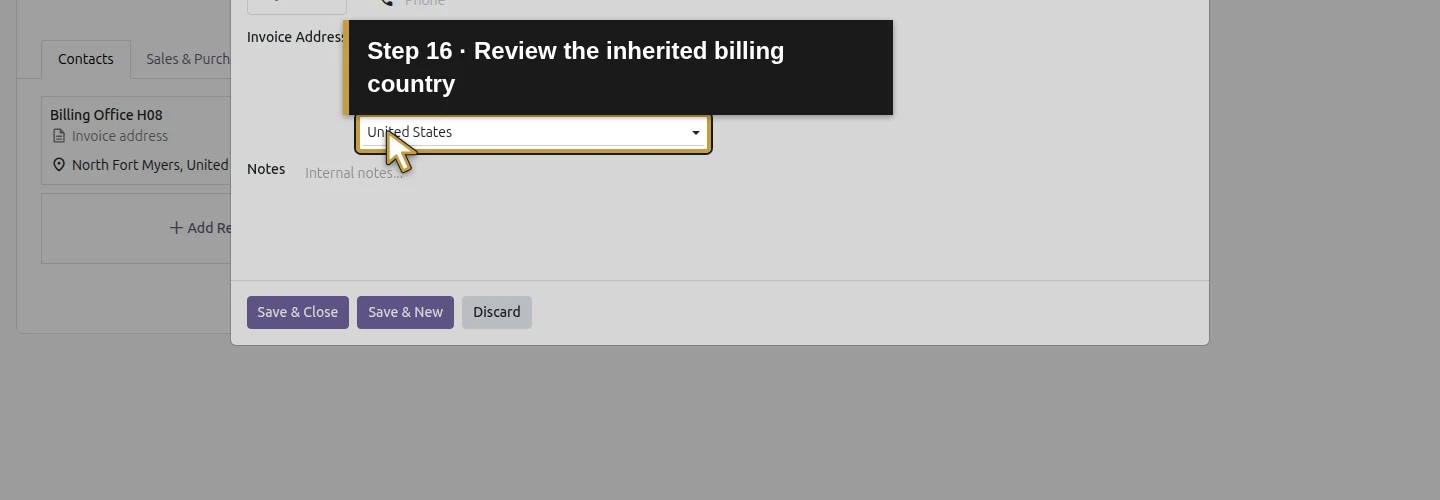
Step 16. Review the inherited billing country
Check Country. It shows United States, inherited from the parent customer in this example. Use the correct country for the actual billing address.
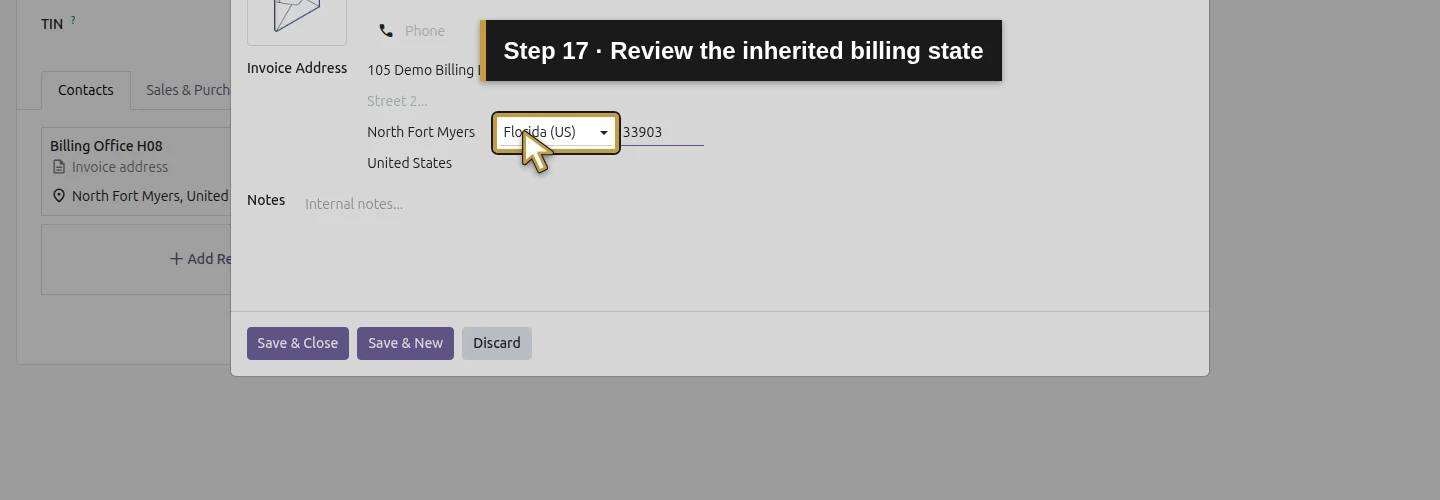
Step 17. Review the inherited billing state
Check State. It shows Florida (US). Review inherited values whenever the billing office is in a different region.
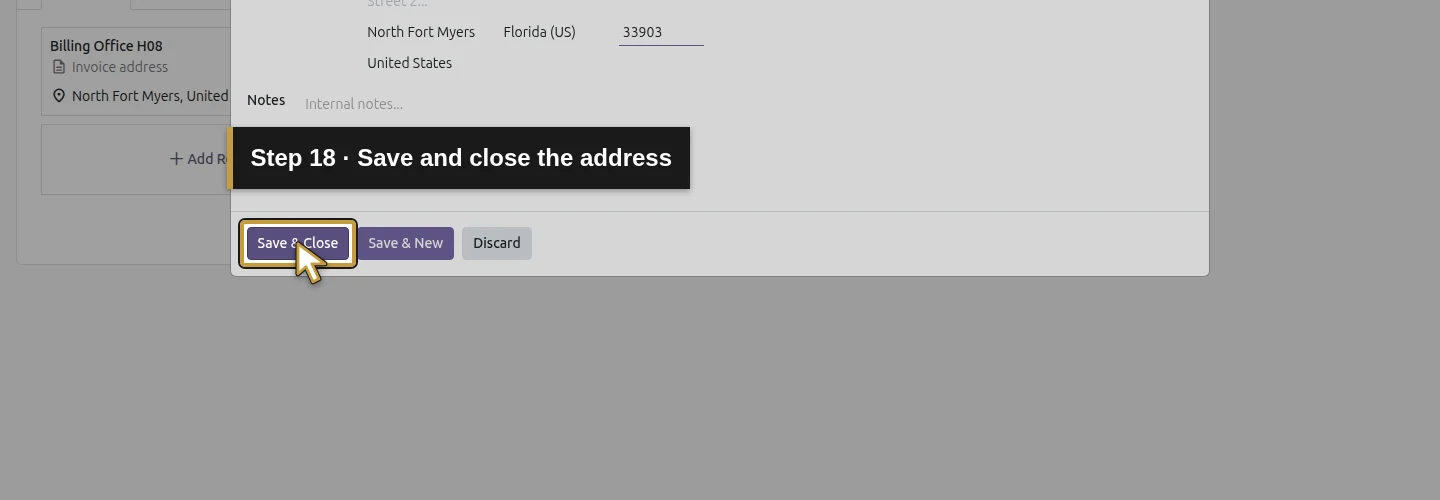
Step 18. Save and close the billing address
Click Save & Close. The billing entry appears under the parent customer with the Invoice address type.
Add the service-site address
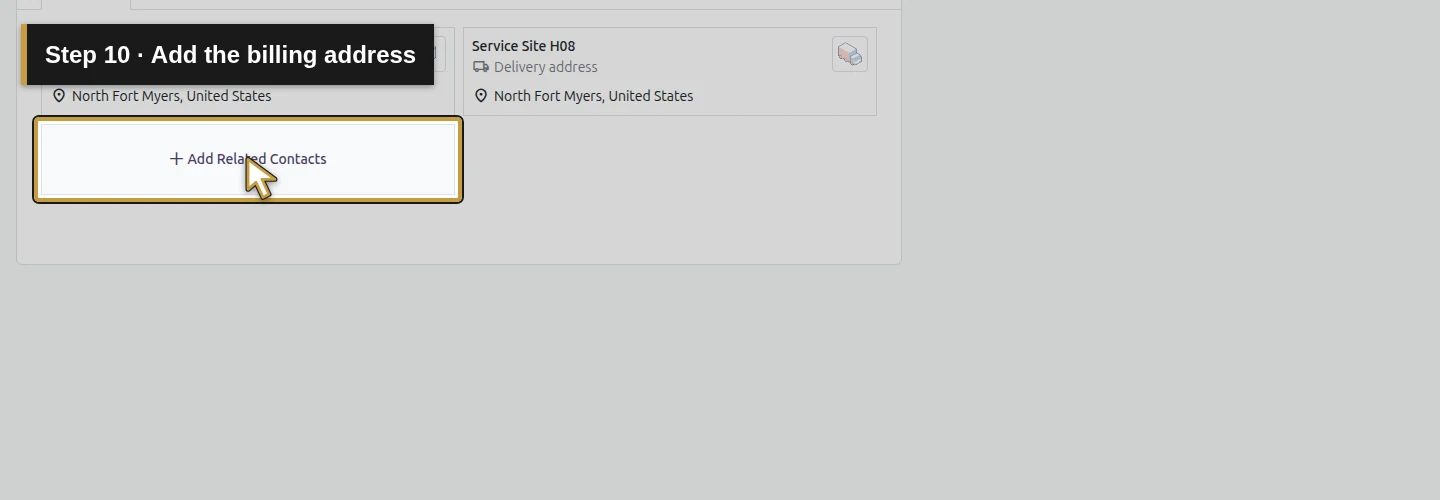
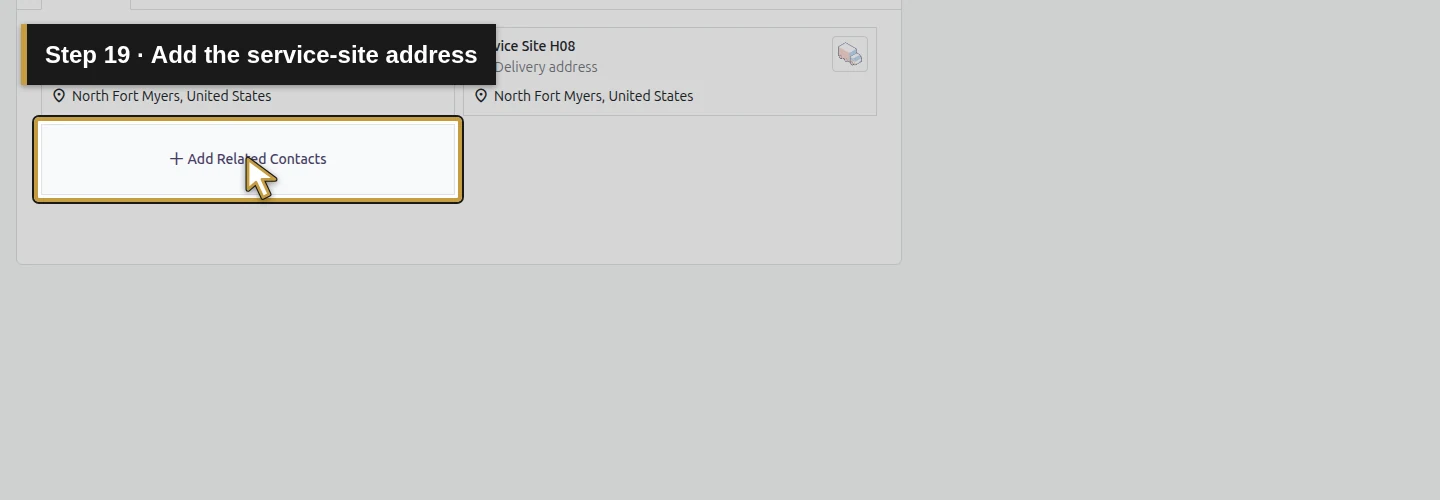
Step 19. Add the service-site address
Click Add Related Contacts again. Add the work location separately from the billing office.
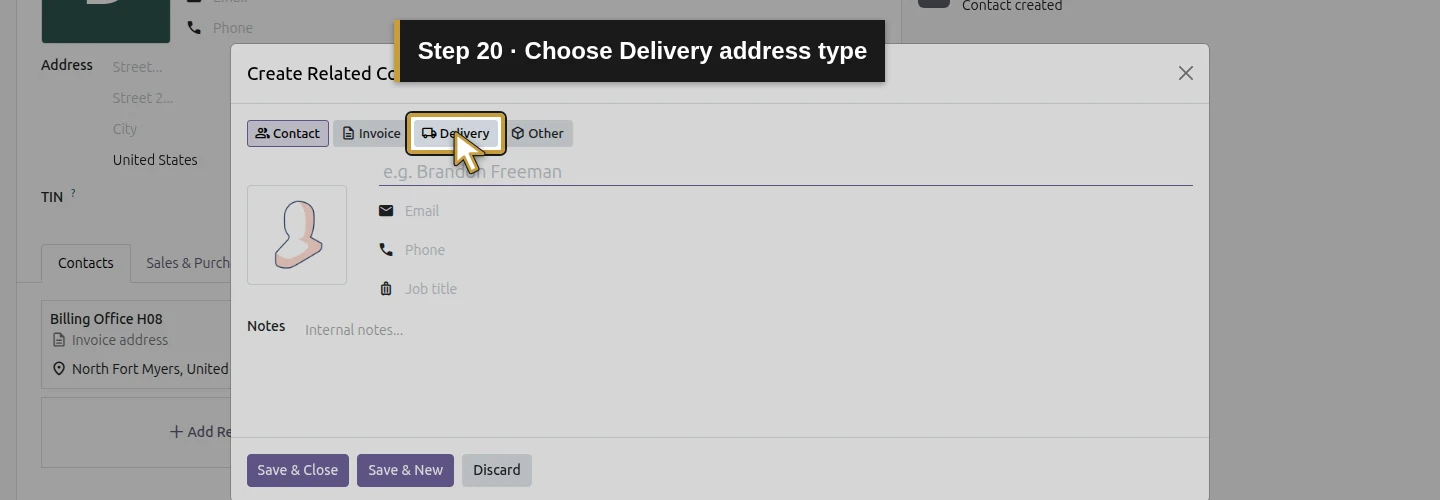
Step 20. Choose Delivery address type
Select the Delivery badge. We use this stock address type for the HVAC service site.
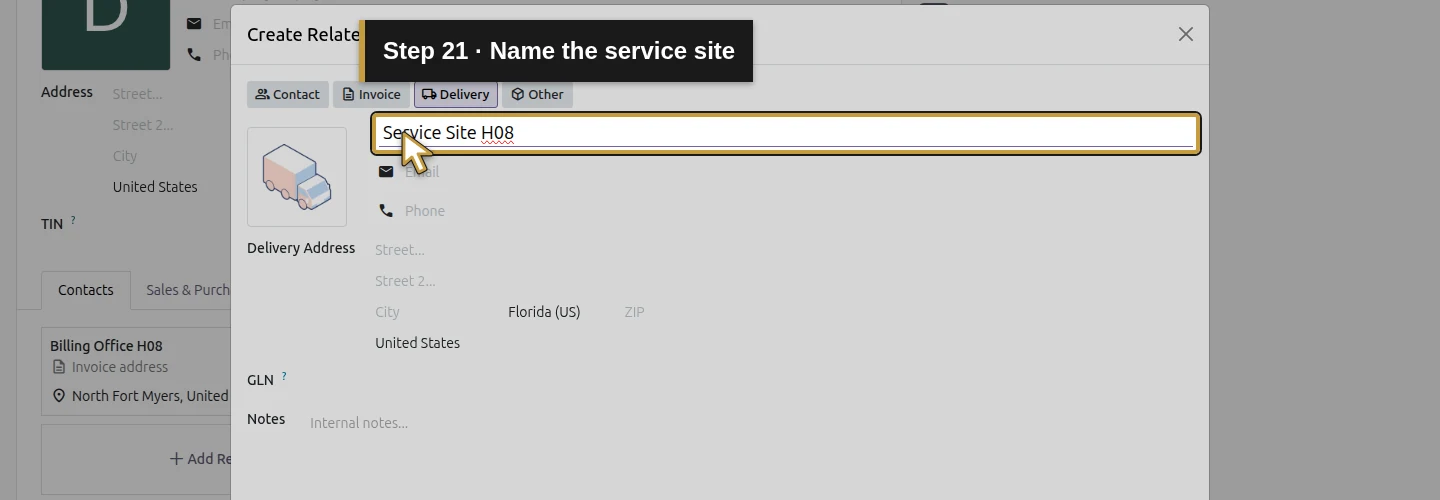
Step 21. Name the service site
Enter Service Site H08 in the name field.
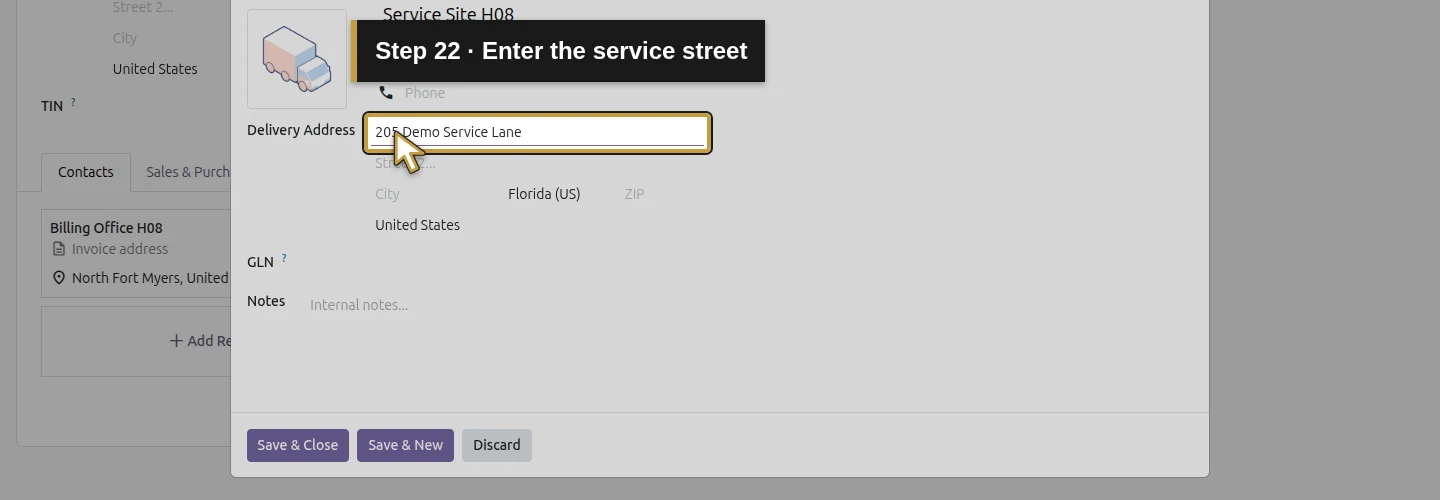
Step 22. Enter the service street
Enter 205 Demo Service Lane in Street. This fictional street differs from the billing office’s street.
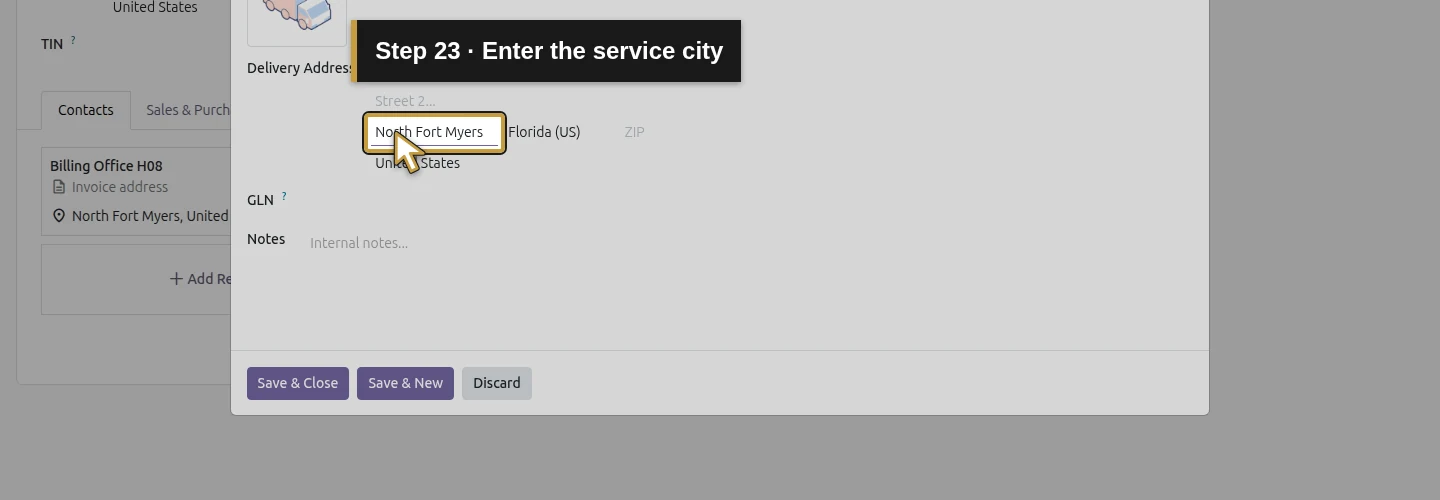
Step 23. Enter the service city
Enter North Fort Myers in City.
Step 24. Enter the service ZIP
Enter 33903 in ZIP.
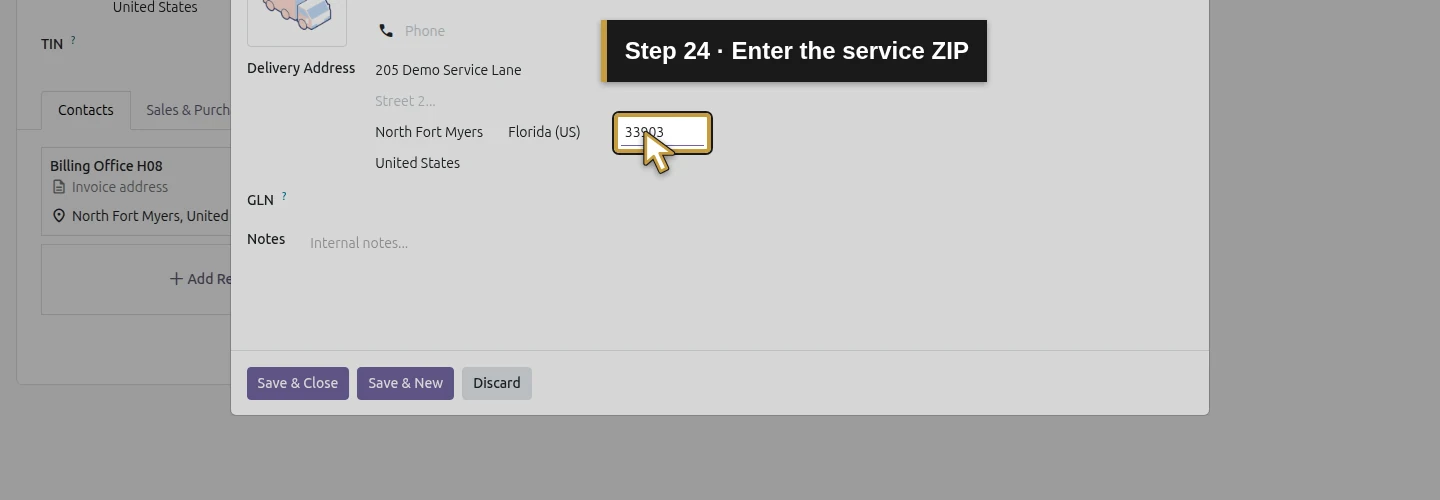
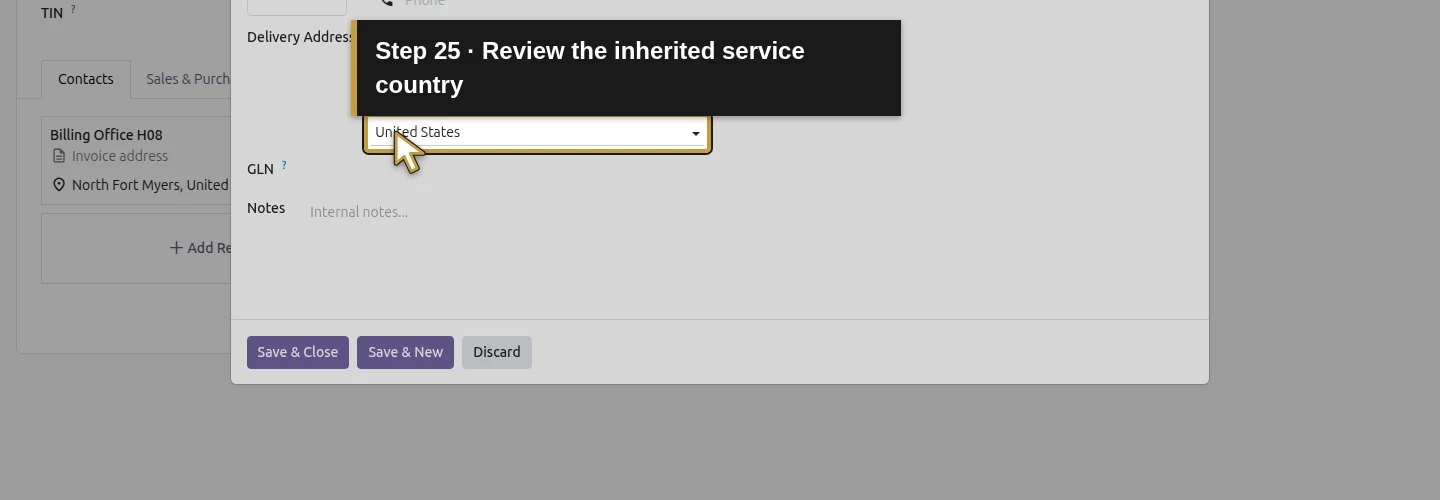
Step 25. Review the inherited service country
Check Country, which shows United States in the demo.
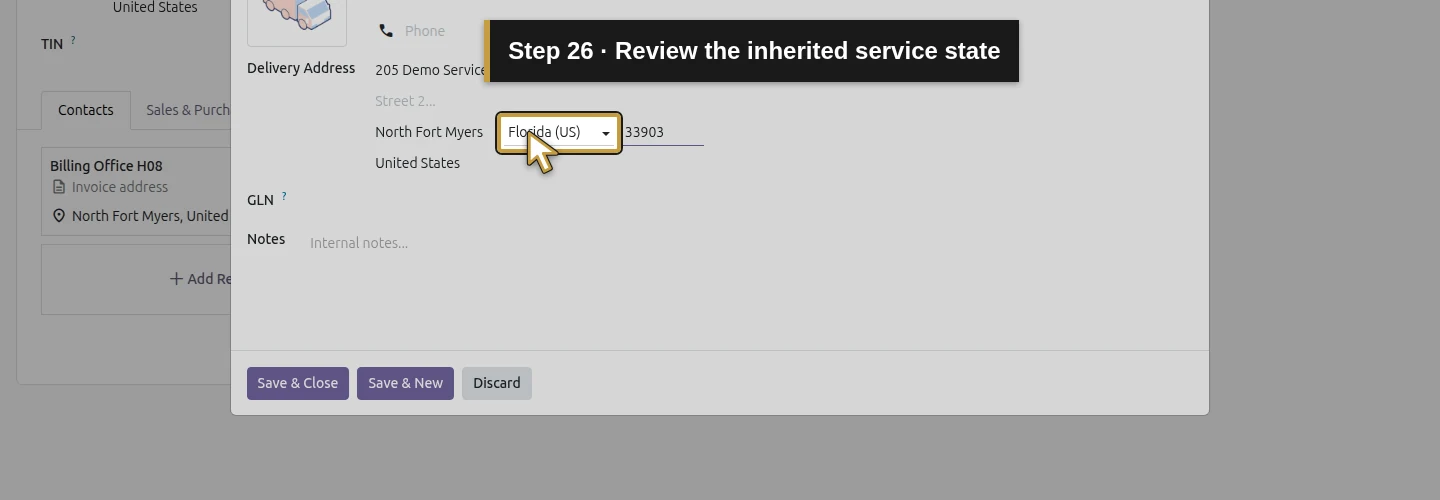
Step 26. Review the inherited service state
Check State, which shows Florida (US). Confirm the actual site’s region before saving.
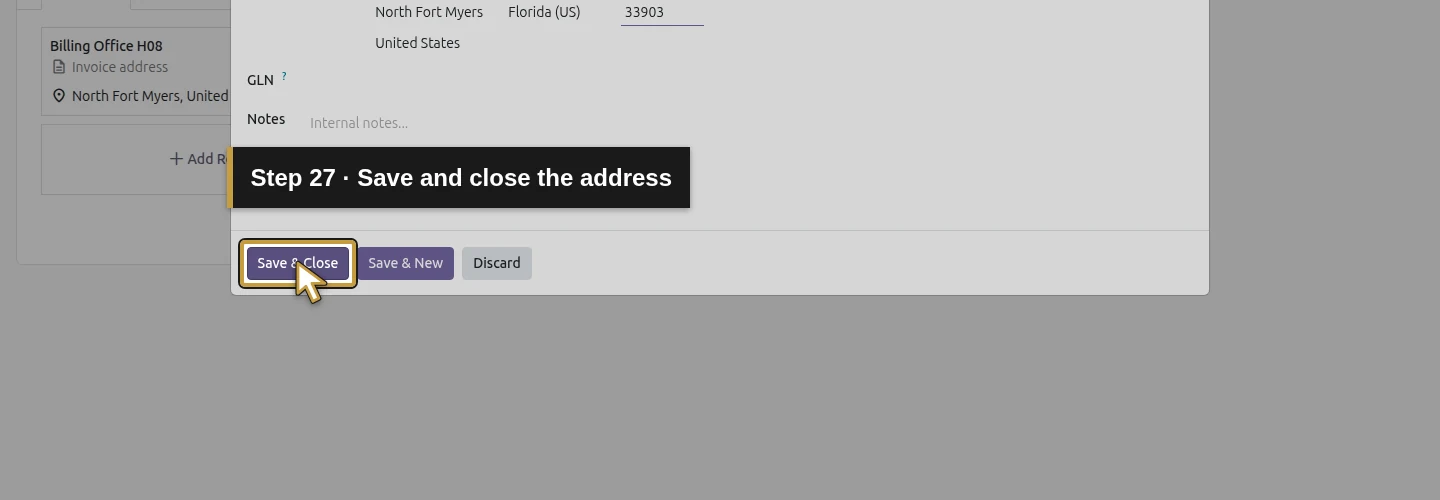
Step 27. Save and close the service address
Click Save & Close. The service-site entry appears with the Delivery address type.
Save and reopen the addresses
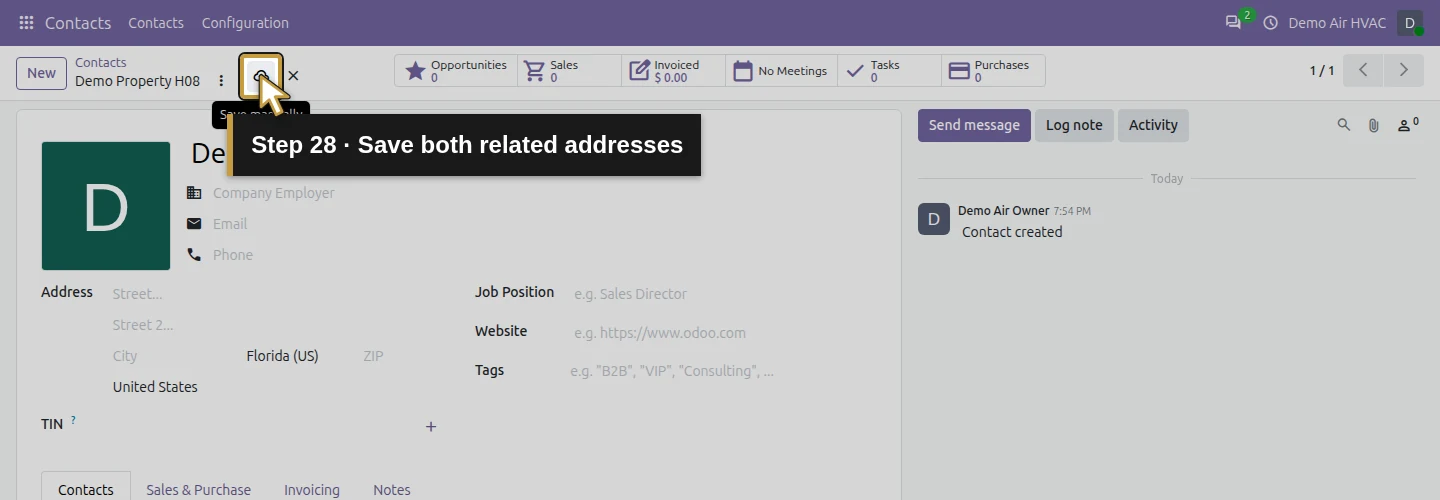
Step 28. Save both related addresses
Click Save manually in the customer’s top bar to save the related-address changes. This control disappears when the form has no pending changes. The screenshot shows it in a later unsaved capture; the video shows the original save of both addresses.
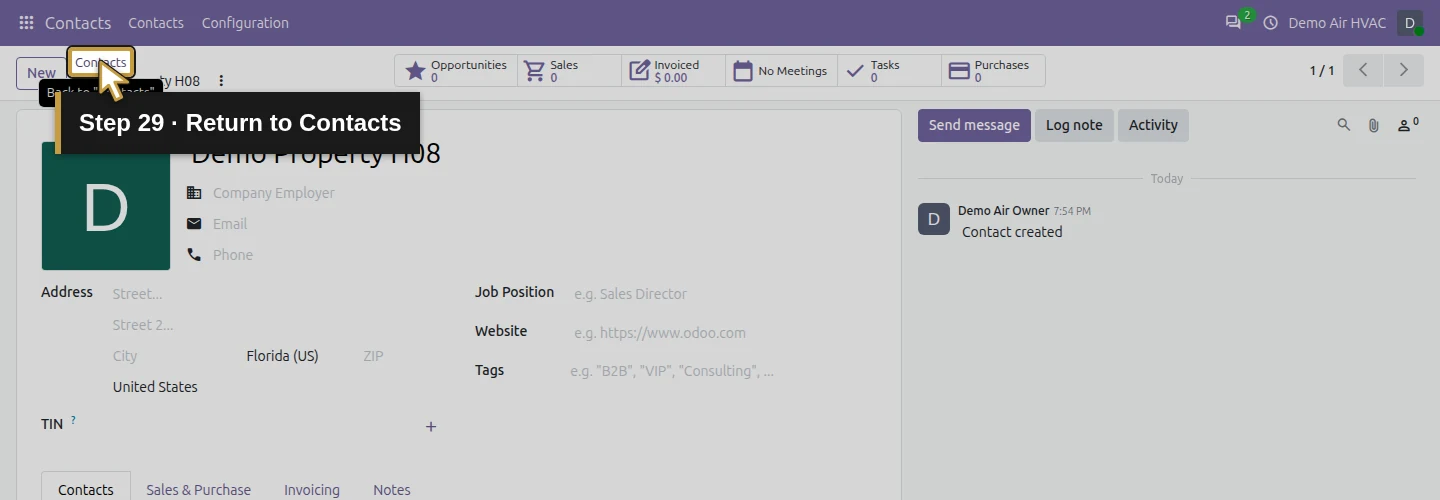
Step 29. Return to Contacts
Click Contacts in the breadcrumb to return to the contact list.
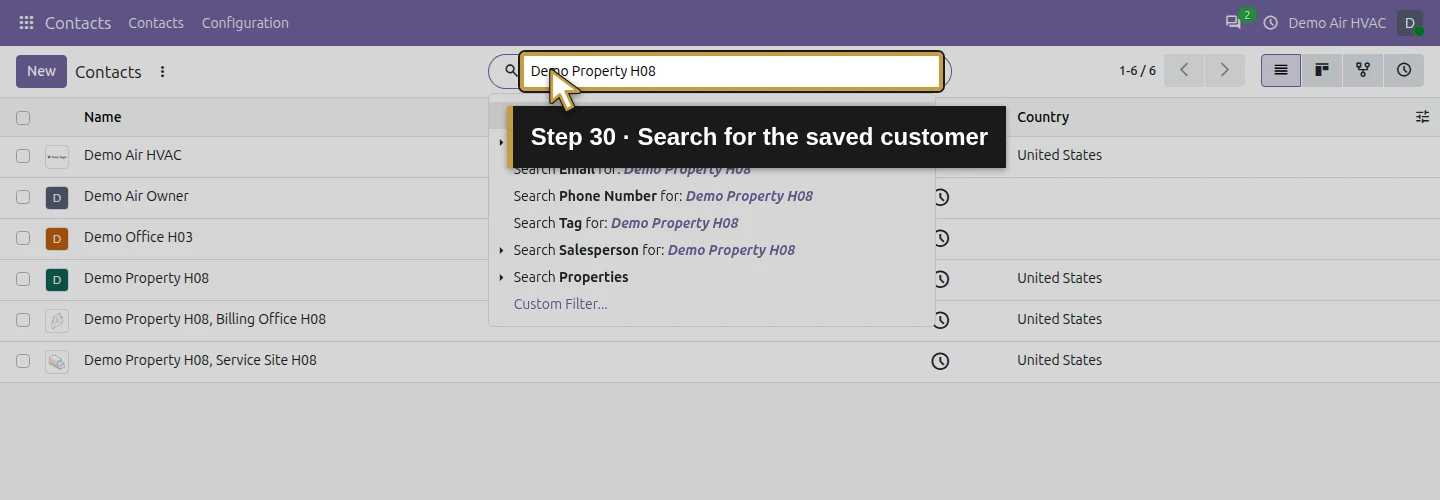
Step 30. Search for the saved customer
Type Demo Property H08 in the search box and press Enter. The demo shows the customer and its two related address rows.
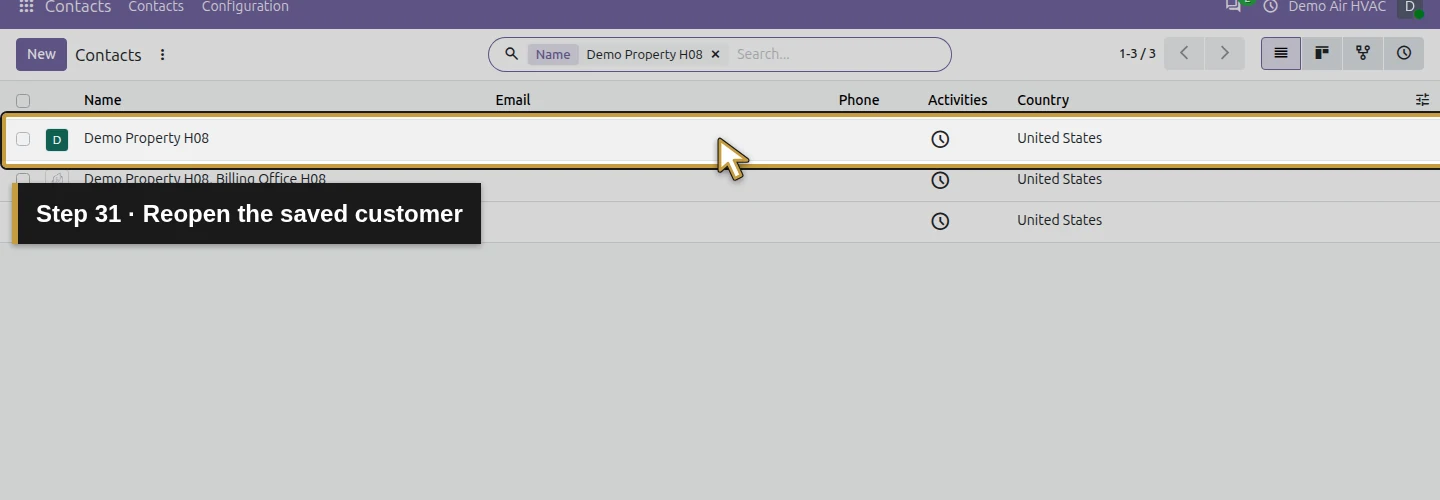
Step 31. Reopen the saved customer
Select the row named exactly Demo Property H08, without the billing-office or service-site suffix. This opens the parent customer.
Step 32. Open the saved billing address
Click Billing Office H08 on the customer’s Contacts tab. Open the address to inspect its full details; the compact card shows its name, type and city.
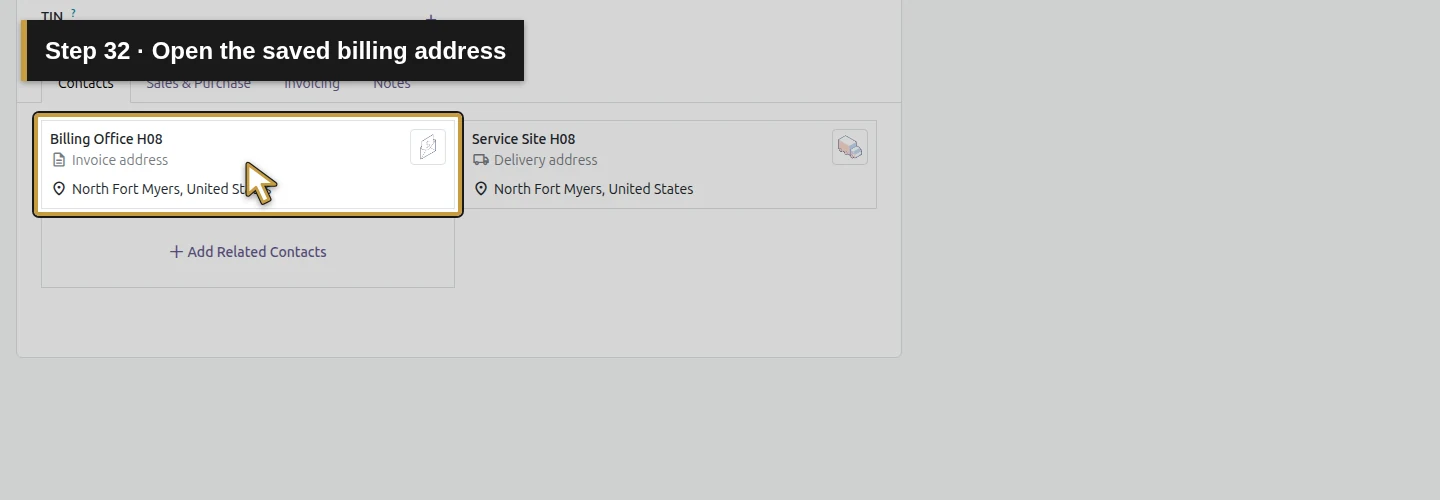
Step 33. Review the saved billing street
Confirm 105 Demo Billing Lane in Street. Also check the Invoice type, billing name, city, ZIP, country and state against your intended billing address.
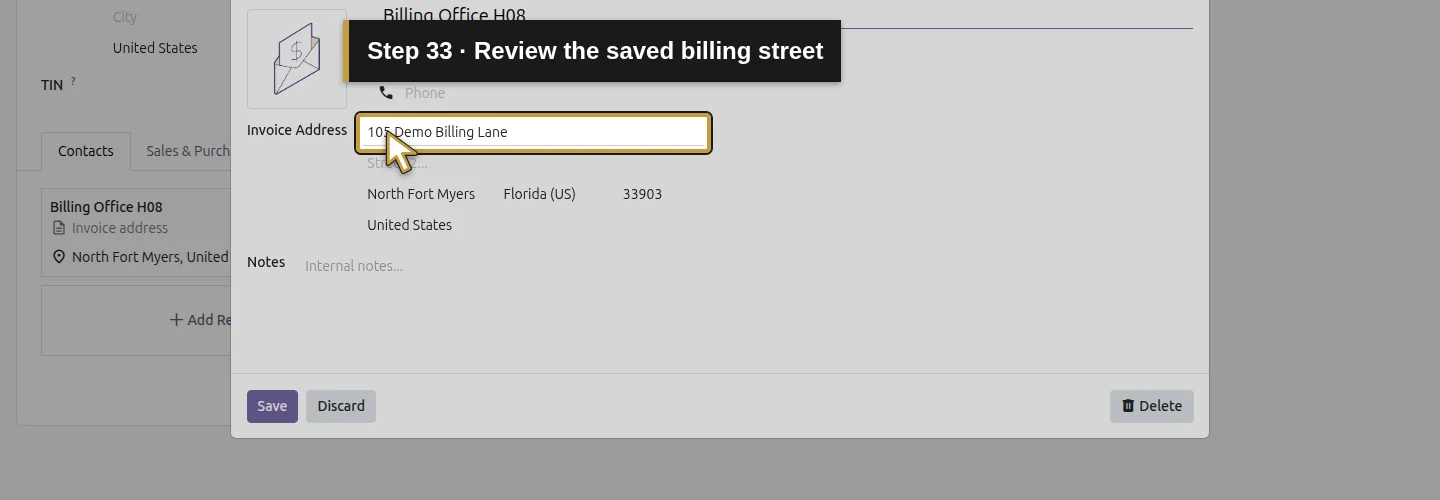
Step 34. Close the billing review without edits
Click Discard to leave the review without changing the saved address. The existing-address dialog has Save and Discard controls.
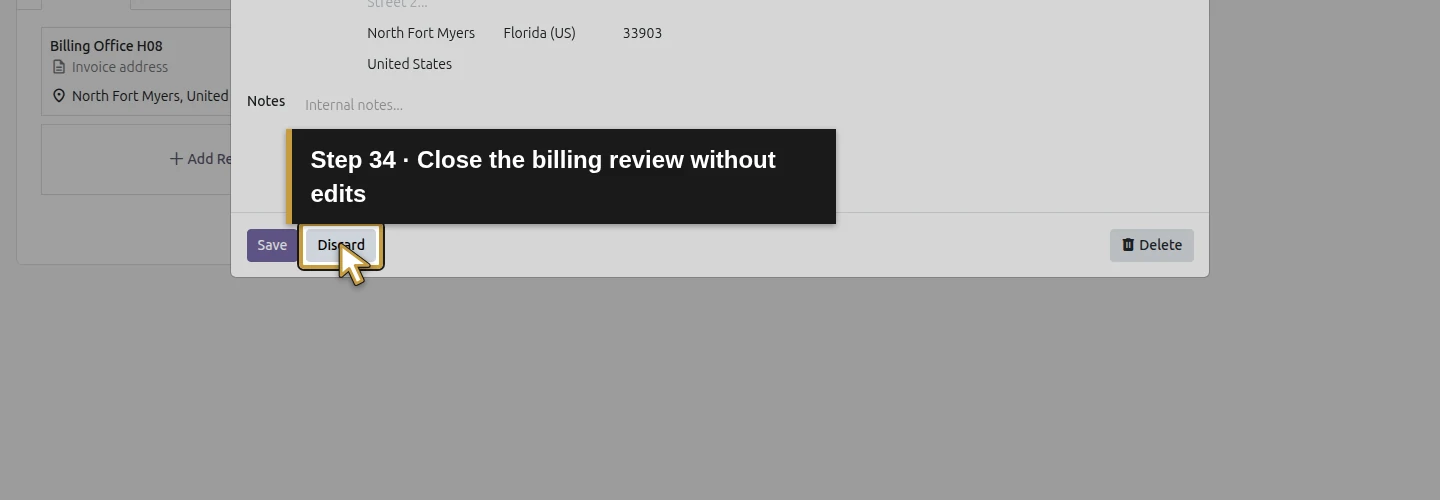
Step 35. Open the saved service address
Click Service Site H08 to inspect the second saved address.
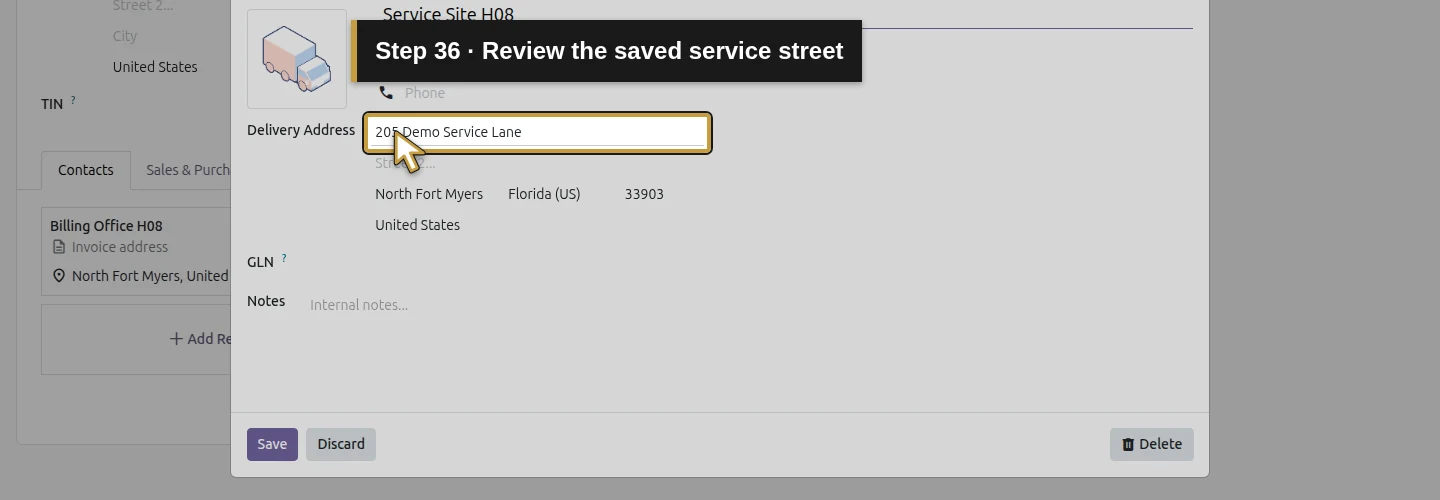
Step 36. Review the saved service street
Confirm 205 Demo Service Lane in Street. Check the Delivery type and the remaining address details against the site where the work will happen.
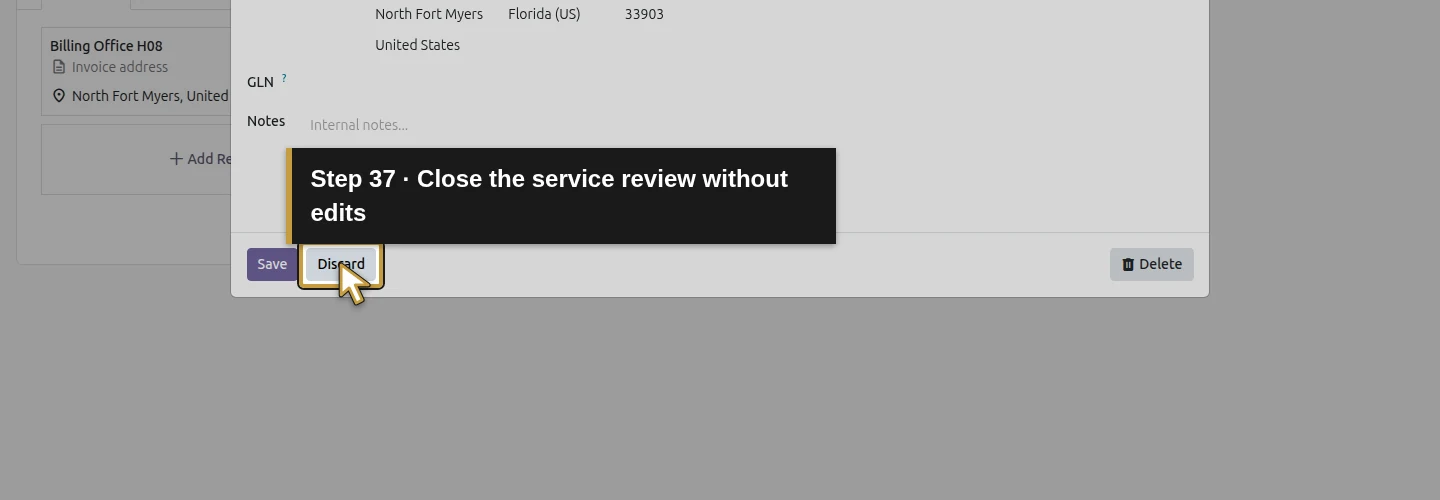
Step 37. Close the service review without edits
Click Discard. Both saved related addresses remain on the customer record.
Check the final result
The customer has two related records: Billing Office H08, type Invoice, at 105 Demo Billing Lane; and Service Site H08, type Delivery, at 205 Demo Service Lane. Both have the checked city, ZIP and region. The addresses remain attached to the same customer after reopening.
Odoo copied the parent’s country and state when the related addresses were created. Its native address lookup resolved the configured Invoice and Delivery records correctly in this single-site example. No quotation, invoice or job was created. Check the selected addresses again when preparing the later quotation.
If your screen differs
The contact search can show the customer and related addresses together. Open the parent row before adding or reviewing related records. In the tested version, select Invoice or Delivery to expose the address fields. Save the related-address changes on the parent before leaving it.
If Save manually is absent and there are no pending changes, reopen the address to inspect the saved values. Avoid creating another record just to repeat the example. If an address is under the wrong customer or has the wrong type, correct that relationship before using it in a transaction.
Questions about customer addresses in Odoo
How do I use different invoice and delivery addresses in Odoo?
Create or open the customer, then use Add Related Contacts. Choose Invoice for the billing office and Delivery for the service site, enter their correct addresses and save. Reopen both related records to check their types and details.
Can one Odoo customer have multiple HVAC service addresses?
Related contacts provide separate address records under one customer. This walkthrough tests one Invoice address and one Delivery address. If you keep several sites, review the address selected on each later quotation; selection among multiple Delivery records was not tested here.
Why does Odoo select the wrong delivery address?
Check the address type and its parent customer, and distinguish the parent from related rows in search results. Then inspect the address selected on the transaction. In this example, the native lookup chose the single configured Delivery child; it does not establish selection behavior for several competing site addresses.
Does an Odoo contact store HVAC equipment history?
This lesson stores customer and address details. It does not create an installed-unit register, service history or automatic dispatch location. Those business needs require their own verified workflow; an address record alone does not establish them.
What is the difference between Invoice and Delivery addresses in Odoo?
Invoice identifies the billing address; Delivery identifies the delivery destination. For this HVAC example, the Delivery record represents the service site. Save the correct type and check the intended address when using it on later work.
Continue preparing the first job
Alex’s first customer now has a checked billing office and service site. Next, prepare the service products, supplier and materials that the first quotation will need.
Get help connecting your Odoo customer and job workflows
Review your customer setup, quotations and HVAC business workflows with an Odoo partner.
Talk to an Odoo partner