
Running an HVAC business with Odoo · Supplier setup
How do I add suppliers and purchase terms in Odoo?
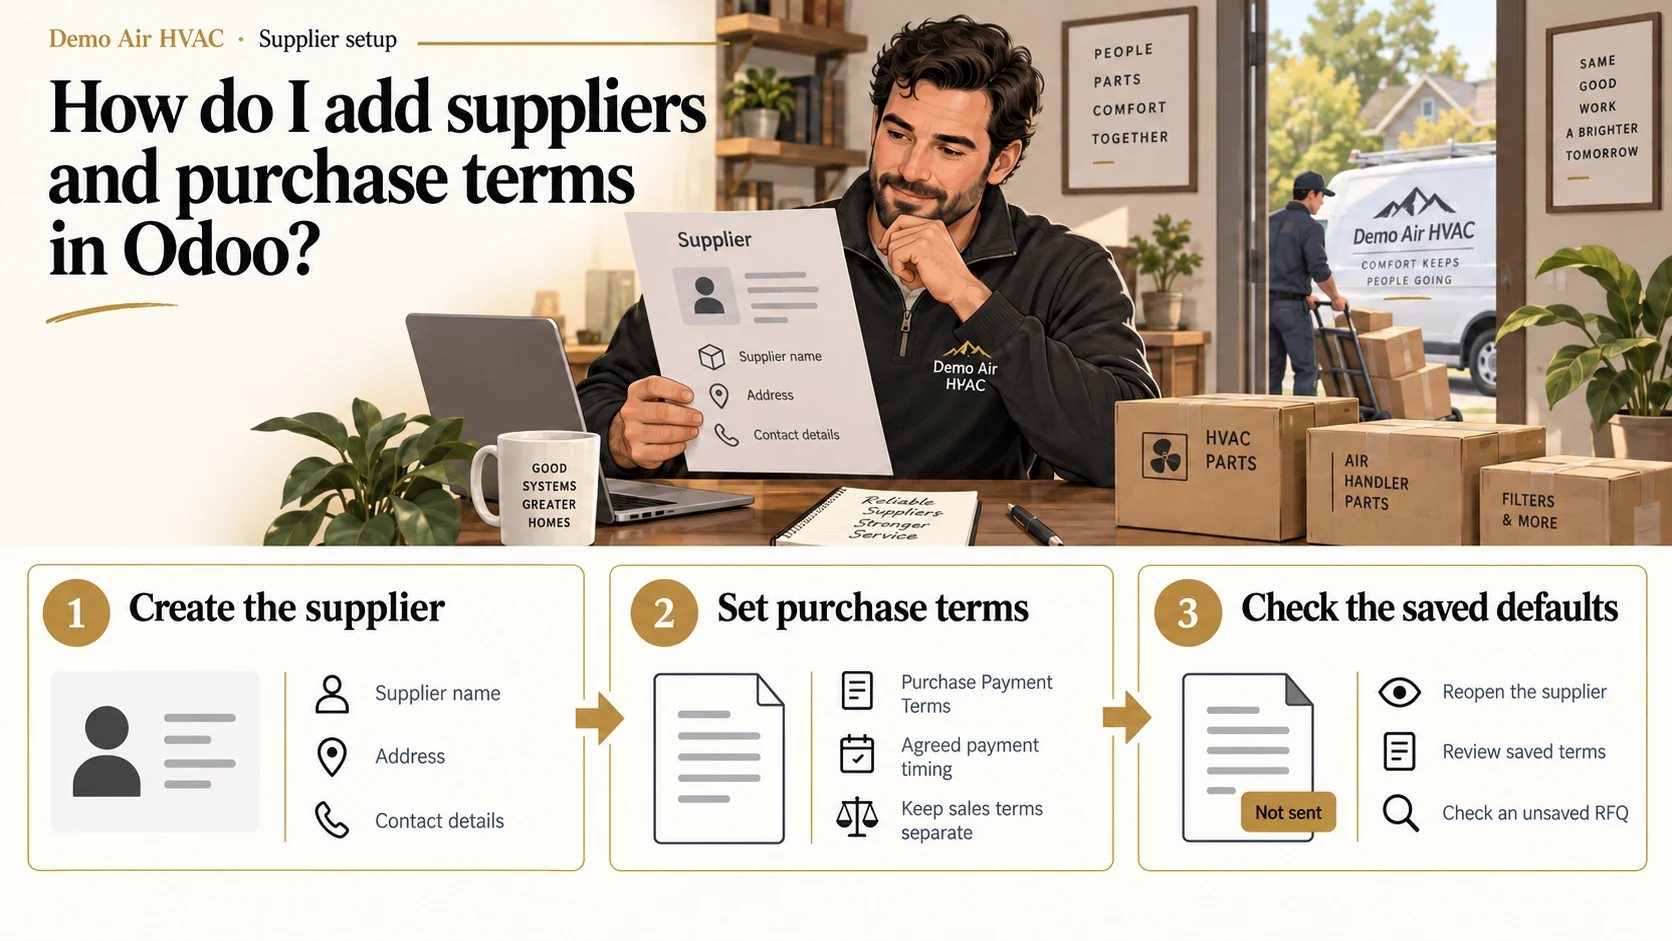
Open Purchase, choose Orders and Vendors, then create the supplier. Set Payment Terms in the Purchase section of Sales & Purchase, save and reopen. Check the default on an unsaved RFQ before using it for a real order.
One saved supplier with checked purchase payment terms, available in the Vendor picker. The RFQ test is discarded without creating an order.
Alex Rivera runs Demo Air HVAC, a fictional heating and cooling business. He is preparing Demo Supply H10 before buying materials. The example agreement is Immediate Payment; use your actual supplier’s agreed terms for your business.
Follow the thirty stepsBefore you begin
Complete the company-profile lesson and the app-selection lesson in the series. The demo has Contacts, Purchase and Invoicing installed. Sign in with supplier-editing and purchasing access; this walkthrough uses the owner administrator.
The screenshots show Odoo 20.0-20260926 Community, with stock fields and menus, without Enterprise or customization. Have the supplier’s name, address and actual payment agreement ready. Search Vendors before using New to avoid duplicates. All example names and streets are fictional; email and phone stay blank in the demo.
Sales and Purchase have separate Payment Terms fields. This lesson sets the supplier’s Purchase Payment Terms. Product vendor prices, lead times, purchase orders, bank details and payment recording are later workflows.
Create the supplier in Purchase
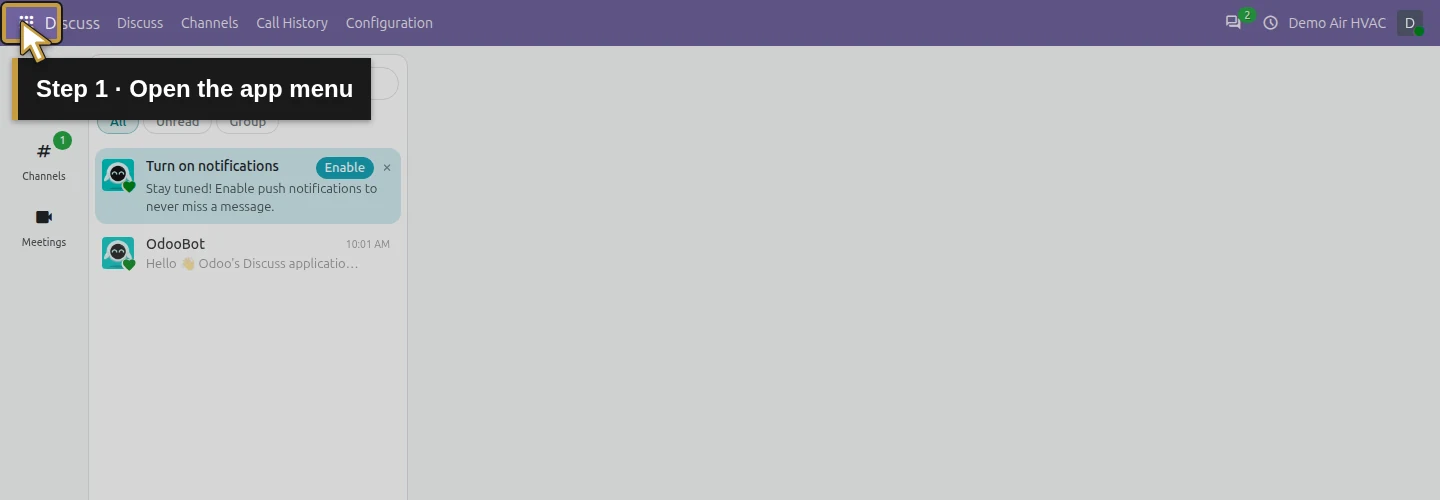
Step 1. Open the app menu
Click the grid-shaped app menu at the top left.
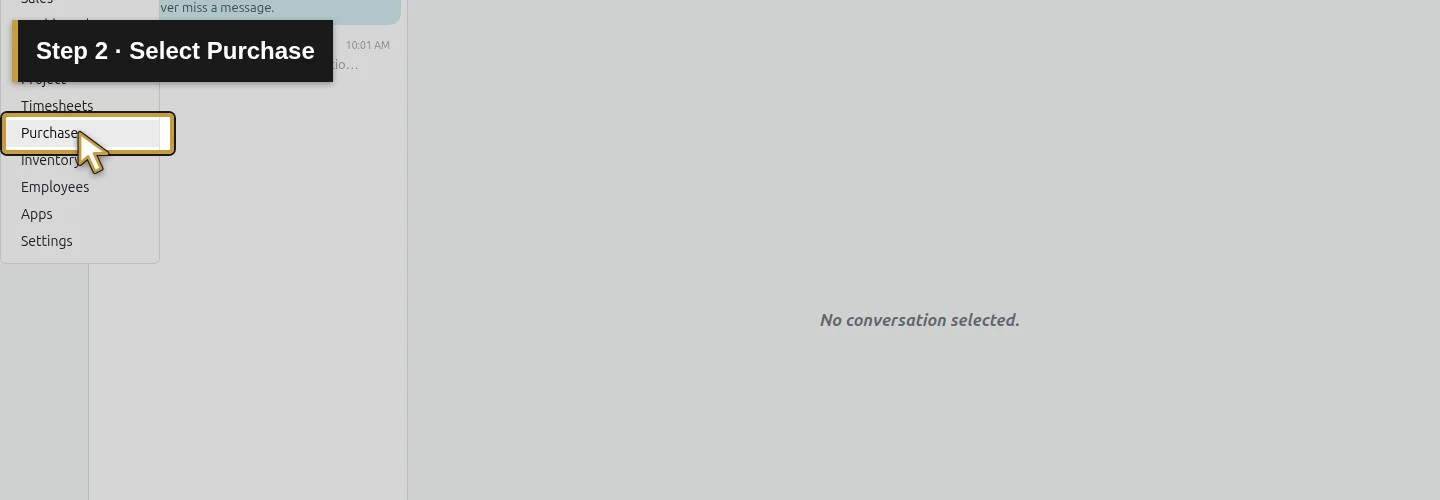
Step 2. Select Purchase
Select Purchase. The purchasing app opens.
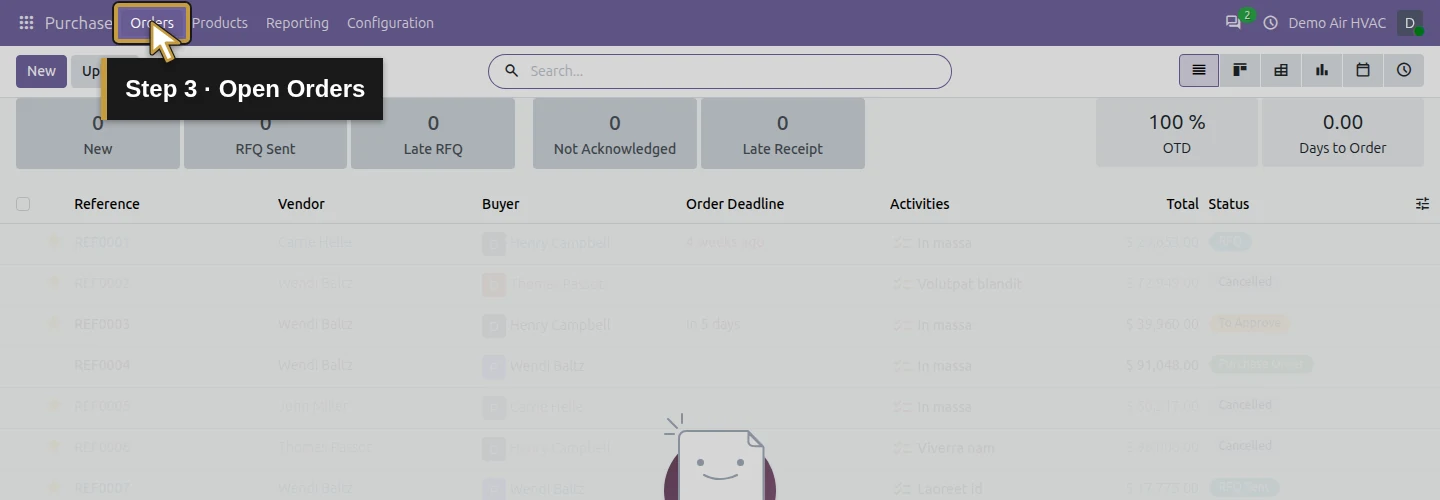
Step 3. Open Orders
Open Orders in the top menu.
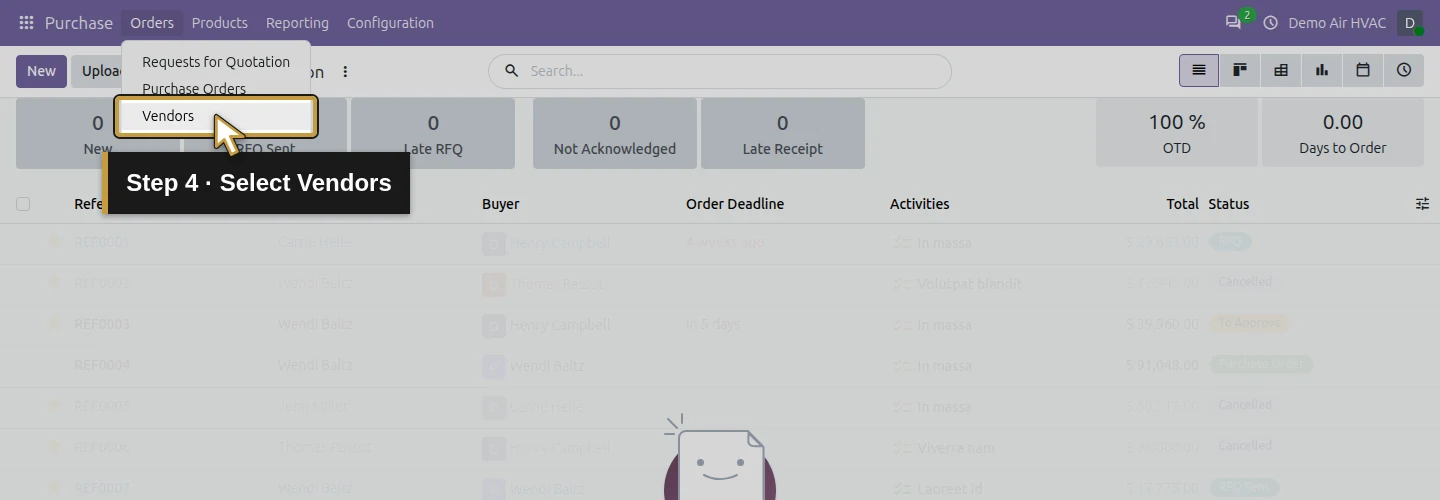
Step 4. Select Vendors
Choose Vendors. Search for your supplier before creating a new record.
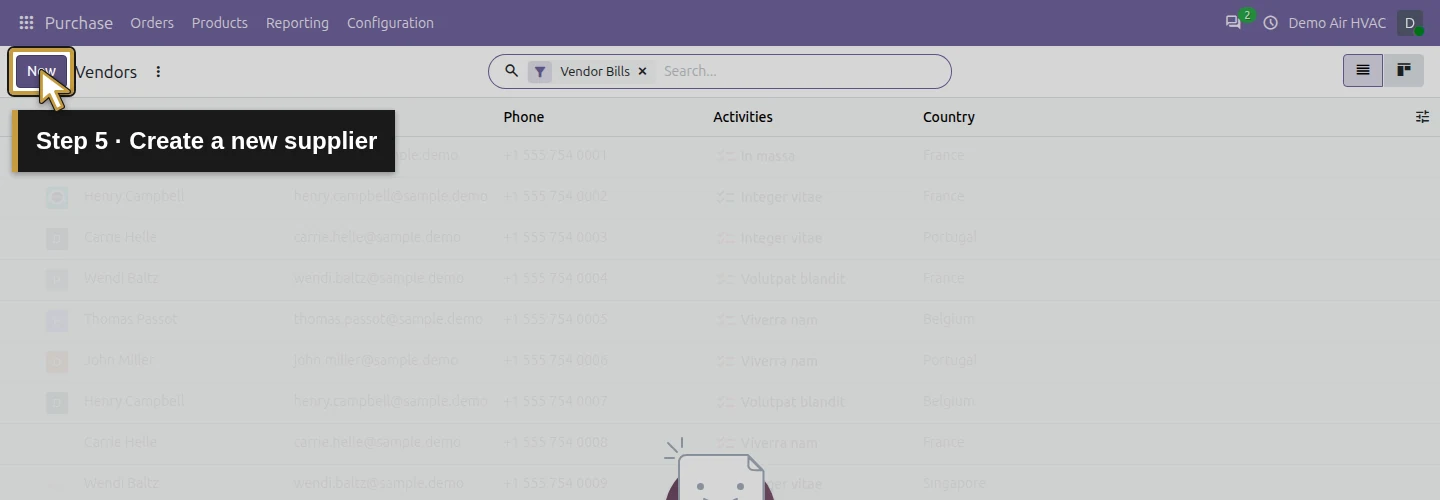
Step 5. Create a new supplier
Click New in Vendors. This starts the native vendor creation path.
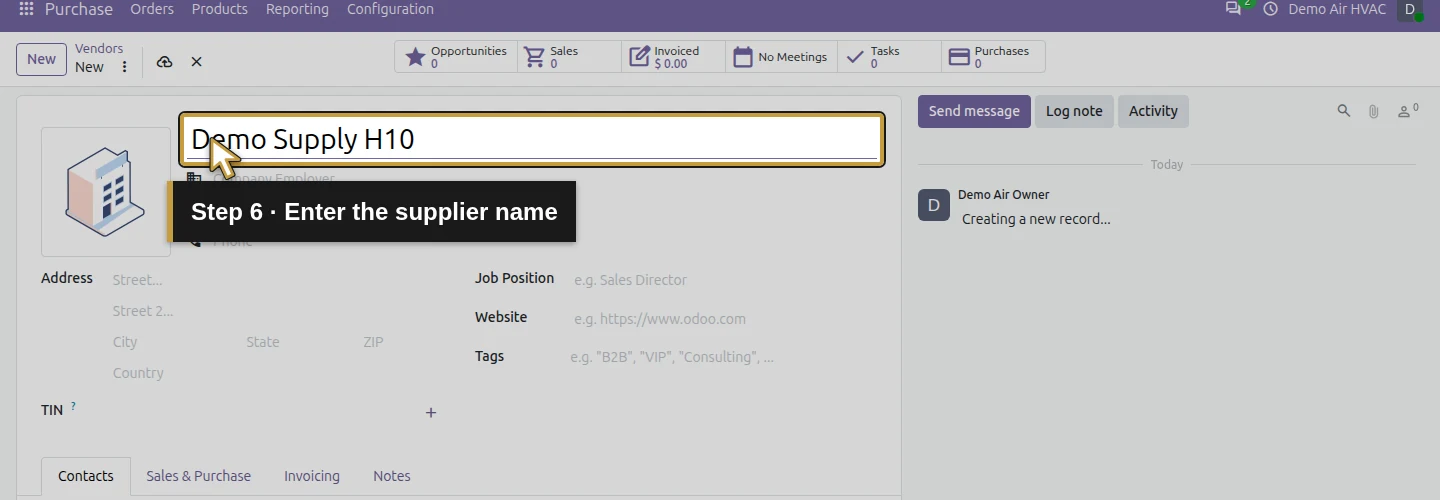
Step 6. Enter the supplier name
Enter Demo Supply H10 in the name field. Use the actual supplier name in your business.
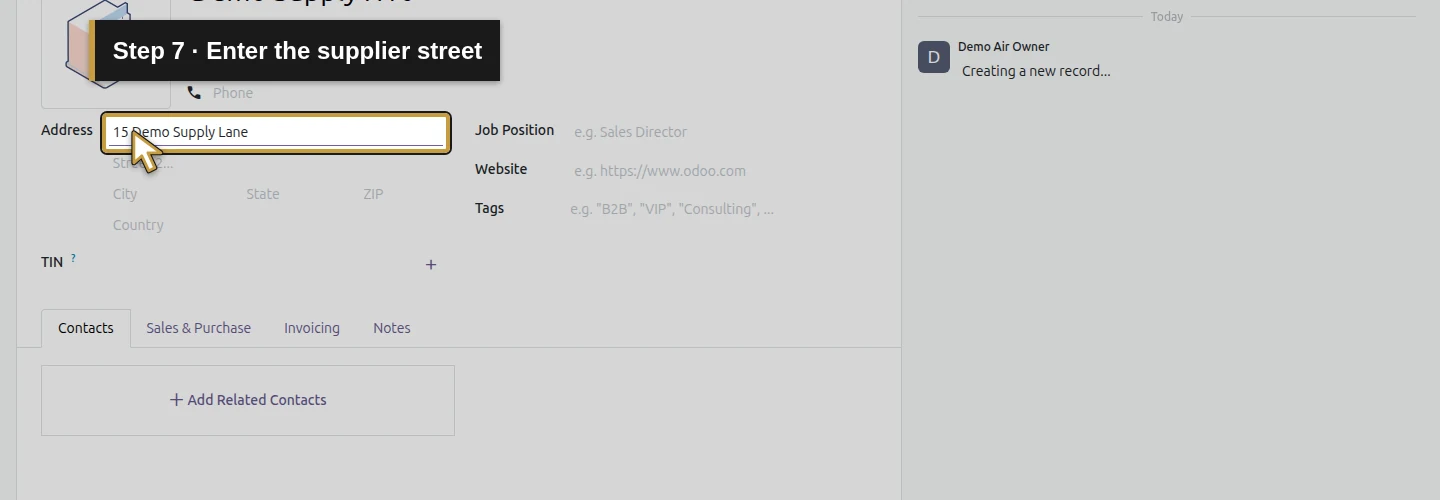
Step 7. Enter the supplier street
Enter 15 Demo Supply Lane in Street. This is a fictional example.
Step 8. Enter the supplier city
Enter North Fort Myers in City.
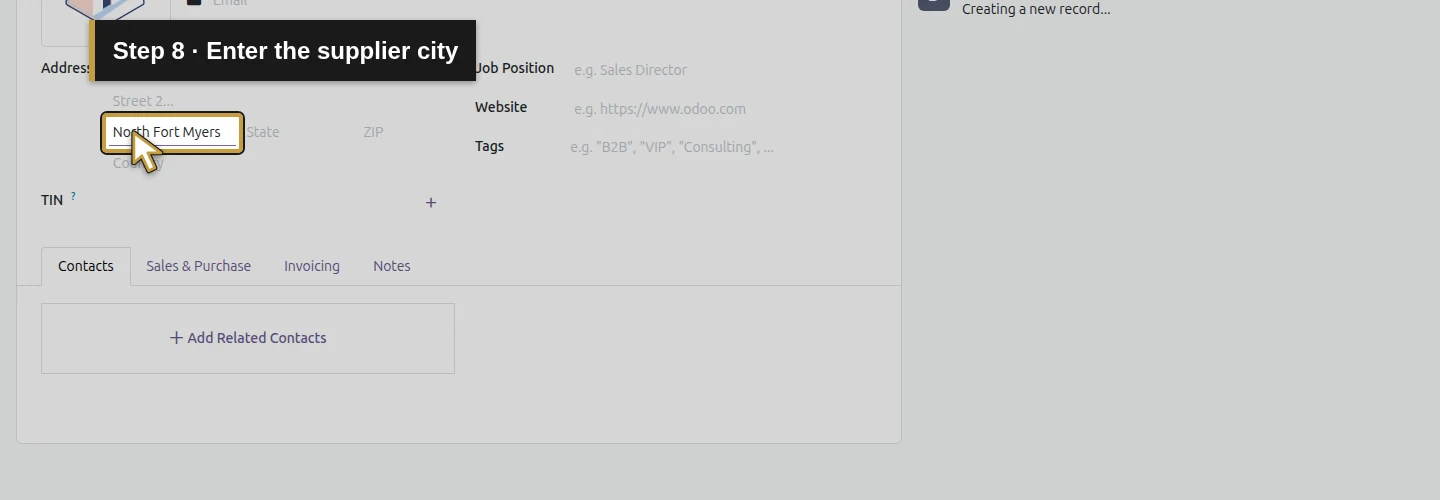
Step 9. Enter the supplier ZIP
Enter 33903 in ZIP.
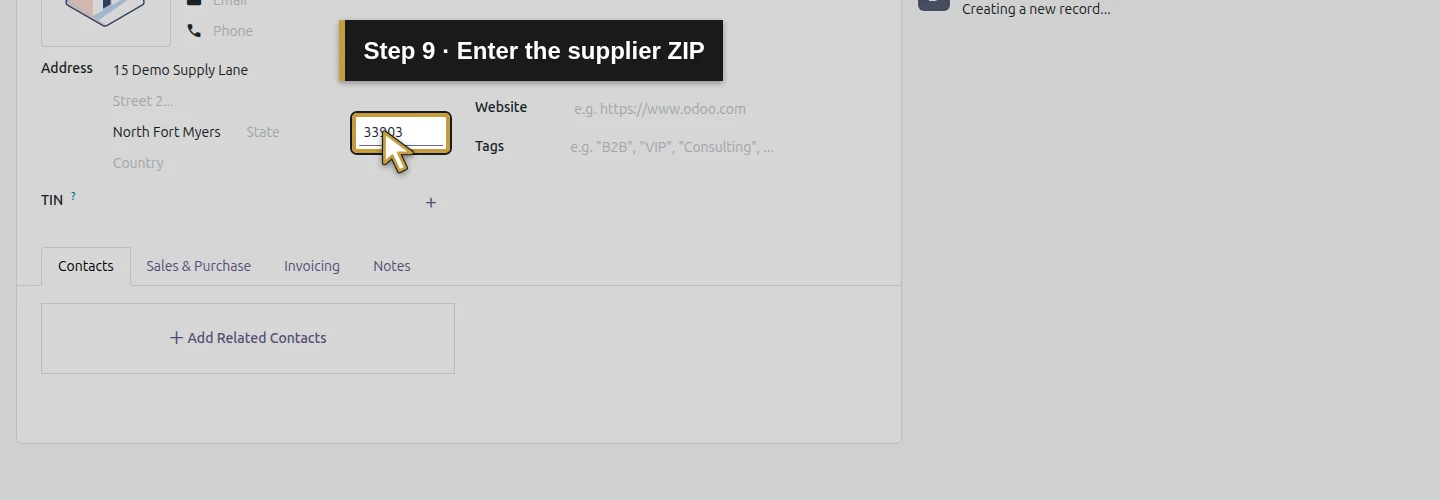
Step 10. Find the supplier country
Type United States in Country.
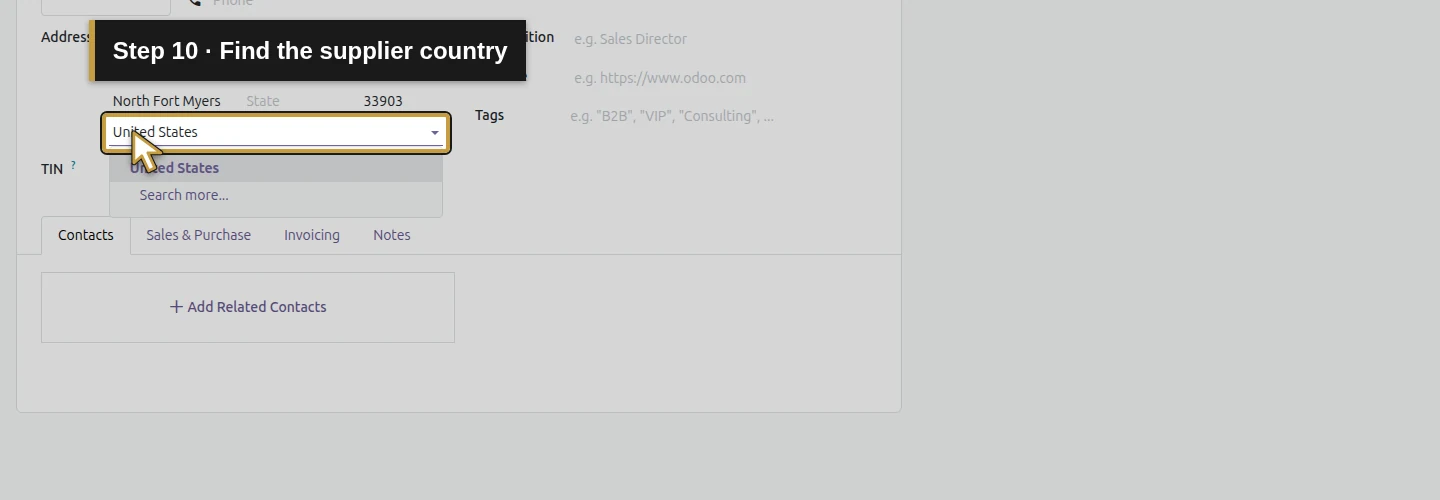
Step 11. Select United States
Select United States from the dropdown.
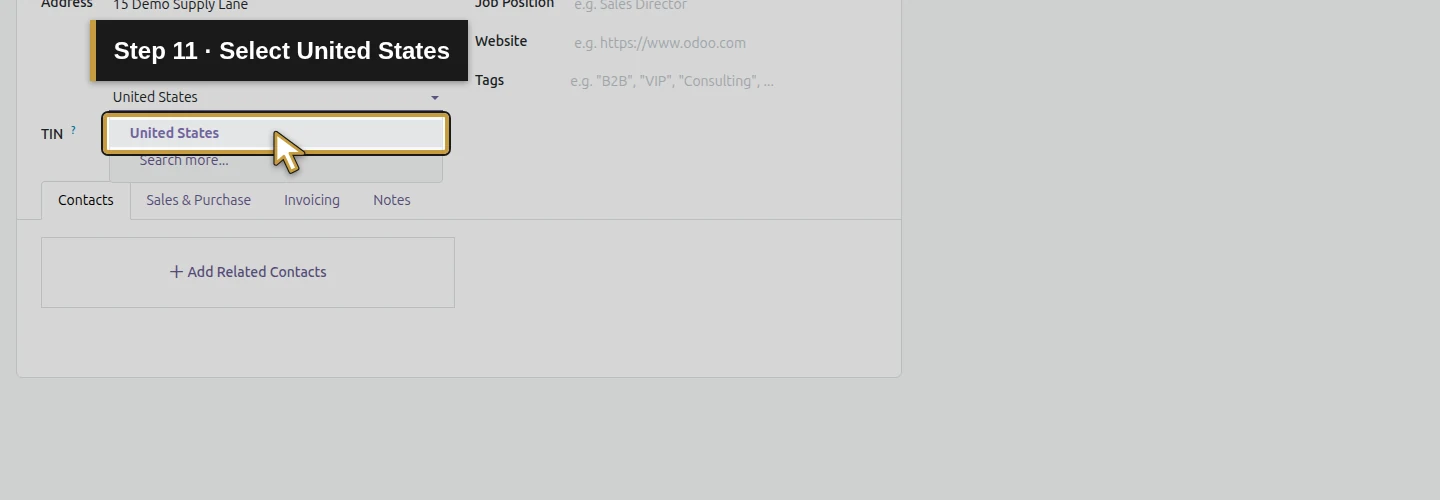
Step 12. Find the supplier state
Type Florida in State.
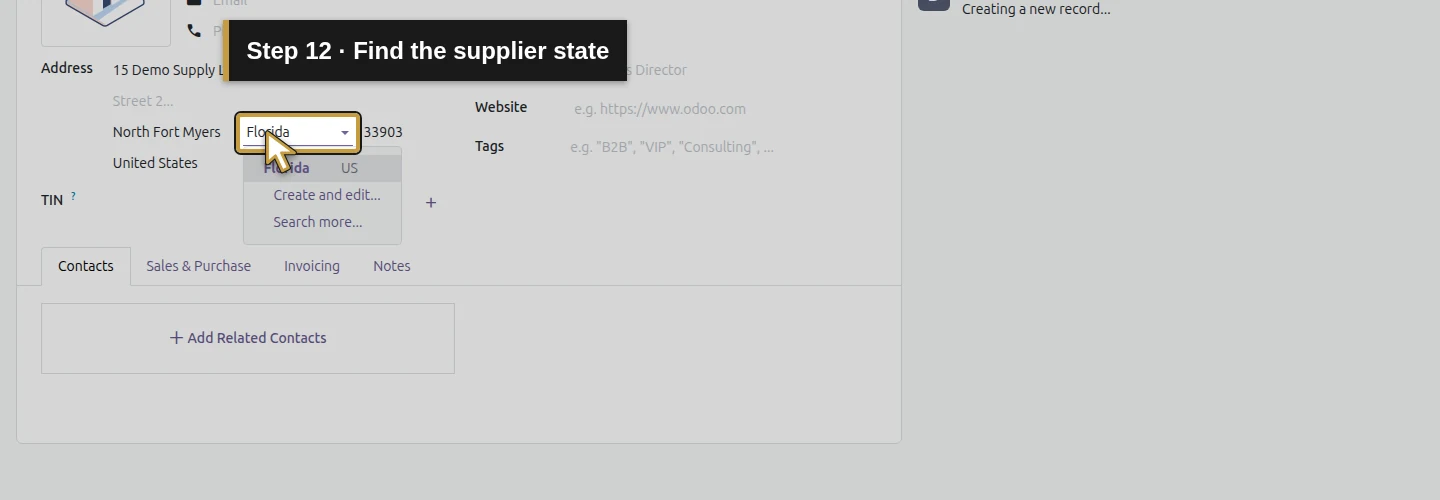
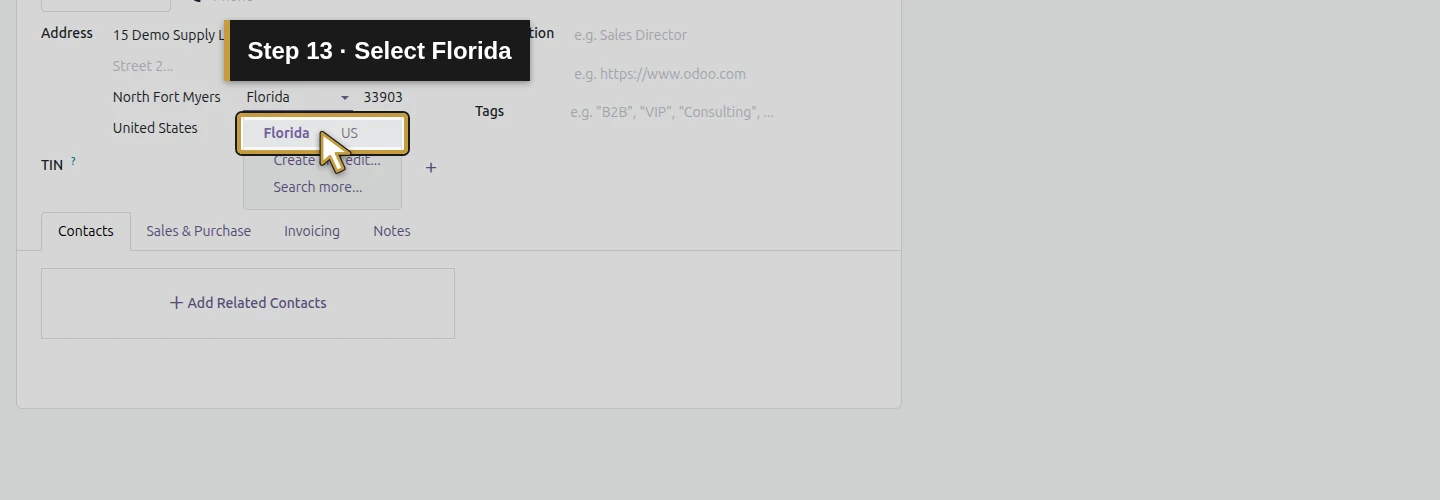
Step 13. Select Florida
Select Florida, shown with its US designation. Check the supplier’s actual region in a real setup.
Set and save the purchase payment terms
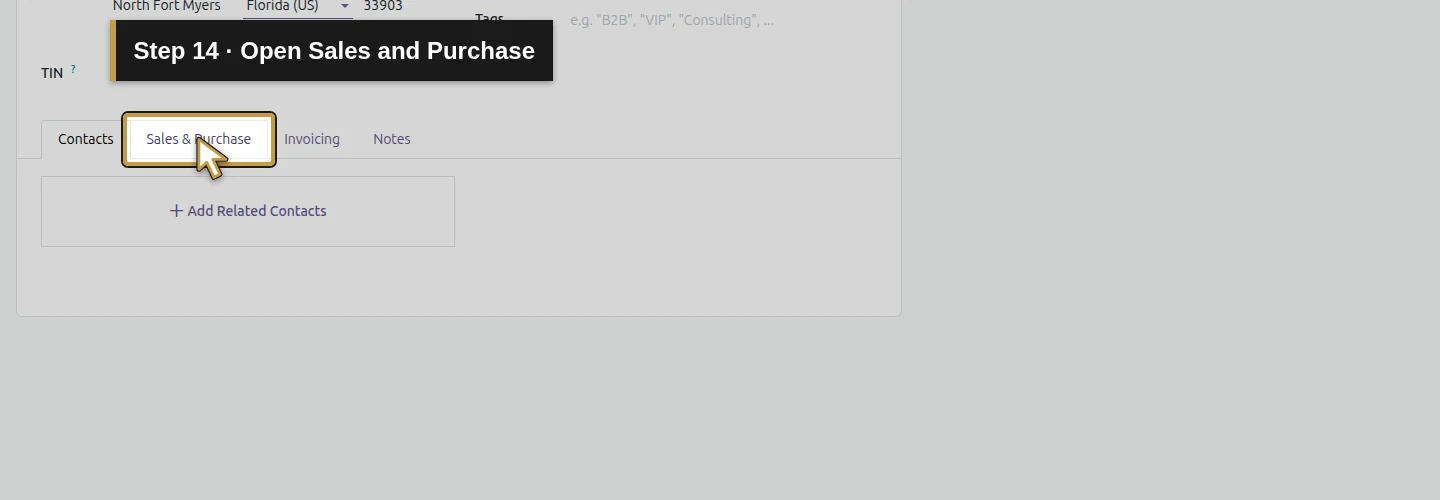
Step 14. Open Sales & Purchase
Select the Sales & Purchase tab. It contains separate Sales and Purchase sections.
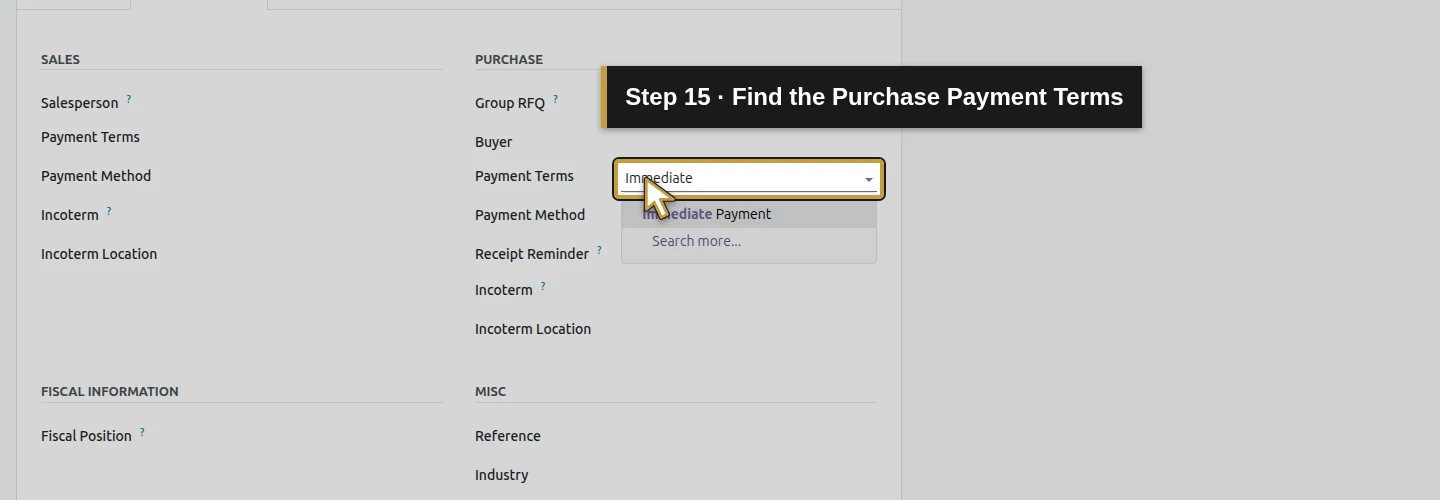
Step 15. Find the Purchase Payment Terms
In the Purchase section, type Immediate into Payment Terms. Use this supplier field, rather than the Sales section’s field.
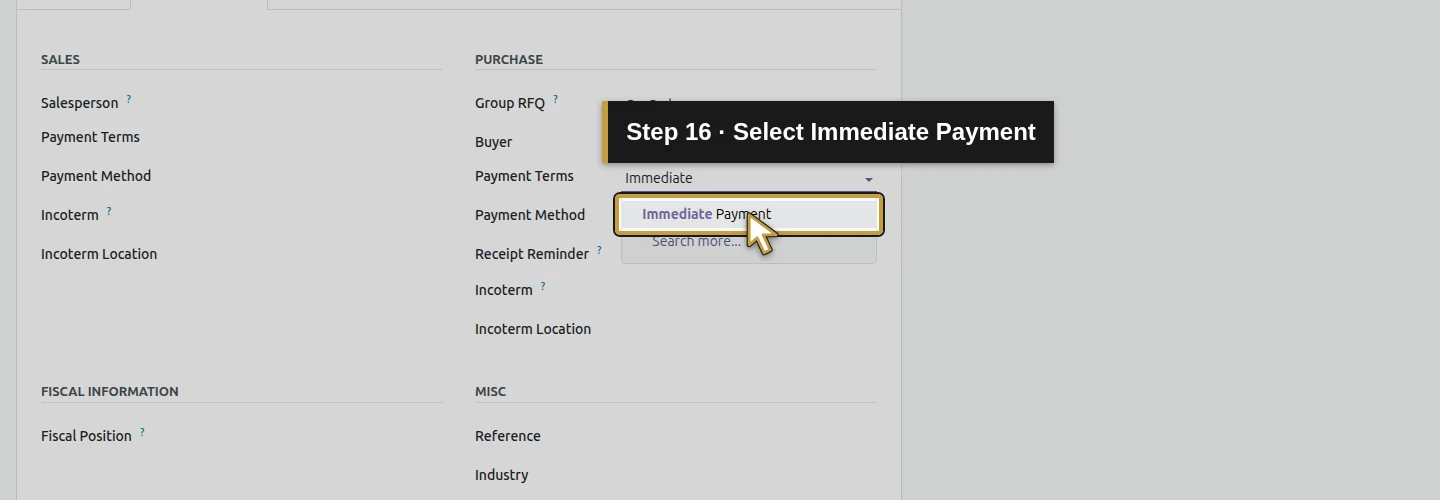
Step 16. Select Immediate Payment
Select Immediate Payment. This existing term represents the fictional agreement for the example; choose your supplier’s actual agreed term.
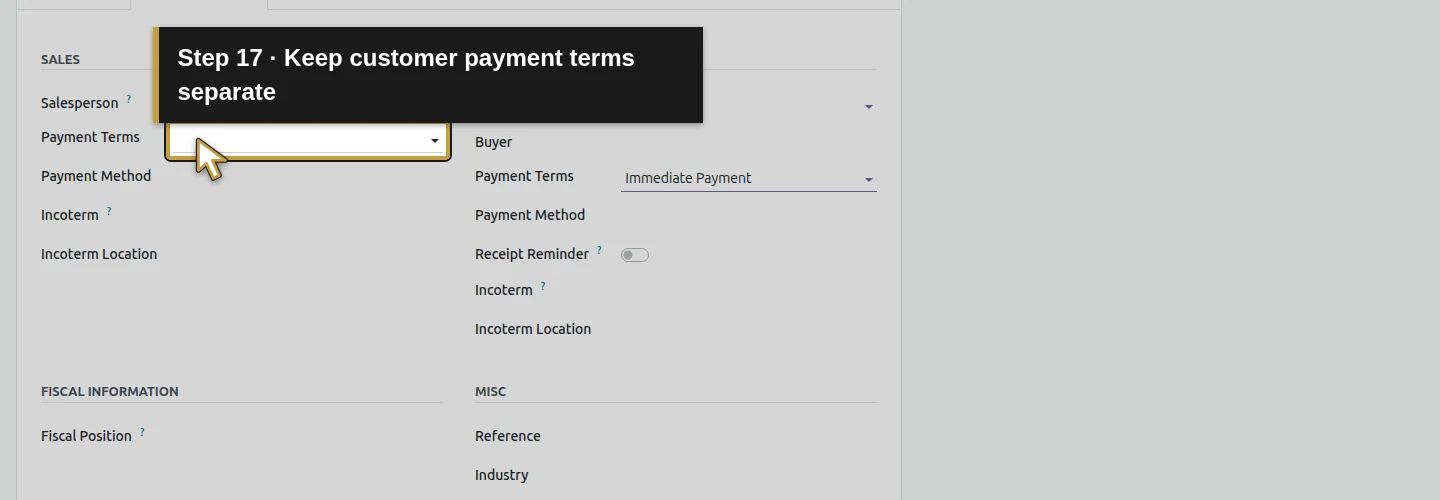
Step 17. Keep customer payment terms separate
Review Payment Terms in the Sales section. It remains blank in this supplier example; setting the purchase term did not set a customer term.
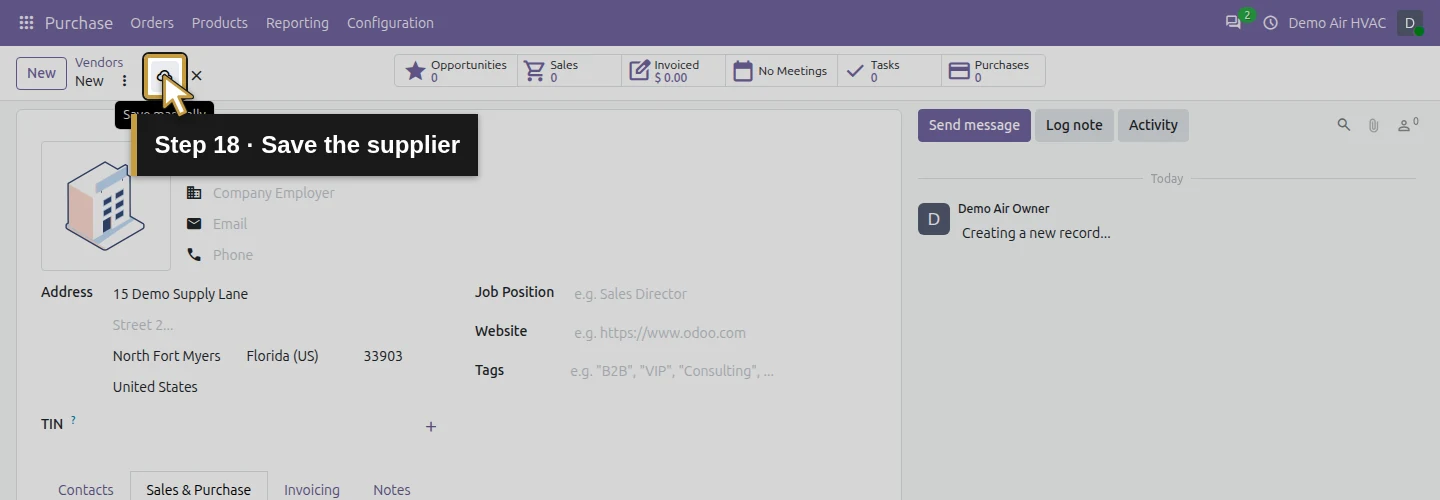
Step 18. Save the supplier
Click the cloud-shaped Save manually control in the top bar. The supplier is saved with its purchase default.
Reopen the supplier and check the default
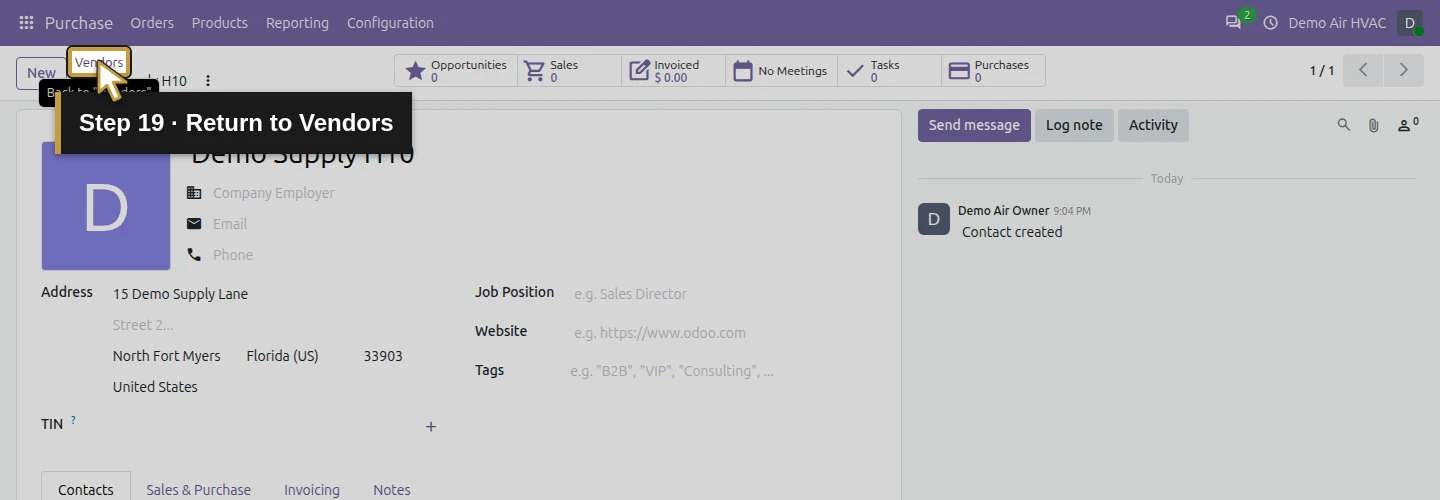
Step 19. Return to Vendors
Click Vendors in the breadcrumb. Keep the Purchase app context for the later Orders menu.
Step 20. Search for the saved supplier
Type Demo Supply H10 in the search box and press Enter.
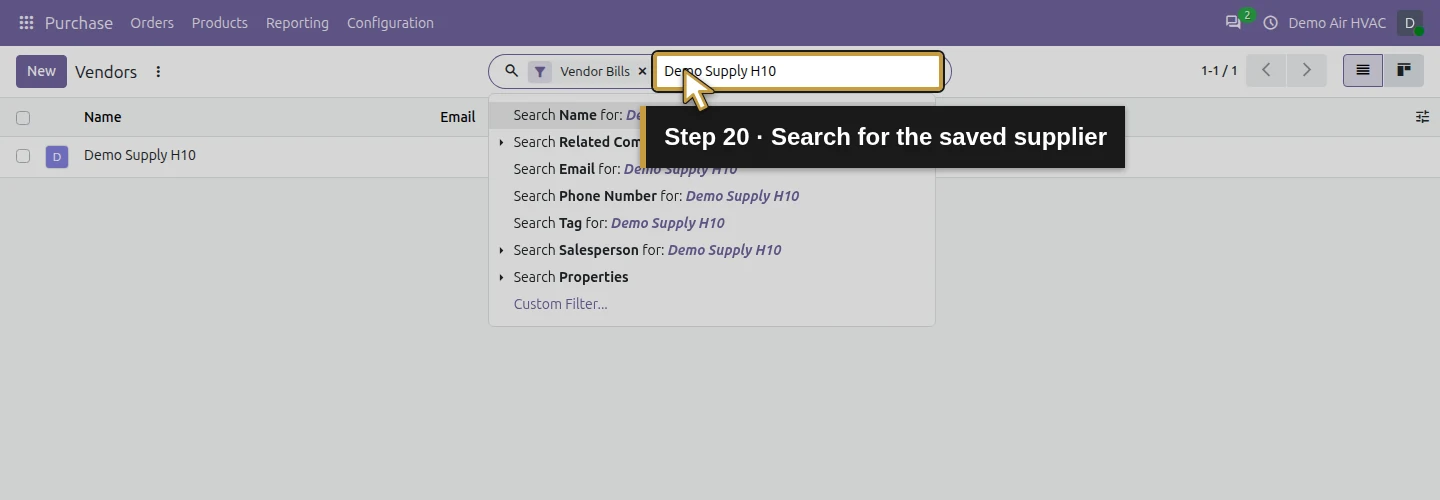
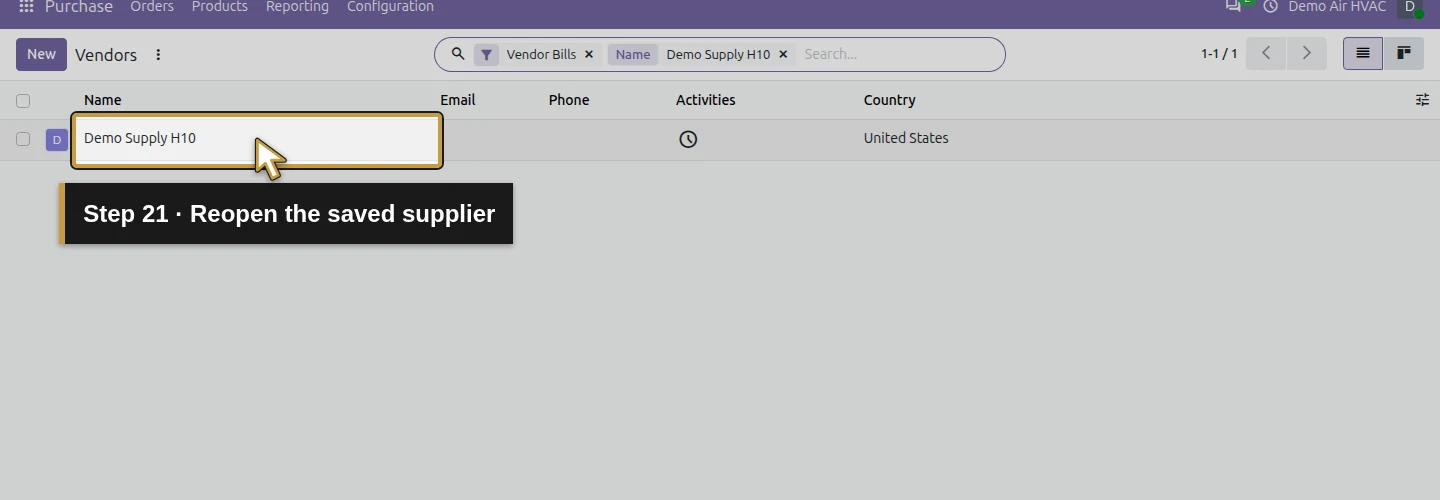
Step 21. Reopen the saved supplier
Click the exact Demo Supply H10 name in the result. Clicking another field in the row may not open the supplier.
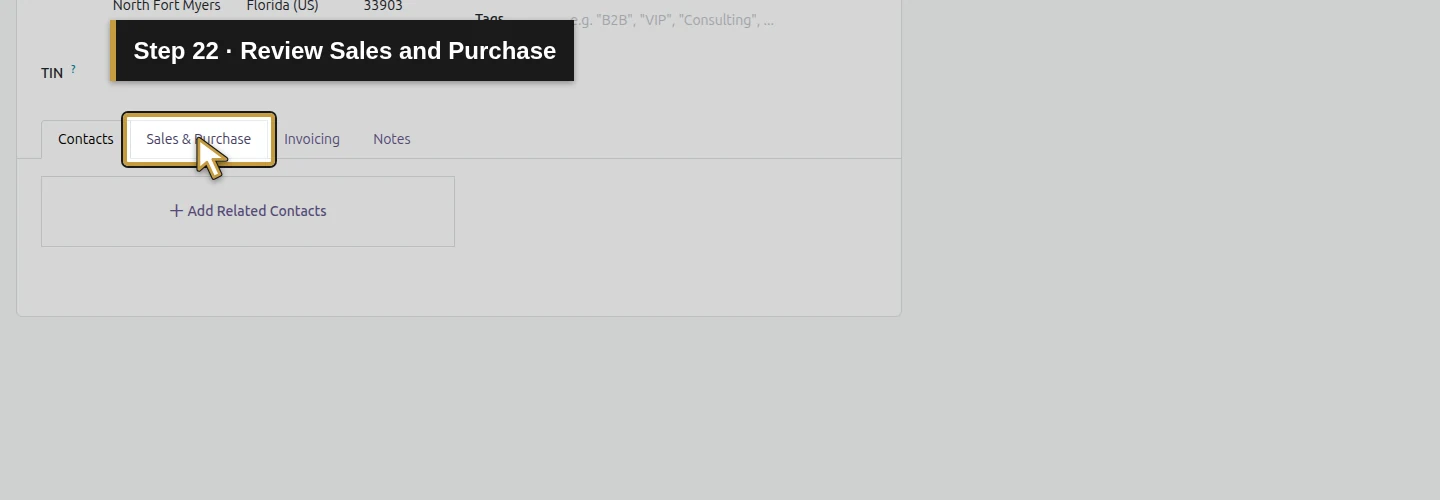
Step 22. Review Sales & Purchase
Open Sales & Purchase on the saved supplier.
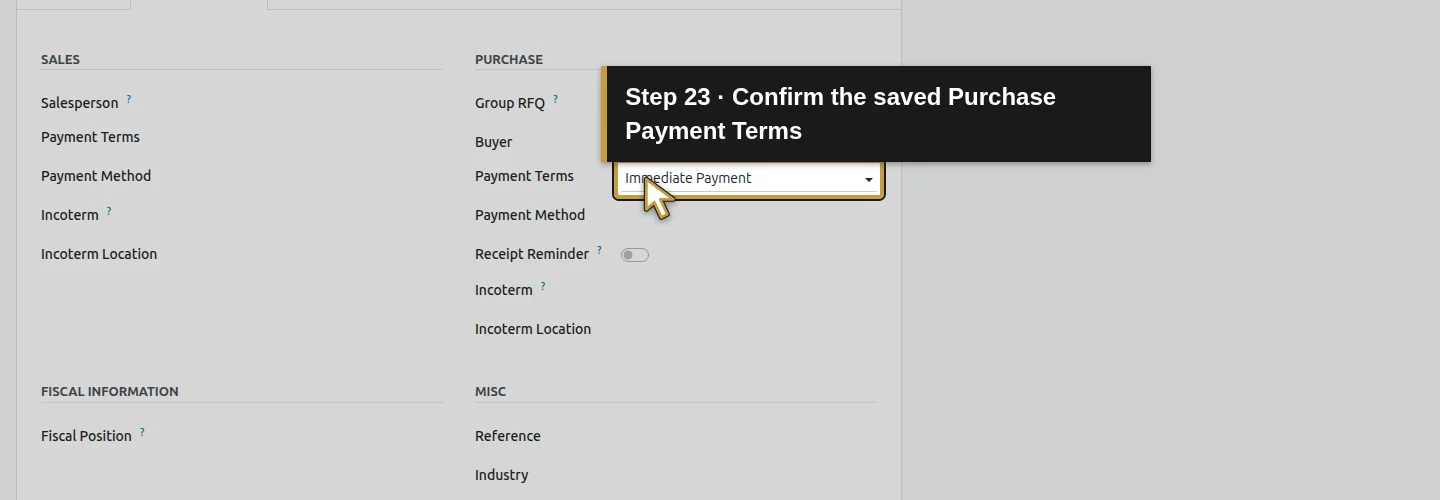
Step 23. Confirm the saved Purchase Payment Terms
Check Purchase > Payment Terms. It still shows Immediate Payment.
Verify the supplier on an unsaved RFQ
Step 24. Open Orders again
Open Orders in the Purchase app’s top menu.
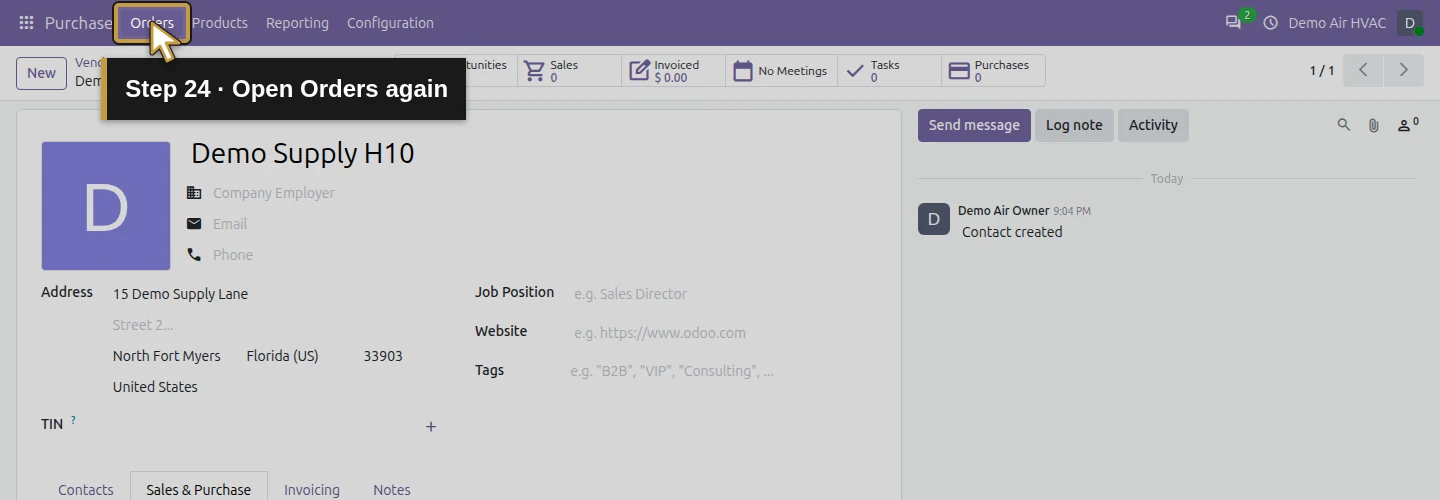
Step 25. Open Requests for Quotation
Choose Requests for Quotation.
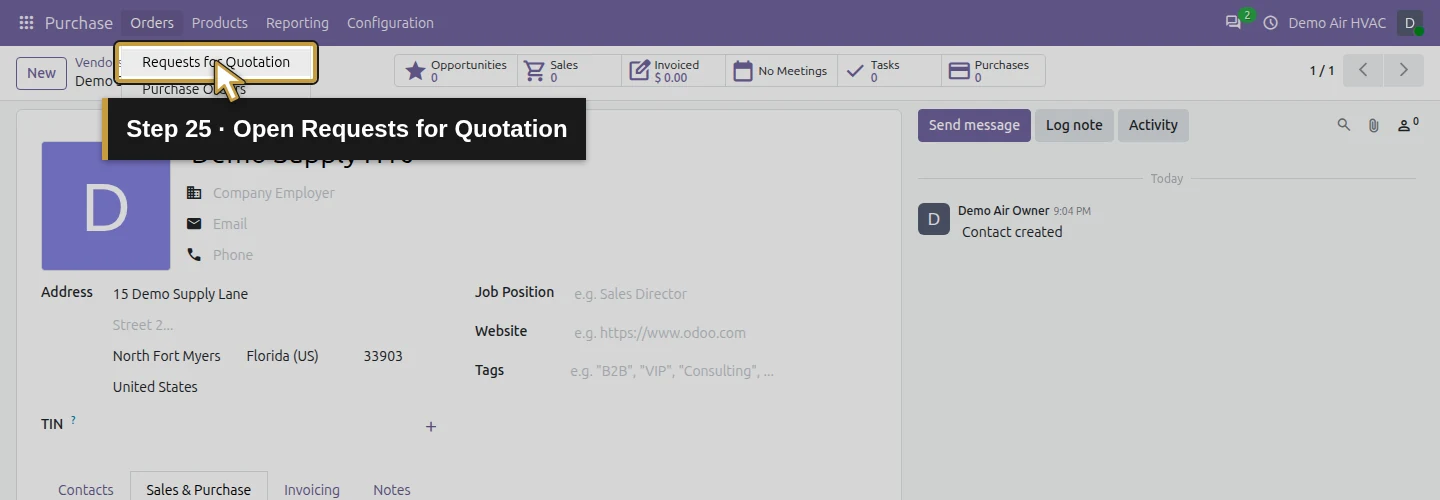
Step 26. Open an unsaved RFQ form
Click New. This is a test form; we will discard it after checking the supplier default.
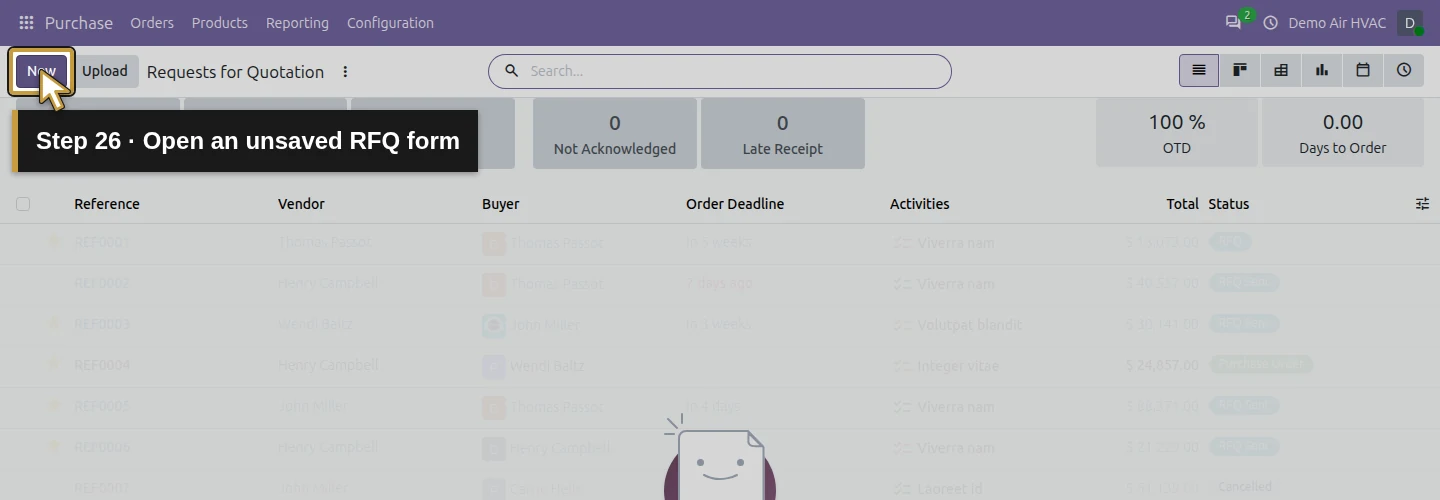
Step 27. Find the supplier in Vendor
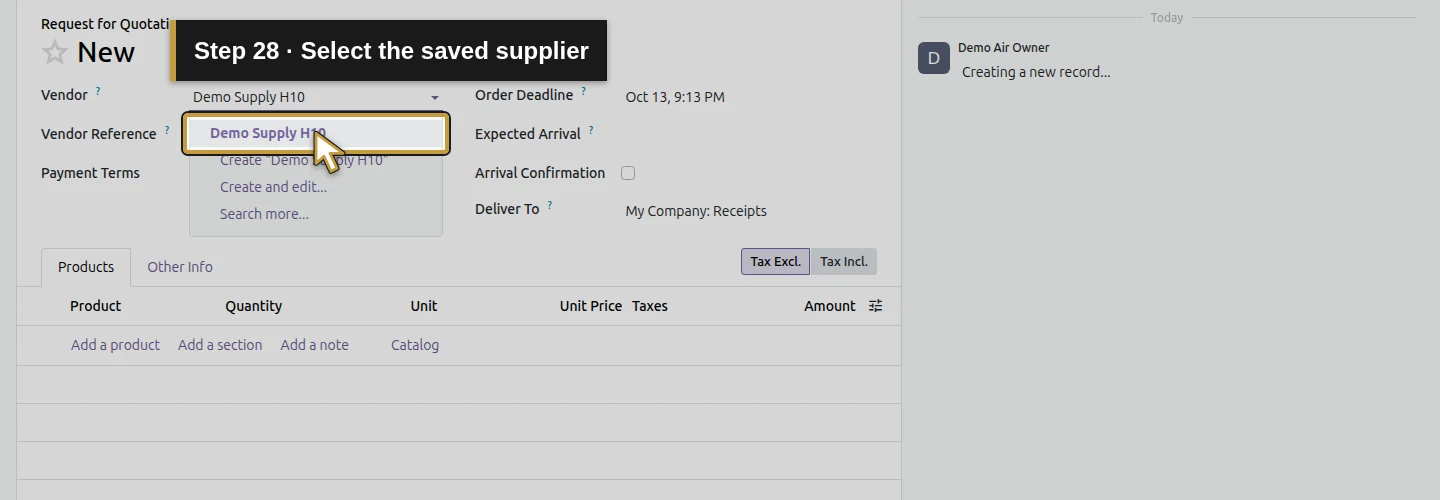
Type Demo Supply H10 into Vendor. The lookup offers the existing supplier and can also offer a Create choice.
Step 28. Select the saved supplier
Choose the existing Demo Supply H10 result. Avoid Create “Demo Supply H10”, which would start another supplier record.
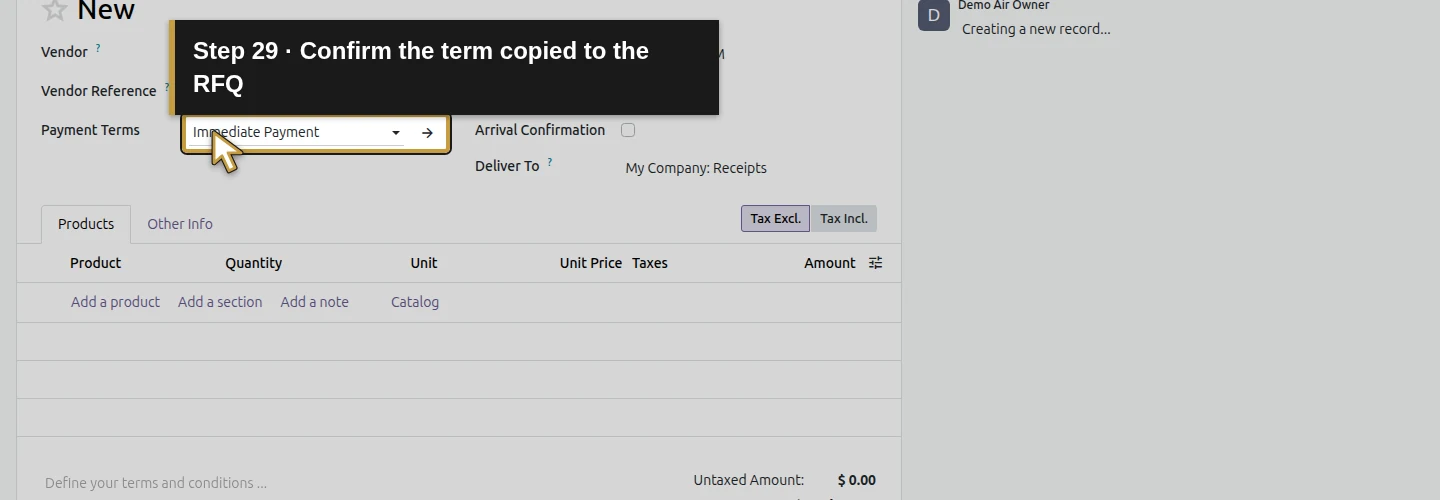
Step 29. Confirm the term copied to the RFQ
Check Payment Terms on the main RFQ form. It shows Immediate Payment, copied from the selected supplier.
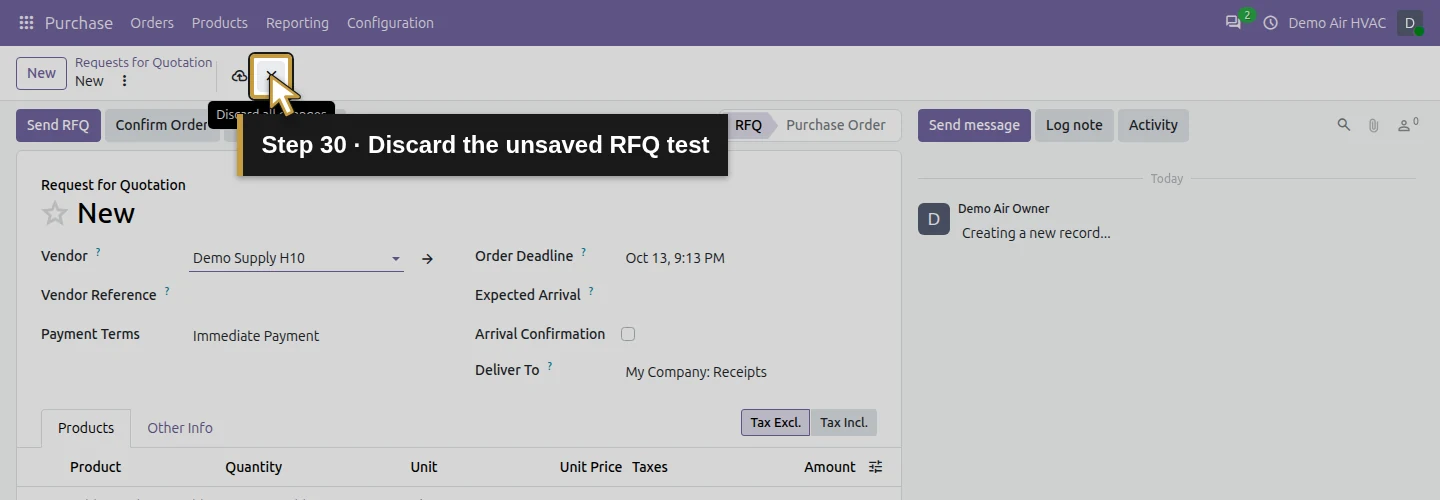
Step 30. Discard the unsaved RFQ test
Click Discard all changes in the top bar. Do not send or confirm this test. The saved supplier remains available, and no purchase order is created.
Check the final result
Demo Supply H10 is saved as a vendor with its checked address and Purchase Immediate Payment term. The separate Sales term is blank. Selecting the supplier on a new RFQ copied the purchase term; discarding that test left the supplier intact and created no order, bill or payment.
Saved defaults reduce repeated entry, but they do not replace review. Check the agreement and selected terms when preparing each later purchase document. Product vendor pricing and lead times require their own product setup.
If your screen differs
Find the Purchase section when the contact has both Sales and Purchase fields. If Orders is missing after reopening a direct supplier URL, navigate through Purchase again. When a lookup offers both an existing supplier and Create, select the existing result. Search before creating another supplier.
Questions about Odoo suppliers and terms
How do I add a vendor in Odoo?
In the tested version, open Purchase, choose Orders > Vendors and click New. Enter the supplier details, set the appropriate purchase defaults, save and reopen. The native Vendors path classified the example as a vendor.
Where do I set vendor payment terms in Odoo?
Open the supplier’s Sales & Purchase tab and use Payment Terms in the Purchase section. Save and reopen the supplier, then check the term when selecting it on a purchasing document.
Are customer and vendor payment terms separate in Odoo?
Yes, the tested contact form has separate Sales and Purchase Payment Terms fields. This workflow set Purchase to Immediate Payment while Sales stayed blank. Choose the field that matches the transaction you are preparing.
Does setting supplier payment terms make a payment in Odoo?
This workflow saved a purchase default and checked its copy onto an unsaved RFQ. It made no payment or bank transfer and created no order or bill. Recording or sending money requires a separate workflow.
How do I avoid duplicate suppliers in Odoo?
Search Vendors before using New. In a Vendor lookup, select the existing supplier name when it is present; the same lookup can also offer a Create option for the typed text. Check the saved supplier rather than creating another one to repeat this lesson.
Continue preparing job materials
Alex’s supplier is ready for later purchasing. Next, prepare the parts and equipment records before creating the first purchase order for a customer job.
Get help setting up Odoo purchasing for your HVAC business
Review your suppliers, products and purchase workflows with an Odoo partner.
Talk to an Odoo partner